1. Inngangur
This manual provides essential instructions for the proper setup, operation, and maintenance of your SentrySafe Executive Security Safe, Model PLX510487. This safe is designed to protect your valuables with an electronic lock and pry-resistant steel construction. Please read this manual thoroughly before using your safe to ensure optimal performance and security.
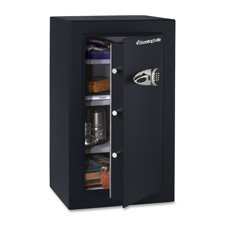
Figure 1: SentrySafe Executive Security Safe (Model PLX510487)
2. Öryggisupplýsingar
- Do not store safe keys inside the safe. Always keep override keys in a secure location away from the safe.
- Gakktu úr skugga um að öryggishólfið sé örugglega fest til að koma í veg fyrir að það sé fjarlægt óheimillega.
- Keep the electronic keypad dry and clean.
- This safe is not water resistant. Do not expose it to water or high humidity.
- Keep children away from the safe and do not allow them to operate the electronic lock.
3. Innihald pakka
Gakktu úr skugga um að allir íhlutir séu til staðar í pakkanum:
- SentrySafe Executive Security Safe (PLX510487)
- Hneka lykla (2)
- Mounting Bolts (for wall mounting)
- Notendahandbók (þetta skjal)
4. Uppsetning
4.1 Upptaka
- Takið öryggishólfið varlega úr umbúðunum.
- Inspect the safe for any signs of damage. If damaged, contact customer support.
- Geymið umbúðaefni til síðari flutnings ef þörf krefur.
4.2 Uppsetning rafhlöðu
The electronic lock requires four (4) AA alkaline batteries (not included).
- Finndu rafhlöðuhólfið innan á hurð öryggishólfsins.
- Opnaðu hlífina á rafhlöðuhólfinu.
- Insert four new AA alkaline batteries, ensuring correct polarity (+/-).
- Lokaðu rafhlöðuhólfinu tryggilega.
4.3 Uppsetning öryggishólfsins
For enhanced security, it is recommended to wall mount the safe.
- Veldu hentugan stað til uppsetningar og vertu viss um að það sé traust yfirborð sem getur borið þyngd öryggishólfsins.
- Open the safe door and locate the pre-drilled mounting holes on the back panel.
- Position the safe against the wall and mark the drilling points through the mounting holes.
- Drill pilot holes into the wall at the marked locations.
- Align the safe with the drilled holes and secure it using the provided mounting bolts. Tighten all bolts firmly.
4.4 Initial Code Setup
Upon first use, you will need to set your personal electronic access code.
- With the safe door open, press the red reset button located on the inside of the door, near the hinge. The yellow indicator light on the keypad will illuminate.
- Innan 5 sekúndna skaltu slá inn 3-8 stafa kóðann sem þú vilt nota á takkaborðinu.
- Press the 'A' or 'B' button to confirm your new code. The yellow light will turn off, and a beep will confirm the code is set.
- Prófaðu nýja kóðann með hurðina opna áður en þú lokar henni.
5. Notkun öryggishólfsins
5.1 Opening the Safe with Electronic Code
- Sláðu inn persónulega 3-8 stafa kóðann þinn á takkaborðinu.
- Press the 'A' or 'B' button. The green indicator light will illuminate, and you will hear a beep.
- Innan 5 sekúndna skaltu snúa handfanginu réttsælis til að opna öryggishólfshurðina.
5.2 Opnun öryggishólfsins með yfirride-lykli
In case of forgotten code or battery failure, use the override key.
- Finndu lyklagatshlífina á takkaborðinu.
- Fjarlægðu hlífina.
- Setjið yfirröðunarlykilinn inn og snúið honum rangsælis.
- While holding the key turned, turn the handle clockwise to open the safe door.
- Fjarlægið lykilinn og setjið lykilgatshlífina aftur á eftir notkun.
5.3 Loka og læsa öryggishólfinu
- Lokaðu öryggishólfshurðinni vandlega.
- Turn the handle counter-clockwise until it is fully engaged and the door is secured.
- Öryggishólfið læsist sjálfkrafa.
5.4 Changing the User Code
- Open the safe door using your current code or override key.
- Press the red reset button on the inside of the door. The yellow indicator light will illuminate.
- Within 5 seconds, enter your new 3-8 digit code.
- Press the 'A' or 'B' button to confirm. The yellow light will turn off, and a beep will confirm the new code.
- Prófaðu nýja kóðann með hurðinni opinni áður en henni er lokað.
6. Viðhald
6.1 Skipt um rafhlöðu
When the batteries are low, the red indicator light will flash when you enter your code. Replace batteries promptly to avoid lock-out.
- Opnaðu öryggishurðina.
- Replace all four AA alkaline batteries as described in Section 4.2.
- Your electronic code will be retained during battery replacement.
6.2 Þrif
Þrífið ytra byrði öryggishólfsins með mjúkum klút.amp klút. Notið ekki slípiefni eða leysiefni, þar sem þau geta skemmt áferðina eða rafeindabúnaðinn.
7. Bilanagreining
- Öryggishólfið opnast ekki með kóða:
- Ensure batteries are fresh and installed correctly. Replace if necessary.
- Sláðu kóðann vandlega inn aftur. Gakktu úr skugga um að engir hnappar séu fastir.
- Try using the override key to open the safe. - Lyklaborðið svarar ekki:
- Check battery installation and replace batteries.
- Ensure no debris is obstructing the buttons. - Forgotten code:
- Use the override key to open the safe.
- Once open, follow the steps in Section 5.4 to set a new user code. - Door does not close/lock properly:
- Gakktu úr skugga um að engir hlutir séu fyrir dyrum eða læsingarboltum.
- Check that the handle is fully turned counter-clockwise to engage the locking mechanism.
8. Tæknilýsing
| Vörumerki | SentrySafe |
| Gerðarnúmer | PLX510487 |
| Tegund læsa | Rafræn, lykill |
| Getu | 6 rúmfætur |
| Efni | Álblendi |
| Gerð uppsetningar | Veggfesting |
| Innifalið íhlutir | Bolts, Keys |
| Þyngd hlutar | 241 pund |
| Vatnsþolsstig | Ekki vatnsheldur |
| Vörumál | 23.8 x 21.5 x 38.3 tommur |
| UPC | 635665104871 |
9. Ábyrgð og stuðningur
SentrySafe products are manufactured to high-quality standards. For specific warranty information, please refer to the warranty card included with your purchase or visit the official SentrySafe website. For technical support, replacement parts, or further assistance, please contact SentrySafe customer service directly.
SentrySafe Official Websíða: www.sentrysafe.com