Inngangur
Thank you for choosing the PILOT 720p Vehicle Dash Cam. This manual provides detailed instructions for the proper installation, operation, and maintenance of your new dash camera. Please read this manual thoroughly before use to ensure optimal performance and longevity of the device.
This dash cam is designed to record video footage while driving, offering features such as 720p HD resolution, a wide viewing angle, motion detection, and loop recording. It comes with an 8GB Micro SD card and a universal window mount for convenient setup.
Innihald pakka
Vinsamlegast staðfestu að allir hlutir sem taldir eru upp hér að neðan séu innifaldir í pakkanum þínum:
- Dash Cam Unit
- 8GB Micro SD kort
- Sogskálarfesting
- USB bíll hleðslutæki
- USB Charger and Sync Cable
- Notendahandbók (þetta skjal)
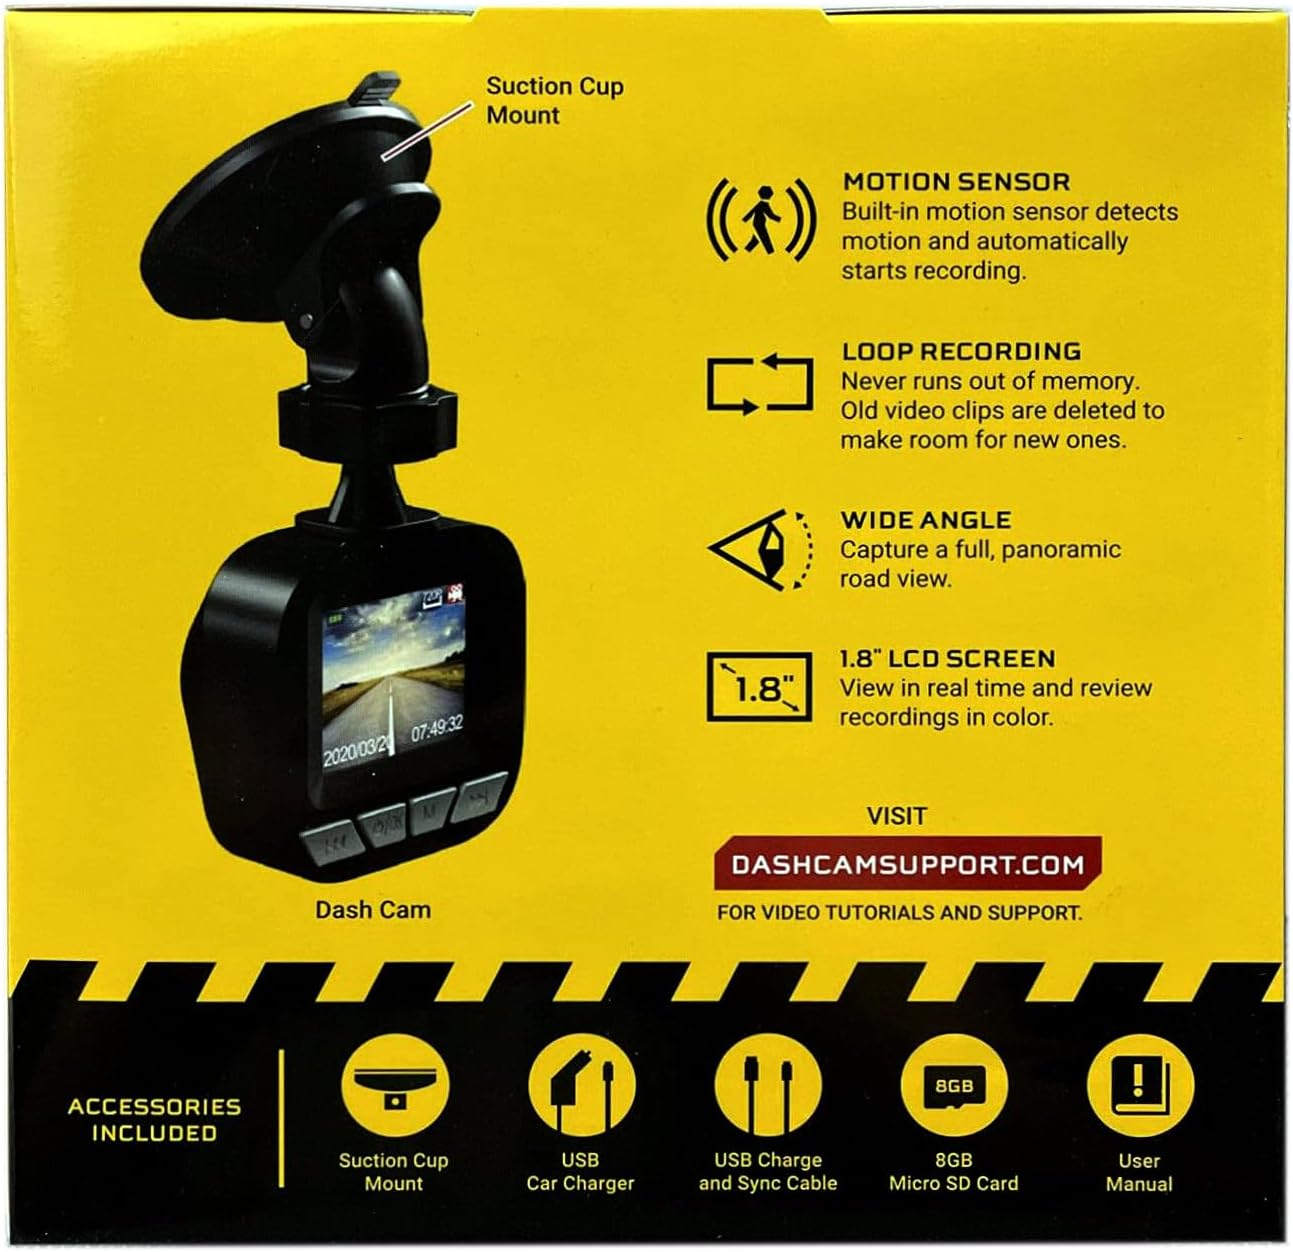
Image: The dash cam unit, suction cup mount, USB car charger, USB charge and sync cable, 8GB Micro SD card, and user manual are shown, along with a summary of key features like motion sensor, loop recording, wide angle, and 1.8" LCD screen.
Eiginleikar vöru
- Upplausn: 720p HD myndbandsupptaka.
- Skjástærð: 1.8-inch LCD display for real-time viewing og spilun.
- Viewí horn: Wide-angle lens to capture a broad road view.
- Hreyfiskynjari: Built-in sensor detects motion and automatically initiates recording.
- Loop Recording: Automatically overwrites older video clips when the memory card is full, ensuring continuous recording.
- Hljóðnemi: Innbyggt fyrir hljóðupptöku.
- Geymsla: Supports Micro SD cards up to 32GB (8GB card included).
- Kraftur: Built-in rechargeable Lithium-ion battery and USB 2.0 port for charging.
Uppsetningarleiðbeiningar
1. Að setja inn Micro SD kortið
Locate the Micro SD card slot on the side or bottom of the dash cam. Gently insert the included 8GB Micro SD card into the slot until it clicks into place. Ensure the card is inserted correctly to avoid damage. The dash cam supports cards up to 32GB.
2. Uppsetning mælaborðs myndavélarinnar
- Clean the desired area on your vehicle's windshield where you intend to mount the dash cam. Ensure the surface is dry and free of dust.
- Festið sogskálina við mælaborðsmyndavélina.
- Press the suction cup firmly against the windshield and flip the lever to secure it in place.
- Stilltu hornið á mælaborðinu til að tryggja skýringu view of the road ahead, avoiding any obstructions.

Mynd: Nærmynd view of the front of the PILOT dash cam, showing the camera lens and the "PILOT" brand logo. This illustrates the main unit for mounting.
3. Tengja máttur
Connect the USB car charger to your vehicle's 12V power outlet (cigarette lighter socket). Then, connect the USB charger and sync cable from the car charger to the USB port on the dash cam. The dash cam will typically power on automatically when the vehicle starts and power is supplied.
Notkunarleiðbeiningar
Kveikt/slökkt
- Sjálfvirkt: The dash cam will power on and begin recording automatically when connected to a power source and the vehicle ignition is turned on. It will power off automatically when the vehicle is turned off and power is disconnected.
- Handbók: To manually power on or off, press and hold the power button (usually located on the side or bottom of the unit) for a few seconds.
Upptökustillingar
- Continuous Loop Recording: The dash cam records video in continuous loops (e.g., 1, 3, or 5-minute segments). When the Micro SD card is full, the oldest unlocked files will be overwritten by new recordings. This ensures you always have the most recent footage.
- Upptaka hreyfiskynjunar: When enabled in the settings, the dash cam will automatically start recording if it detects motion in front of the camera while the vehicle is parked and the dash cam is powered on. This feature is useful for monitoring your vehicle when stationary.
Viewing Upptökur
1.8 tommu LCD skjárinn gerir þér kleift að view lifandi footage og afturview recorded videos directly on the device. Use the navigation buttons (typically labeled 'Menu', 'Up', 'Down', 'OK') to browse through the menu options and playback recorded files. Refer to the on-screen interface for specific navigation prompts.
Dagsetning og tími Stamp
Ensure the date and time are set correctly in the dash cam's settings menu. This is crucial for accurate record-keeping of video footage.
Viðhald
- Þrif á linsunni: Regularly clean the camera lens with a soft, lint-free cloth to ensure clear video quality. Avoid abrasive materials or harsh chemicals.
- Stjórnun SD-korts: It is recommended to format the Micro SD card periodically (e.g., once a month) within the dash cam's settings menu. This helps maintain card performance and prevents data corruption. Back up any important footage áður en það er formatað.
- Umhirða rafhlöðu: The built-in Lithium-ion battery is primarily for emergency recording and saving settings. For continuous operation, keep the dash cam connected to the vehicle's power supply. Avoid exposing the device to extreme temperatures for extended periods.
- Uppfærsla vélbúnaðar: Check the manufacturer's support webvefsvæði (DASHCAMSUPPORT.COM) periodically for any available firmware updates to improve performance and add new features.
Úrræðaleit
| Vandamál | Möguleg lausn |
|---|---|
| Mælaborðsmyndavélin kviknar ekki. |
|
| Dash cam turns off frequently during driving. |
|
| Myndband footage er óskýrt eða óskýrt. |
|
| Mælaborðsmyndavélin tekur ekki upp. |
|
Tæknilýsing
| Eiginleiki | Smáatriði |
|---|---|
| Upplausn | 720p HD |
| Skjástærð | 1.8 tommur |
| Viewí horn | Wide Angle (135 Degrees Field Of View) |
| Hreyfiskynjari | Innbyggður |
| Loop Recording | Innbyggður |
| Hljóðnemi | Innbyggður |
| USB tengi | USB 2.0 |
| Rafhlaða | Innbyggt endurhlaðanlegt litíumjón |
| Stuðningur við minniskort | Micro SD up to 32GB (8GB included) |
| Þyngd hlutar | 8 aura |
| Tengitækni | USB |
| Gerð uppsetningar | Gluggafesting |
Stuðningur
For additional assistance, video tutorials, or further support, please visit the official support websíða:
Please have your product model information ready when contacting support.