Inngangur
Thank you for choosing the Xgody 3-Channel Dash Cam. This manual provides detailed instructions for the installation, operation, and maintenance of your new dash camera. Please read this manual thoroughly before using the product to ensure proper function and to maximize your user experience. Keep this manual for future reference.
Vara lokiðview og hvað er í kassanum
The Xgody 3-Channel Dash Cam is designed to record video from the front, inside, and rear of your vehicle simultaneously, providing comprehensive coverage. It features high-definition recording, infrared night vision, G-sensor for emergency locking, loop recording, and parking monitoring.
Innihald pakka:
- Xgody Dash Cam Unit
- Aftan View Camera (6M cable)
- Bíll hleðslutæki
- USB gagnasnúra
- Notendahandbók
- 64GB SD kort
- Límmiði
- Card Pin
- Screws (for rear camera installation)
- 3M Glue Stick Card Line
- Krókstöng (fyrir kapalleiðsögn)

Figure 1: Xgody Dash Cam and Included Accessories
Helstu eiginleikar
Three-Channel Recording
The dash cam simultaneously records video from three perspectives: front (1080p), inside (720p), and rear (720p). For clearer internal and external footage, the front and cabin dual-lens cameras can operate independently at 1080p+1080p.

Figure 2: Three-Channel Recording Overview
Infrared (IR) Night Vision
The inside-facing camera is equipped with 4 IR LED lights and an F/2.0 aperture. This technology automatically increases exposure in low-light or dark conditions, ensuring clear video footage of the vehicle's interior. The operating temperature range is -31°F to 167°F (-35°C to 75°C).

Mynd 3: Innrauð nætursjón í notkun
Loop Recording
Continuous loop recording automatically overwrites the oldest unlocked video files when the memory card is full. This ensures that recording never stops due to a full card, providing uninterrupted surveillance.

Mynd 4: Virkni lykkjuupptöku
G-skynjari (neyðarlás)
The built-in G-sensor detects sudden shocks or collisions. When such an event occurs, the dash camera automatically locks the current video footage, preventing it from being overwritten by loop recording. This ensures critical evidence is preserved.
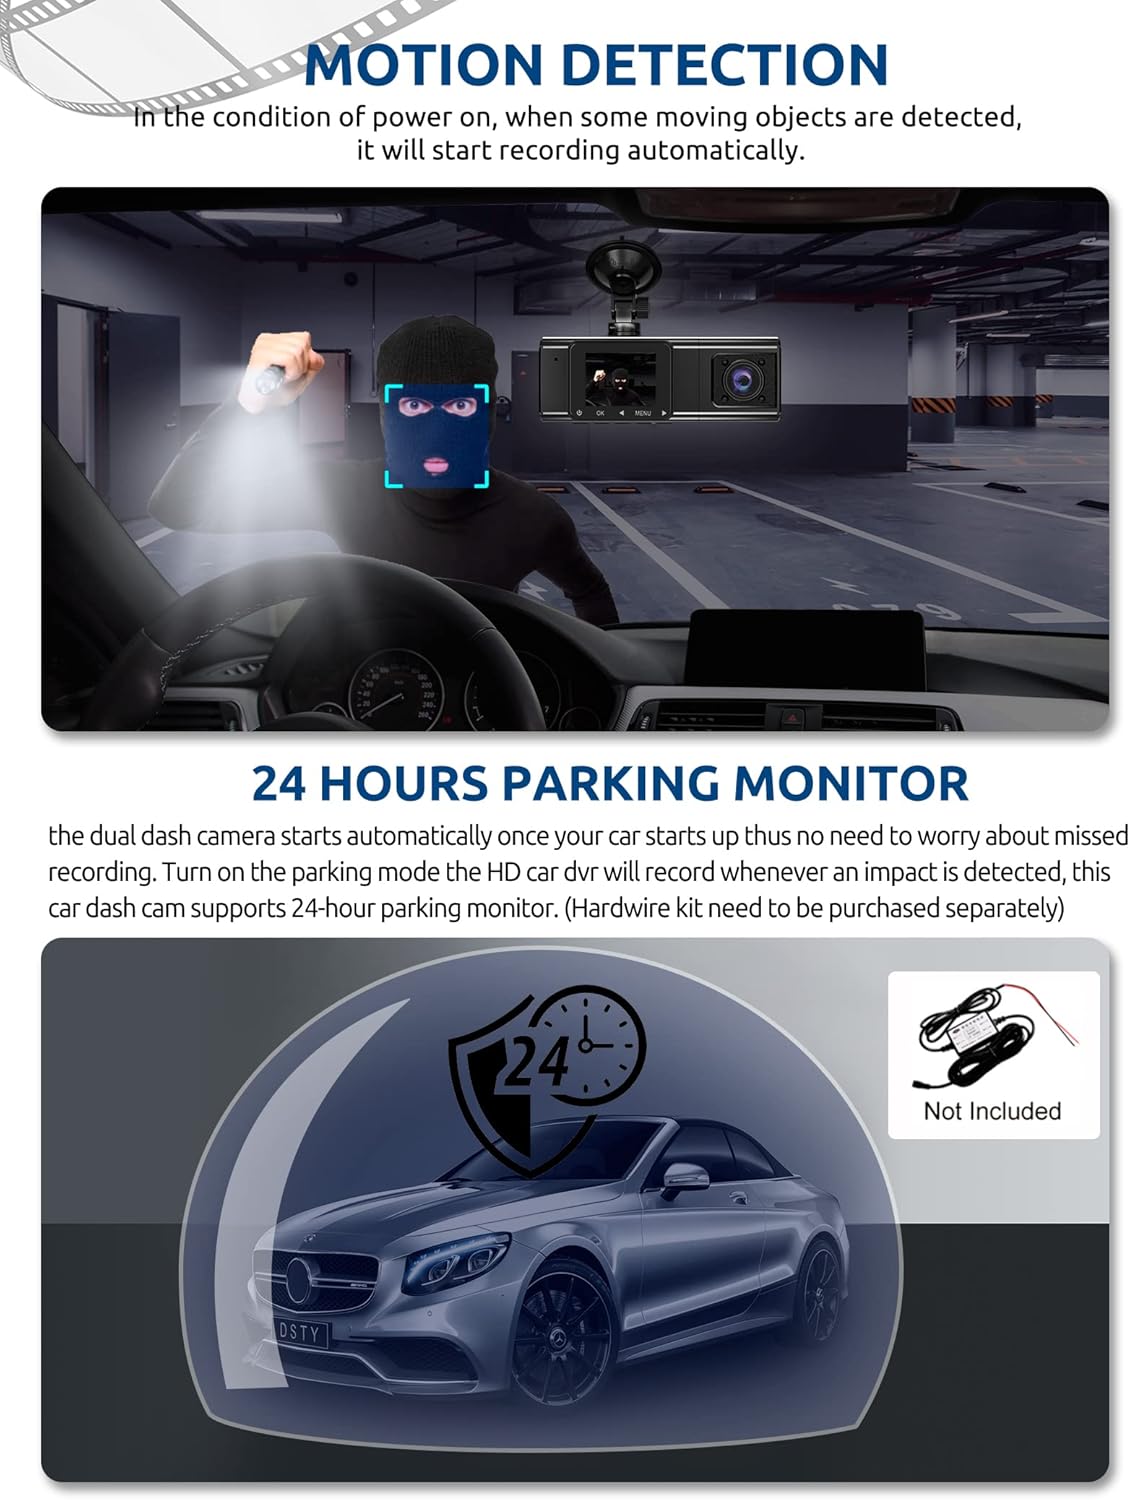
Figure 5: G-Sensor Activating During an Impact
Motion Detection & 24-Hour Parking Mode
In motion detection mode, the video recorder begins recording automatically when it detects movement in front of the camera. For continuous 24-hour surveillance, even when the car is off, the dash cam can be connected to the car battery via a hardwire kit (not included). This enables parking mode, which records when an impact is detected.

Figure 6: Motion Detection and Parking Monitoring
Uppsetningarleiðbeiningar
1. Insert the SD Card
- Finndu SD-kortaraufina á hlið bílmyndavélarinnar.
- Settu meðfylgjandi 64GB SD-kort í myndavélina með gullnu tengiliðunum að aftan þar til það smellpassar.
- Gakktu úr skugga um að kortið sé alveg sett í.
2. Festið mælaborðsmyndavélina
- Hreinsið framrúðuna þar sem þið ætlið að festa mælaborðsmyndavélina.
- Festið sogskálfestinguna við mælaborðsmyndavélina.
- Press the suction cup firmly against the windshield and lock it into place. Position the camera to ensure a clear view af veginum framundan án þess að skyggja á útsýni þitt fyrir aksturinn.
3. Setjið upp afturmyndavélina
- Tengdu snúruna fyrir aftari myndavélina við aðal mælaborðsmyndavélina.
- Route the cable neatly along the vehicle's headliner and trim to the rear of the car. Use the provided crowbar to tuck the cable under panels.
- Mount the rear camera on the rear windshield using the adhesive sticker or screws, ensuring it has a clear view af veginum fyrir aftan.
4. Tengdu rafmagn
- Stingdu bílhleðslutækinu í sígarettukveikjarann í bílnum þínum.
- Tengdu hinn endann á snúrunni fyrir bílhleðslutækið við aflgjafatengi mælaborðsmyndavélarinnar.
- Mælaborðsmyndavélin kviknar venjulega sjálfkrafa þegar bíllinn er ræstur og slokknar á sér þegar slökkt er á honum.
Notkunarleiðbeiningar
Kveikt/slökkt
- Sjálfvirkt: The dash cam powers on and starts recording automatically when connected to power and the vehicle ignition is on. It powers off automatically when the ignition is turned off.
- Handbók: Press and hold the power button for a few seconds to manually turn the device on or off.
Upptökustillingar
- Venjuleg upptaka: The default mode, continuously recording video in segments.
- Neyðarupptaka (G-skynjari): Automatically activated upon impact, locking the current video file.
- Upptaka hreyfiskynjunar: Records when motion is detected while the vehicle is parked (requires activation in settings).
- Bílastæðavöktun: Records when an impact is detected while the vehicle is parked (requires hardwire kit and activation in settings).
Valmyndarleiðsögn
- Notaðu 'MENU' hnappinn til að fá aðgang að stillingum.
- Use the 'UP' and 'DOWN' arrow buttons to navigate through menu options.
- Press the 'OK' button to confirm selections.
- Common settings include video resolution, loop recording duration, G-sensor sensitivity, parking mode, date/time, and language.
Viewing Footage
- Á tæki: Enter playback mode via the menu to view recorded videos directly on the dash cam screen.
- Í tölvu: Remove the SD card from the dash cam and insert it into a computer's card reader. The video files can then be accessed and played using standard media player software.
Viðhald
Forsníða SD-korts
It is recommended to format the SD card regularly (e.g., once a month) to ensure optimal performance and prevent data corruption. This can typically be done through the dash cam's menu settings. Formatting will erase all data on the card, so back up any important files fyrst.
Linsaþrif
Periodically clean the lenses of the front, inside, and rear cameras with a soft, lint-free cloth. Avoid using abrasive cleaners that could scratch the lens surface. Clean lenses ensure clear video quality.
Firmware uppfærslur
Check the official Xgody website periodically for any available firmware updates. Updates can improve performance, add new features, or fix bugs. Follow the instructions provided with the firmware update carefully.
Úrræðaleit
| Vandamál | Möguleg orsök | Lausn |
|---|---|---|
| Mælaborðsmyndavélin kviknar ekki. | Engin straumgjafi; bilað bílhleðslutæki; laus tenging. | Check car charger connection; ensure vehicle's cigarette lighter socket is functional; try a different power source if available. |
| Upptaka stöðvast eða files eru skemmd. | SD-kort fullt; SD-kortsvilla; ósamhæft SD-kort. | Format the SD card regularly; use a high-speed (Class 10 or U3) SD card; replace the SD card if issues persist. |
| Screen is unresponsive or distorted. | Extreme temperatures; software glitch. | Allow the device to return to normal operating temperature; perform a factory reset (refer to manual for specific steps); ensure the device is not exposed to direct sunlight for extended periods in hot climates. |
| Myndgæðin eru léleg. | Óhrein linsa; hlífðarfilma enn á linsunni; röng upplausnarstilling. | Clean camera lenses; remove any protective film; check video resolution settings in the menu. |
| G-skynjarinn er of næmur/ekki nógu næmur. | Næmni G-skynjarans er of há/lág. | Adjust G-sensor sensitivity in the dash cam's settings menu. |
Tæknilýsing
| Eiginleiki | Forskrift |
|---|---|
| Vörumál | 4.25 x 1.77 x 1.57 tommur |
| Þyngd hlutar | 1.26 pund |
| Tengitækni | USB, þráðlaust |
| Myndbandsupplausn | 1080p (Front), 720p (Inside), 720p (Rear) |
| Skjástærð | 1.5 tommur |
| Tegund Flash-minni | SD |
| Rekstrarhitastig | -31°F til 167°F (-35°C til 75°C) |
| Innifalið íhlutir | Minniskort (64GB) |
| Litur | Svartur |
Ábyrgð og stuðningur
Xgody provides 18 months of service for this product. If you have any questions or require assistance regarding your Xgody Dash Cam, please contact our customer support. We aim to respond with helpful advice within 24 hours.
For support, please refer to the contact information provided in the packaging or on the official Xgody websíða.