1. Inngangur
This manual provides essential information for the safe and efficient operation, maintenance, and troubleshooting of your Profile GE Automatic Espresso Machine + Milk Frother. Please read these instructions thoroughly before first use and retain for future reference.

Image 1.1: The Profile GE Automatic Espresso Machine with a prepared espresso and a latte.
2. Öryggisupplýsingar
Fylgið alltaf grunnöryggisráðstöfunum þegar rafmagnstæki eru notuð til að draga úr hættu á eldsvoða, raflosti og meiðslum á fólki.
- Ensure the appliance is connected to a grounded outlet.
- Ekki dýfa vélinni, snúrunni eða stinga í vatn eða annan vökva.
- Taktu úr sambandi þegar það er ekki í notkun og fyrir þrif.
- Ekki nota tæki með skemmda snúru eða kló.
- Haldið höndum og snúrum frá heitum fleti.
- Notið aðeins fylgihluti sem framleiðandi mælir með.
3. Vöru lokiðview
Atvinnumaðurinnfile GE Automatic Espresso Machine is designed for convenience and quality, featuring an integrated grinder, milk frother, and smart connectivity.
3.1 Íhlutir
- Stjórnborð: Touch-sensitive buttons for various drink selections and functions.
- Bean Hopper: Stores whole coffee beans for grinding.
- Vatnsgeymir: Fjarlægjanlegur tankur fyrir vatnsveitu.
- Kaffistút: Gefur út bruggað kaffi.
- Gufustöng: Til að freyða mjólk.
- Dreypibakki: Collects excess liquids.
- Gámur fyrir grænmeti: Safnar notuðum kaffikorgum.

Image 3.1: The top control panel with buttons for Espresso, Americano, My Brew, Steam, and Hot Water.

Image 3.2: The integrated bean hopper with whole coffee beans and grind size adjustment knob.

Image 3.3: The removable water reservoir being lifted from the machine.
4. Uppsetning
4.1 Upppakkning og upphafleg uppsetning
- Fjarlægið varlega öll umbúðaefni.
- Place the machine on a stable, level surface away from heat sources and direct sunlight.
- Tryggið að nægilegt rými sé í kringum vélina fyrir loftræstingu og aðgang að íhlutum.
4.2 Upphafsþrif
Before first use, clean all removable parts with warm water and mild detergent. Rinse thoroughly and dry. Wipe the exterior of the machine with a damp klút.
4.3 Fylling vatnsgeymisins
- Remove the water reservoir from the machine (refer to Image 3.3).
- Fill with fresh, cold drinking water up to the MAX line.
- Replace the reservoir securely into the machine.
4.4 Bæta við kaffibaunum
- Open the lid of the bean hopper (refer to Image 3.2).
- Pour whole coffee beans into the hopper. Do not overfill.
- Lokaðu lokinu örugglega.
4.5 Powering On and Initial Rinse
- Stingdu rafmagnssnúrunni í jarðtengda rafmagnsinnstungu.
- Press the power button on the control panel. The machine will perform an initial rinse cycle.
- Place a container under the coffee spout to collect the rinse water.
4.6 SmartHQ App Connection
For enhanced customization and software updates, connect your espresso machine to the SmartHQ app.
- Download the SmartHQ app from your device's app store.
- Follow the in-app instructions to pair your espresso machine.
- Customize drink preferences, volume, and strength through the app.

Image 4.1: Using the SmartHQ app to control and customize the espresso machine.
5. Notkunarleiðbeiningar
5.1 Að brugga kaffi
The machine offers Espresso, Americano, Lungo, and Hot Water options. The 'My Cup' setting is pre-set to Ristretto and can be adjusted via the SmartHQ app.
- Ensure the water reservoir is filled and the bean hopper contains coffee beans.
- Settu bolla undir kaffitútinn.
- Select your desired drink (Espresso, Americano, Lungo, My Cup) from the control panel.
- Vélin mun sjálfkrafa mala baunirnar, brugga og gefa kaffið þitt.

Image 5.1: The espresso machine dispensing a fresh shot of espresso.
5.2 Aðlögun malastærðar
The integrated conical burr grinder allows for 5 levels of grind size adjustment, from coarsest to finest, to optimize flavor extraction.
- Locate the grind size adjustment knob inside the bean hopper (refer to Image 3.2).
- Turn the knob to select your desired grind setting. Finer grinds are suitable for espresso, while coarser grinds are better for longer coffee types.
5.3 Using the Steam Frother
The steam frother creates various milk textures for cappuccinos, lattes, and more.
- Fill the included stainless steel frothing pitcher with cold milk.
- Settu gufusprotann ofan í mjólkina.
- Ýttu á „Steam“ hnappinn á stjórnborðinu.
- Move the pitcher to achieve desired foam texture.
- Once finished, press the 'Steam' button again to stop.
- Immediately clean the steam wand after each use to prevent milk residue buildup.
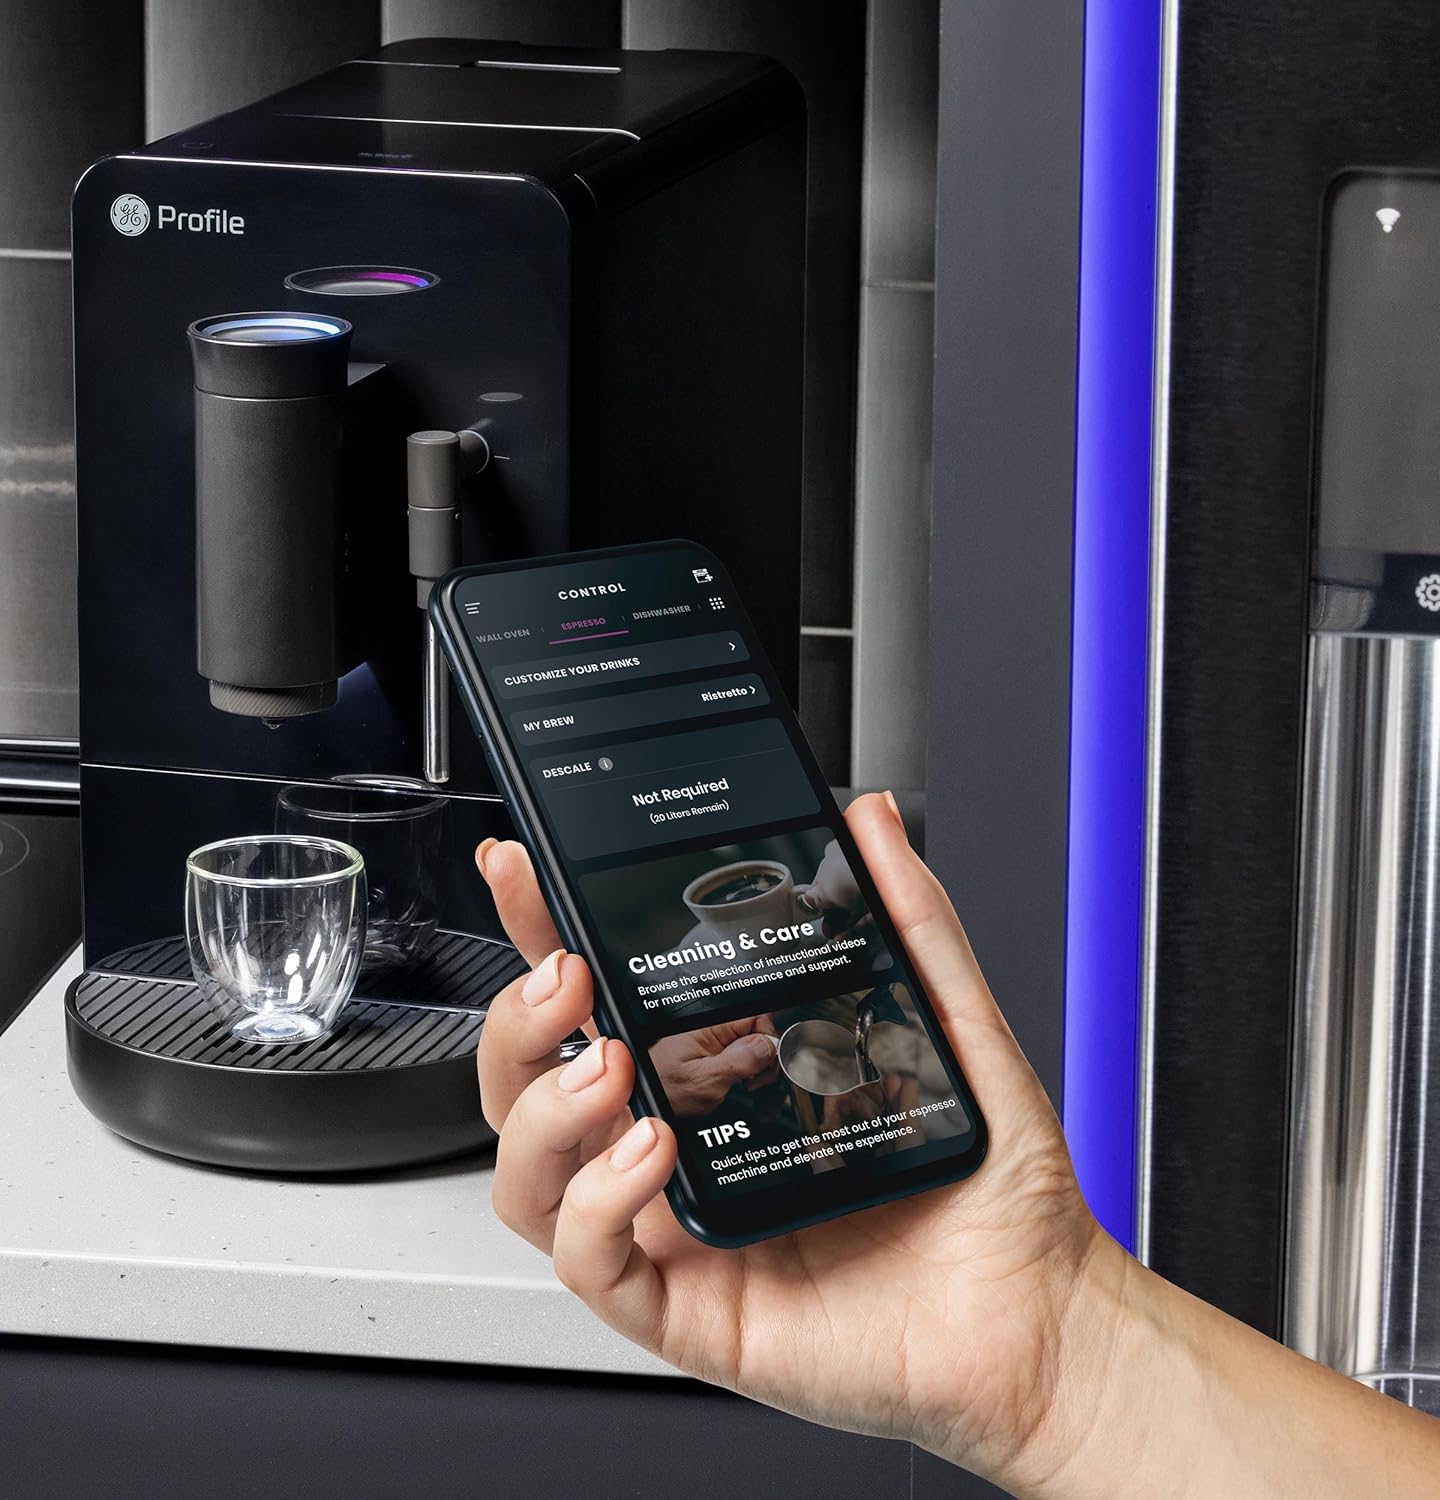
Image 5.2: A hand using the steam wand to froth milk in a stainless steel pitcher.
6. Viðhald
Regluleg þrif og viðhald tryggja bestu mögulegu afköst og endingu espressóvélarinnar.
6.1 Dagleg þrif
- Gufustöng: Eftir hverja notkun skal þurrka gufustútinn með auglýsingu.amp cloth. Purge steam briefly to clear any milk residue from the nozzle.
- Dropabakki og ílát fyrir maísgrjón: Tæmið og skolið daglega. Vélin gefur til kynna hvenær þarf að tæma ílátið fyrir kaffikorg.
- Vatnsgeymir: Skolið daglega og fyllið á með fersku vatni.
6.2 Vikuleg þrif
- Bruggunareining: The brew unit is typically removable for rinsing under running water. Refer to the included cleaning kit instructions for detailed steps.
- Bean Hopper: Periodically clean out any oil residue or old beans.
6.3 Afkalkun
The machine will prompt you when descaling is required. Use a descaling solution specifically designed for espresso machines and follow the instructions provided with the descaling agent or in the SmartHQ app.
7. Bilanagreining
Þessi kafli fjallar um algeng vandamál sem þú gætir lent í með espressóvélina þína.
| Vandamál | Möguleg orsök | Lausn |
|---|---|---|
| No coffee dispensed / "Add Beans" message | Bean hopper empty or beans not feeding correctly. | Refill bean hopper. Gently stir beans to ensure they feed into the grinder. |
| Kaffið er of veikt eða vatnskennt | Grind size too coarse, insufficient coffee dose, or descaling needed. | Adjust grind size to a finer setting. Check SmartHQ app for strength settings. Perform descaling if prompted. |
| Mjólk freyðir ekki almennilega | Steam wand clogged, milk type unsuitable, or insufficient steam pressure. | Clean steam wand thoroughly. Use fresh, cold milk. Ensure machine is heated to steam temperature. |
| Kveikir ekki á vélinni | Ekki tengt, slökkt á rafmagninutage, or circuit breaker tripped. | Check power connection. Verify power outlet functionality. Reset circuit breaker if necessary. |
| SmartHQ app connectivity issues | Incorrect Wi-Fi password, network interference, or app bug. | Verify Wi-Fi credentials. Ensure machine is within Wi-Fi range. Restart app and machine. Check for app updates. |
8. Tæknilýsing
- Vörumerki: Profile
- Fyrirmyndarheiti: GE Profile Automatic Espresso Machine + Frother
- Tegund vörunúmer: P7CEBBS6RBB
- Litur: Svartur
- Vörumál: 7" D x 16" B x 12.5" H
- Þyngd hlutar: 16 pund
- Voltage: 120V
- Notkunarhamur: Alveg Sjálfvirk
- Sérstakir eiginleikar: Built-In Bean Hopper, Built-In Conical Burr Grinder & Adjustable Grind Size, Programmable My Brew Setting, Steam Frother & Frothing Pitcher, WiFi Connected
- Innifalið íhlutir: Cleaning Kit, Coffee Bean Container, Espresso Machine, Steam Wand, Milk Pitcher, Water Tank
- Tegund kaffiinntaks: Heilar baunir
- Inntak mannviðmóts: Snertiskjár

Image 8.1: Product dimensions of the espresso machine.
9. Ábyrgð og stuðningur
This product is covered by a manufacturer's warranty. For specific warranty details, registration, or technical support, please refer to the warranty card included with your product or visit the official GE Profile website. You may also contact customer service through the SmartHQ app for assistance.