1. Inngangur
Thank you for choosing the ARROWMAX SES PRO Electric Precision Screwdriver. This cordless tool is designed for precision tasks, featuring smart motion control and a comprehensive set of 34 magnetic bits. It is ideal for electronics, laptops, glasses, and other delicate applications. This manual provides essential information for safe operation, setup, maintenance, and troubleshooting to ensure optimal performance and longevity of your device.
2. Öryggisupplýsingar
Please read all safety warnings and instructions carefully before using this product. Failure to follow these instructions may result in electric shock, fire, and/or serious injury.
- Haltu vinnusvæðinu hreinu og vel upplýstu. Ringulreið eða dökk svæði valda slysum.
- Ekki nota rafmagnsverkfæri í sprengifimu lofti, svo sem í návist eldfimra vökva, lofttegunda eða ryks. Rafmagnsverkfæri mynda neista sem geta kveikt í ryki eða gufum.
- Haldið börnum og nærstadda frá meðan rafmagnsverkfæri eru í notkun. Truflanir geta valdið því að þú missir stjórn á þér.
- Forðist að kveikja óvart á tækinu. Gangið úr skugga um að rofinn sé í slökktri stöðu áður en tækið er tengt við rafhlöðuna, tekið upp eða borið.
- Ekki of mikið. Haltu réttri fótfestu og jafnvægi á hverjum tíma. Þetta gerir kleift að stjórna rafmagnsverkfærinu betur við óvæntar aðstæður.
- Klæddu þig rétt. Ekki vera í lausum fötum eða skartgripum. Haltu hárinu þínu og fötum frá hreyfanlegum hlutum. Laust föt, skartgripir eða sítt hár geta festst í hreyfanlegum hlutum.
- Notaðu persónuhlífar. Notaðu alltaf augnhlífar. Hlífðarbúnaður eins og rykgrímur, rennilausir öryggisskór, húfur eða heyrnarhlífar sem notaðir eru við viðeigandi aðstæður munu draga úr líkamstjóni.
- Geymið aðgerðalaus rafmagnsverkfæri þar sem börn ná ekki til og leyfðu ekki fólki sem ekki kannast við rafmagnsverkfærið eða þessar leiðbeiningar að stjórna rafmagnsverkfærinu.
- Viðhalda rafmagnsverkfæri. Athugaðu hvort hreyfanlegir hlutar séu misjafnir eða bindist, brotum á hlutum og hvers kyns öðru ástandi sem getur haft áhrif á virkni vélbúnaðarins. Ef það er skemmt skaltu láta gera við rafmagnsverkfærið fyrir notkun.
- Notaðu rafmagnsverkfæri, fylgihluti og verkfærabita o.fl. í samræmi við þessar leiðbeiningar, að teknu tilliti til vinnuaðstæðna og vinnunnar sem á að framkvæma. Notkun rafmagnstækisins til annarra aðgerða en ætlað er gæti valdið hættulegum aðstæðum.
- Endurhlaða aðeins með hleðslutækinu sem framleiðandi tilgreinir. Hleðslutæki sem hentar fyrir eina tegund rafhlöðupakka getur skapað eldhættu þegar það er notað með öðrum rafhlöðupakka.
- Ekki nota tólið ef rofinn kveikir og slekkur ekki á því. Öll rafmagnsverkfæri sem ekki er hægt að stjórna með rofanum er hættulegt og verður að gera við.
- Aftengdu rafhlöðupakkann frá rafmagnsverkfærinu áður en þú gerir breytingar, skiptir um aukabúnað eða geymir rafmagnsverkfæri. Slíkar fyrirbyggjandi öryggisráðstafanir draga úr hættu á að rafmagnsverkfærið ræsist óvart.
3. Innihald pakka
The ARROWMAX SES PRO Electric Precision Screwdriver package typically includes the following items:
- 1 x ARROWMAX SES PRO Electric Precision Screwdriver
- 1 x Magnetic Storage Case
- 34 x Magnetic Precision Bits (S2 Steel, 4mm)
- 1 x USB-A til USB-C hleðslusnúra

Image: The ARROWMAX SES PRO Electric Precision Screwdriver, its magnetic bit case, and the included 34 precision bits.
4. Vöru lokiðview og íhlutir
Familiarize yourself with the main components of your ARROWMAX SES PRO screwdriver:

Image: Labeled diagram of the ARROWMAX SES PRO screwdriver's key components.
- Tegund C hleðslutengi: Located at the top for recharging the internal battery.
- LED stöðuskjár: An OLED screen showing battery level, torque setting, and operational status.
- Aflhnappur: Used to turn the device on/off and adjust torque settings.
- Álfelgur: Endingargóð og létt smíði.
- LED ljós: Lýsir upp vinnusvæðið fyrir betri yfirsýn.
- Bit Installation Port: Where precision bits are inserted.
5. Uppsetning
5.1 Hleðsla skrúfjárnsins
- Locate the USB-C charging port at the top of the screwdriver.
- Connect the provided USB-A to USB-C charging cable to the screwdriver and a compatible USB-A power adapter (not included).
- The LED Status Display will indicate the charging progress. A full charge allows for tightening approximately 900 screws.
- Mikilvæg athugasemd: This electric screwdriver only supports USB-A to USB-C charging and is not compatible with USB-C PD (Power Delivery) chargers.

Mynd: Yfirview of charging port, battery, torque adjustment, and OLED display.
5.2 Installing Precision Bits
- Select the appropriate precision bit from the magnetic storage case. The case features a pop-up design for easy access.
- Insert the bit firmly into the Bit Installation Port at the tip of the screwdriver. The magnetic holder will secure the bit in place.
- To remove a bit, simply pull it out.
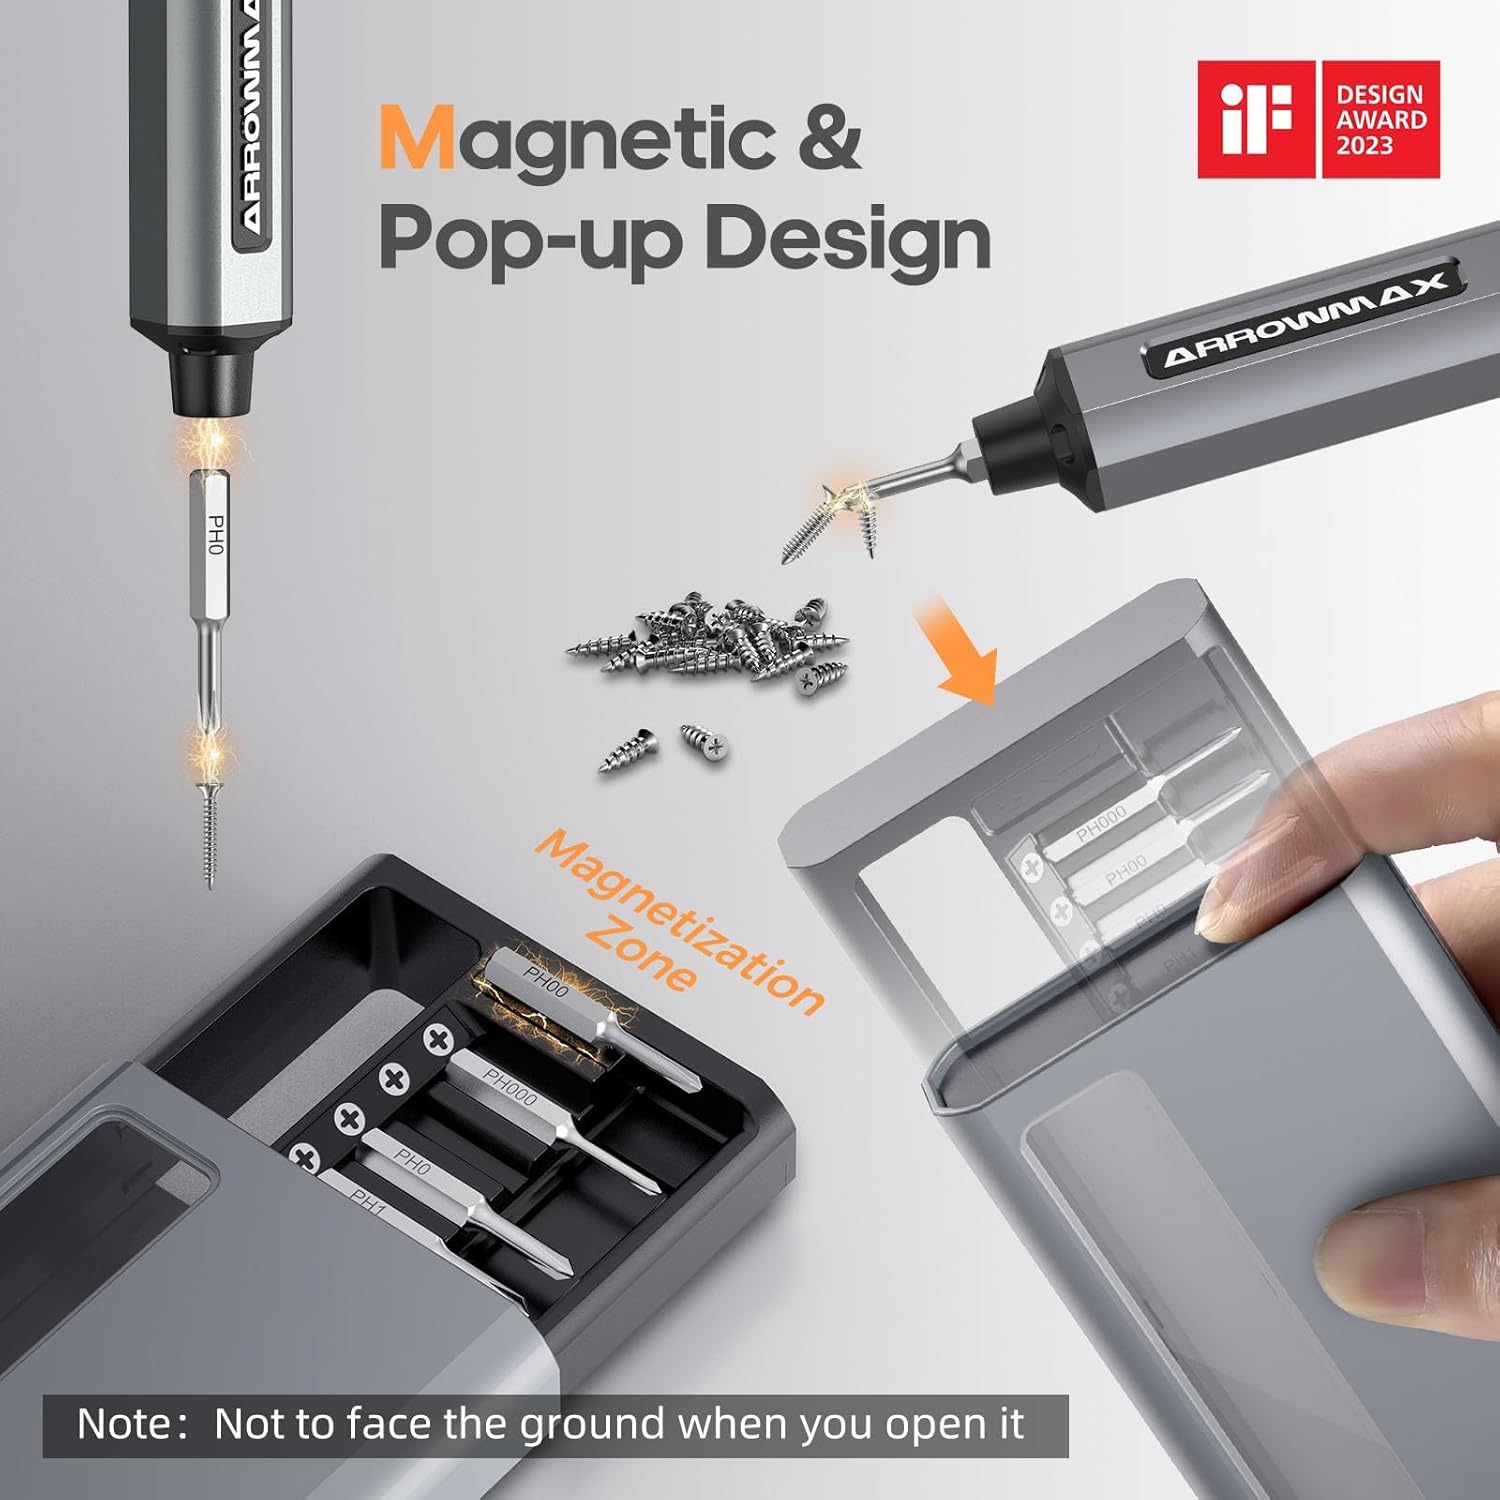
Image: Magnetic pop-up bit case design and bit magnetization zone.
6. Notkunarleiðbeiningar
6.1 Kveikt/slökkt
Press and hold the Power Button for a few seconds to turn the screwdriver on or off. The OLED screen will illuminate upon activation.
6.2 Stillingar á togkrafti
The SES PRO offers 5 adjustable torque levels, including an auto-sensing mode, to suit various tasks. The electric torque ranges from 0.049 N.m to 0.30-0.35 N.m, with a manual torque of 3 N.m.
- With the screwdriver powered on, press the Power Button three times continuously to cycle through the torque settings.
- The OLED screen will display the current torque level (e.g., 1, 2, 3, 4, A for Auto-Sensing).
- Select a lower torque for delicate items like glasses or small electronics, and higher torque for more robust applications.
- For screws that are too tight for the electric motor, the screwdriver can be used in manual mode by applying direct force.
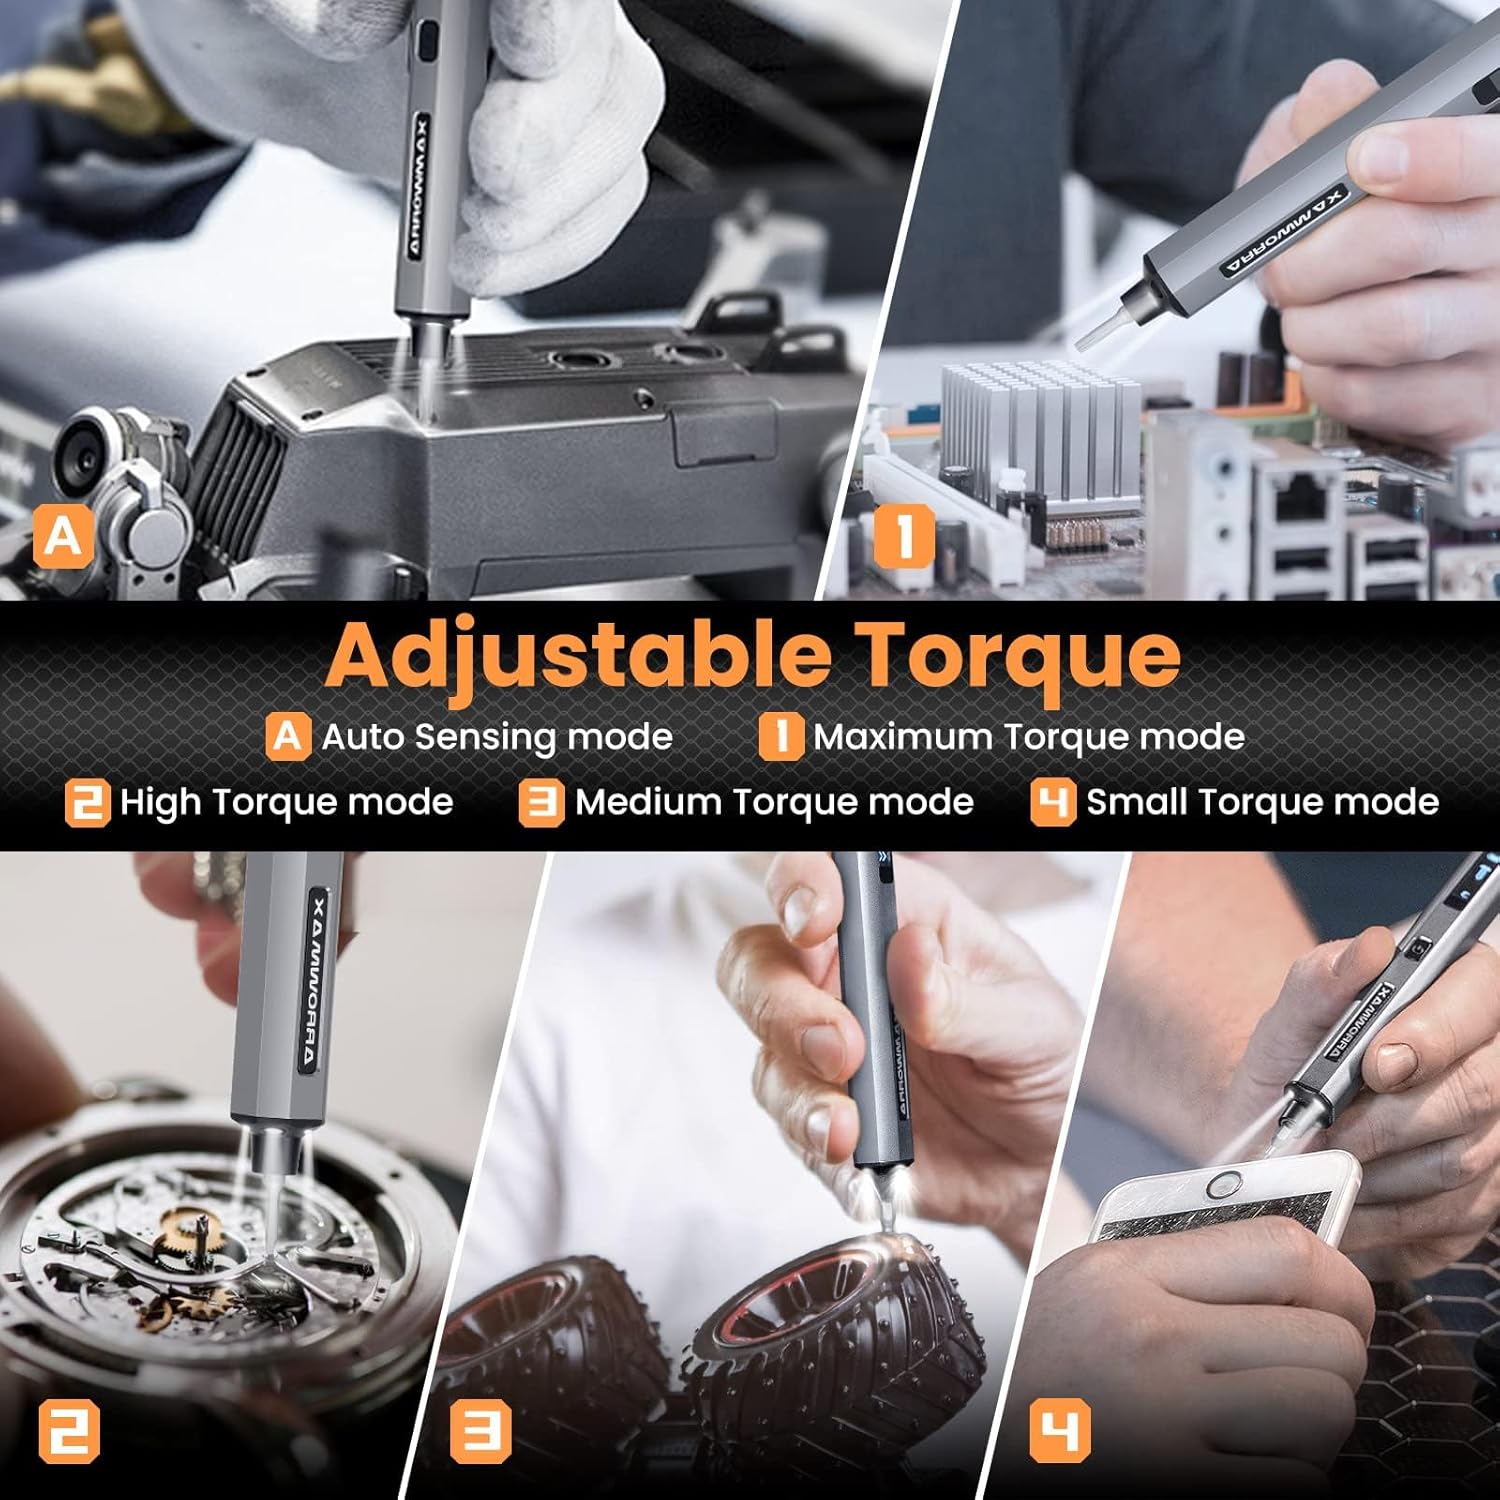
Image: Adjustable torque settings for various applications.
6.3 Body Sensory Dual-Mode (Forward/Reverse)
The SES PRO features a body sensory dual-mode for intuitive control of rotation direction.
- To drive a screw in (tighten), gently rotate your wrist in a clockwise direction while holding the screwdriver.
- To remove a screw (loosen), gently rotate your wrist in a counter-clockwise direction.
- The screwdriver's internal gyroscope detects your wrist movement and activates the motor accordingly.
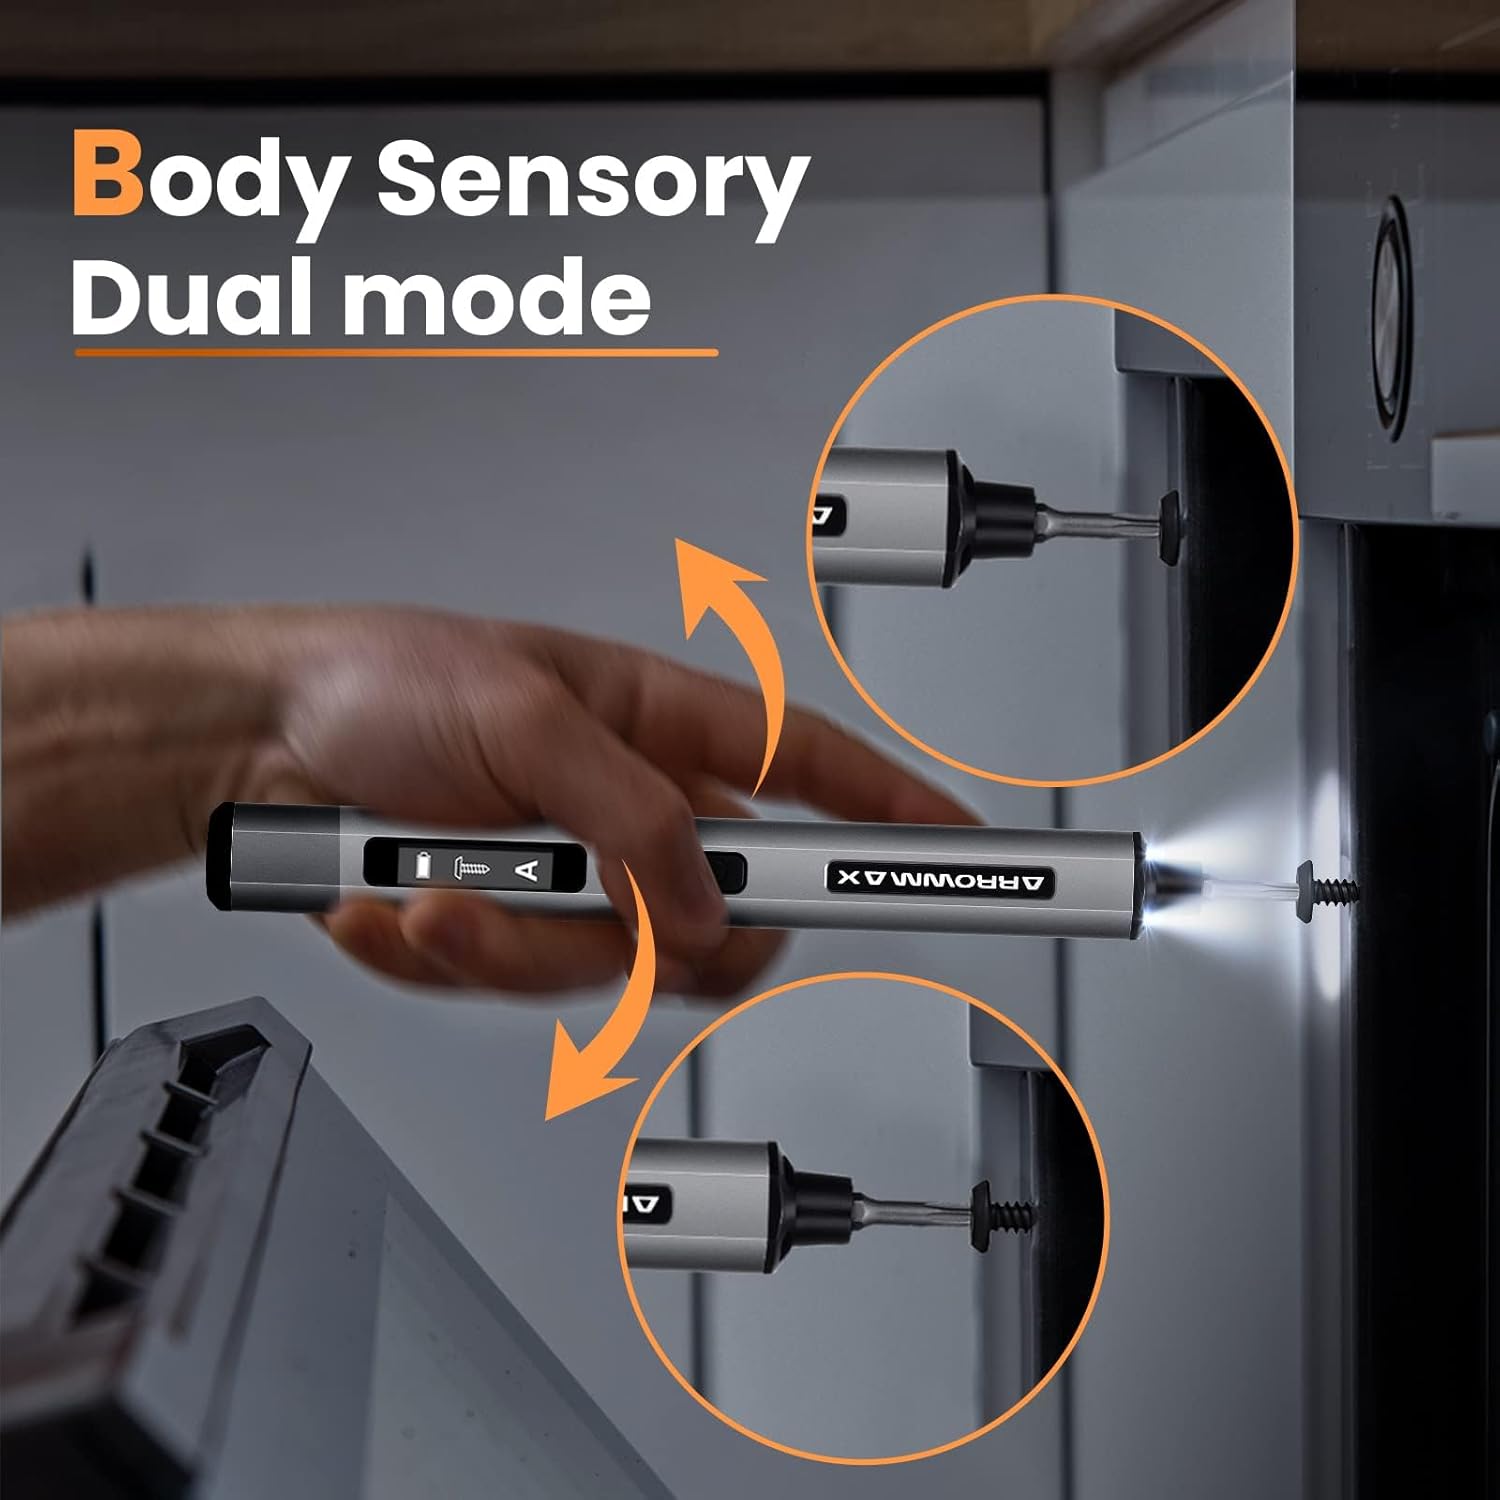
Image: Body sensory dual-mode in action for forward and reverse operation.
6.4 LED vinnuljós
The integrated LED lights at the tip of the screwdriver automatically illuminate when the motor is active, providing clear visibility of your work area.
7. Viðhald
7.1 Þrif
- Wipe the screwdriver body with a soft, dry cloth. Do not use abrasive cleaners or solvents.
- Ensure the bit installation port is free of debris.
7.2 Umhirða rafhlöðu
- Til að lengja líftíma rafhlöðunnar skal forðast að tæma hana alveg oft.
- Store the screwdriver in a cool, dry place when not in use.
- Hleðjið rafhlöðuna reglulega ef hún er geymd í langan tíma til að koma í veg fyrir djúpa úthleðslu.

Image: The SES PRO's long-lasting battery capacity.
7.3 Bita Umhirða
- Keep the precision bits clean and free of rust.
- Store bits securely in the magnetic case to prevent loss and damage.
8. Bilanagreining
If you encounter issues with your ARROWMAX SES PRO screwdriver, refer to the following common problems and solutions:
| Vandamál | Möguleg orsök | Lausn |
|---|---|---|
| Screwdriver does not turn on or respond. | Lítil rafhlaða; tækið er slökkt. | Charge the screwdriver using the provided USB-A to USB-C cable. Ensure the power button is pressed to turn it on. |
| Skrúfjárn hleðst ekki. | Incorrect charger type; faulty cable/adapter. | Ensure you are using a USB-A to USB-C cable and a standard USB-A power adapter. USB-C PD chargers are not supported. Try a different cable or adapter. |
| Motor lacks power or cannot loosen/tighten screws. | Low battery; incorrect torque setting; screw is too tight for electric mode. | Charge the screwdriver. Increase the torque setting. For very tight screws, manually loosen or tighten them first, then use the electric mode. |
| Directional control (forward/reverse) is inconsistent. | Improper wrist movement; gyroscope calibration issue. | Ensure clear and deliberate wrist movements. If issues persist, try restarting the device. |
| Bits fall out or are not held securely. | Bit installation port is dirty; bit is not fully inserted. | Clean the bit installation port. Ensure the bit is pushed in firmly until it clicks or feels secure. |
9. Tæknilýsing
Key technical specifications for the ARROWMAX SES PRO Electric Precision Screwdriver:
| Eiginleiki | Forskrift |
|---|---|
| Vörumerki | ARROWMAX |
| Fyrirmynd | SES PRO (AM-199913-G) |
| Hraði | 200 snúninga á mínútu |
| Aflgjafi | Rafhlöðuknúið |
| Voltage | 3.7 volt (DC) |
| Rafmagns tog | 0.049 N.m - 0.30-0.35 N.m (Adjustable) |
| Handvirkt tog | 3 Nm |
| Tegund rafhlöðu | Litíumjónarafhlöður (500mAh) |
| Hleðsluport | USB-C (USB-A to USB-C charging only) |
| Þyngd hlutar | 13.7 aura |
| Stærðir pakka | 7.48 x 3.43 x 1.73 tommur |
| Sérstakir eiginleikar | OLED Screen, Smart Motion Control, Ergonomic Design, LED Lights |
10. Ábyrgð og stuðningur
The manufacturer's warranty information for this product is not explicitly provided in the available data. For details regarding warranty coverage, duration, and terms, please refer to the documentation included with your purchase or contact the retailer where the product was acquired.
For technical support, product inquiries, or assistance with troubleshooting that is not covered in this manual, please visit the official ARROWMAX website or contact their customer service department. Contact information can typically be found on the product packaging or the manufacturer's official online channels.