Vara lokiðview
This manual provides detailed instructions for the assembly, operation, and maintenance of your PayLessHere Office Computer Gaming Chair. Designed for ergonomic comfort and versatility, this chair features a breathable mesh back, adjustable height, 360-degree swivel, and lumbar support, making it suitable for both office work and gaming.
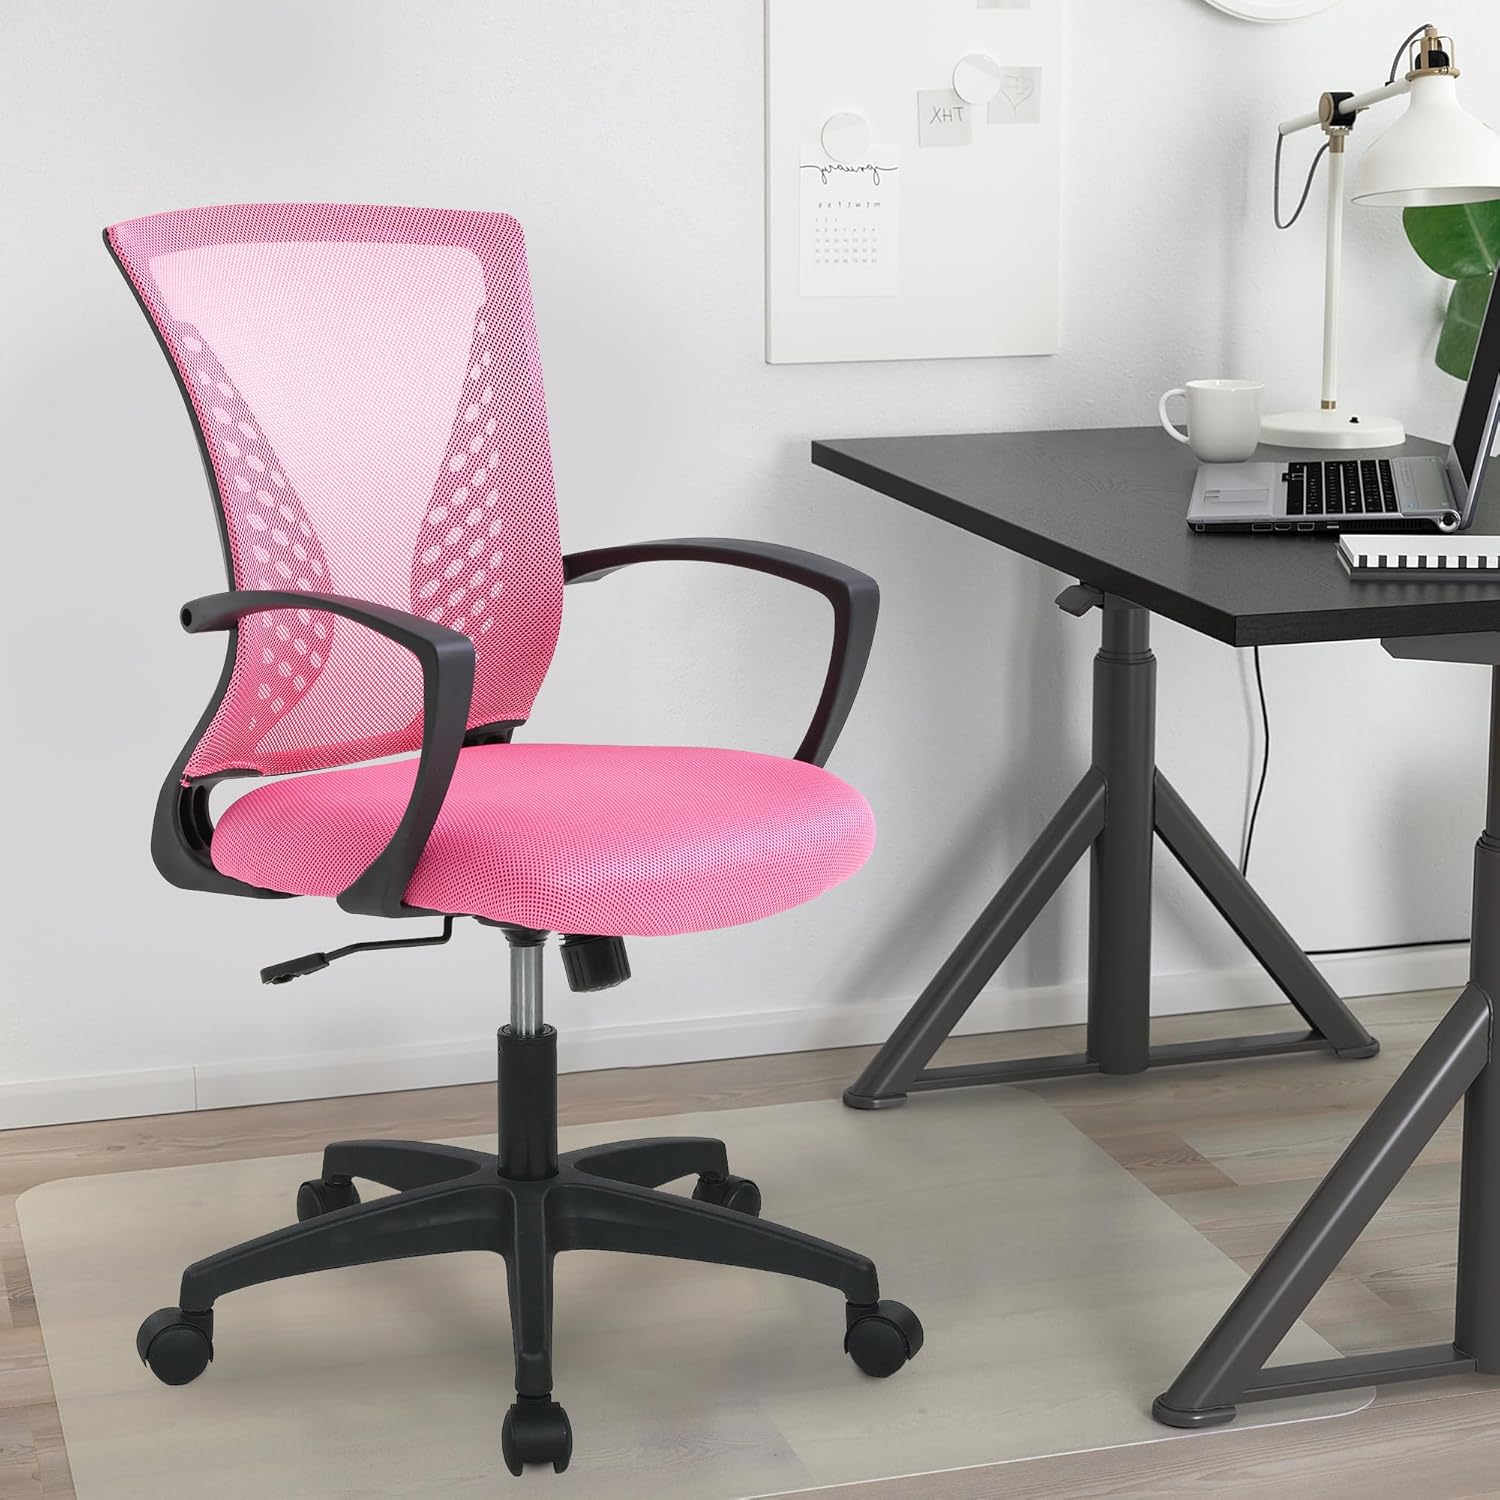
Image: The PayLessHere Office Computer Gaming Chair in pink, set up in a home office environment.
Öryggisupplýsingar
Do not exceed the maximum weight capacity of 250 pounds. Ensure the chair is properly assembled and stable before use.
Always follow assembly instructions carefully. Keep small parts away from children. Regularly inspect the chair for loose screws or damaged components and tighten or replace as necessary.
Innihald pakka
Áður en samsetning hefst skal ganga úr skugga um að allir íhlutir séu til staðar:
- Bakstoð stóls (1)
- Sætispúði (1)
- Armpúðar (2)
- Gaslyftuflaska (1)
- Stjörnustöð (1)
- Hjólhjól (5)
- Vélbúnaðarplata (1)
- Screws and Allen Wrench (1 set)
Samsetningarleiðbeiningar
Follow these steps to assemble your PayLessHere Office Computer Gaming Chair:
Skref 1: Festið hjólin við botninn
Insert the five caster wheels into the holes at the end of each leg of the star base. Push firmly until they click into place.

Image: Close-up of the chair's star base and caster wheels, highlighting 360-degree rotation and floor protection.
Step 2: Insert Gas Lift Cylinder
Setjið gaslyftukútinn í miðjugatið á samsetta stjörnuföstunni. Fjarlægið ekki rauða lokið af gaslyftunni fyrr en leiðbeiningar berast um það.

Mynd: Ítarleg view of the chair's components, including the certified gas rod (lift cylinder).
Step 3: Attach Mechanism Plate to Seat
Stilltu plötuna á vélbúnaðinum saman við skrúfugötin á neðri hlið sætispúðans. Gakktu úr skugga um að framhlið vélbúnaðarins snúi að framhlið sætsins. Festið með skrúfum með meðfylgjandi sexkantslykli.
Skref 4: Festu armpúða
Attach the armrests to the sides of the seat cushion using the designated screws. Pay attention to the 'L' (left) and 'R' (right) markings on the armrests.
Step 5: Connect Backrest to Seat
Align the backrest with the attachment points on the seat cushion or mechanism plate. Secure with screws.
Step 6: Assemble Seat to Base
Carefully place the assembled seat (with mechanism and armrests) onto the gas lift cylinder. The tapered end of the gas lift should fit securely into the mechanism plate.
Samsetningarmyndband
Video: A demonstration of the adjustable features of the office chair, including height and swivel, for home comfort.
Notkunarleiðbeiningar
Familiarize yourself with the chair's adjustable features for optimal comfort:
Hæðarstilling
To adjust the seat height, pull the lever located under the right side of the seat upwards. While seated, lift your weight slightly to raise the chair, or remain seated to lower it. Release the lever to lock the height.

Image: Diagram illustrating the height adjustment lever and 360-degree swivel function of the chair.
Halla og halla
The chair features a reclining backrest. To activate the tilt, pull the lever (often the same as the height adjustment lever, or a separate one) outwards. To lock the backrest in an upright position, push the lever inwards. The tension of the tilt can be adjusted by rotating the round knob located under the front of the seat.
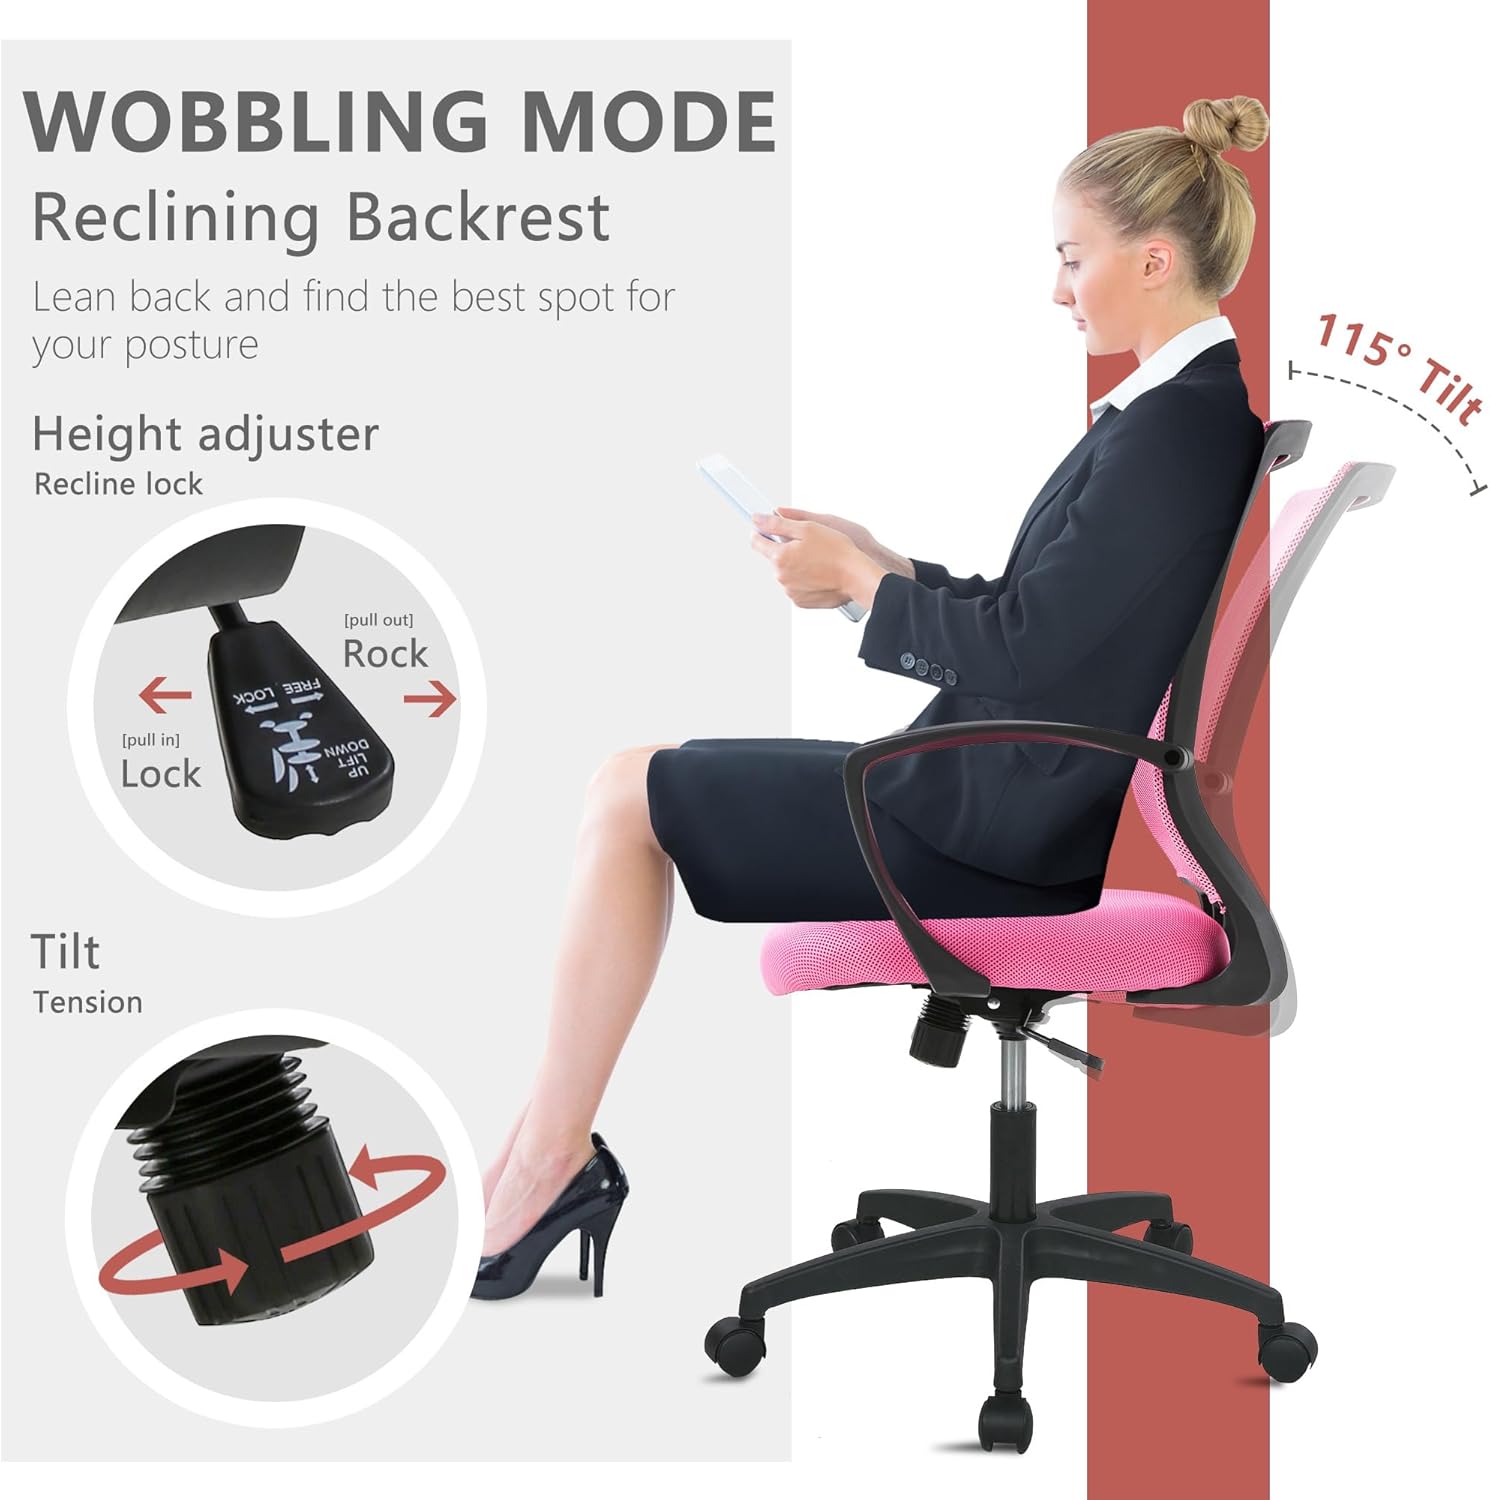
Image: Illustration of the chair's wobbling mode, showing the reclining backrest and the tilt tension adjustment knob.
Snúningsaðgerð
The chair is designed to swivel 360 degrees, allowing for easy movement and access to different areas of your workspace without needing to reposition the entire chair.
Viðhald
Proper maintenance will extend the life of your chair:
- Þrif: For mesh and fabric surfaces, use a soft cloth with mild soap and water. Avoid harsh chemicals. For the plastic and metal parts, wipe with a damp klút.
- Skoðun: Athugið reglulega allar skrúfur og bolta til að tryggja að þær séu vel hertar. Herðið ef þörf krefur til að viðhalda stöðugleika og öryggi.
- Hjól: Keep caster wheels clean from hair and debris to ensure smooth rolling.
Úrræðaleit
Ef þú lendir í vandræðum með stólinn þinn skaltu skoða eftirfarandi algeng vandamál og lausnir:
| Vandamál | Möguleg orsök | Lausn |
|---|---|---|
| Stóllinn stillir ekki hæðina | Gaslyftuhandfangið er ekki virk eða gaslyftan biluð. | Ensure the lever is fully pulled up/down. If issue persists, contact customer support for gas lift replacement. |
| Stóllinn vaggar | Lausar skrúfur eða ójafnt gólf. | Athugið og herðið allar samsetningarskrúfur. Gangið úr skugga um að stóllinn sé á sléttu og jöfnu yfirborði. |
| Hjólin rúlla ekki mjúklega | Rusl í hjólum eða skemmd hjól. | Remove any hair or debris from the caster wheels. If damaged, replace casters. |
| Bakstoðin hallar sér ekki eða læsist | Tilt mechanism locked or tension too high. | Dragðu hallastöngina út á við til að opna hana. Stilltu hallaspennuhnappinn á lægri stillingu. |
Tæknilýsing
| Eiginleiki | Smáatriði |
|---|---|
| Vörumerki | Borgaðu minna hér |
| Nafn líkans | Office Computer Gaming Chair |
| Litur | Bleikur |
| Vörumál (D x B x H) | 23" D x 22" B x 40" H |
| Sætisdýpt | 17 tommur |
| Þyngd hlutar | 21 pund |
| Efni | Mesh (Back), Foam (Seat) |
| Bakstíll | Netbak |
| Sérstakir eiginleikar | Cushion Availability, Ergonomic, Rolling, Adjustable Height, Swivel |
| Húsgagnagrunnhreyfing | Snúnings |
| Tala liggjandi stöðu | 2 til 5 |
| Hámarksþyngdargeta | 250 pounds (as per safety information) |
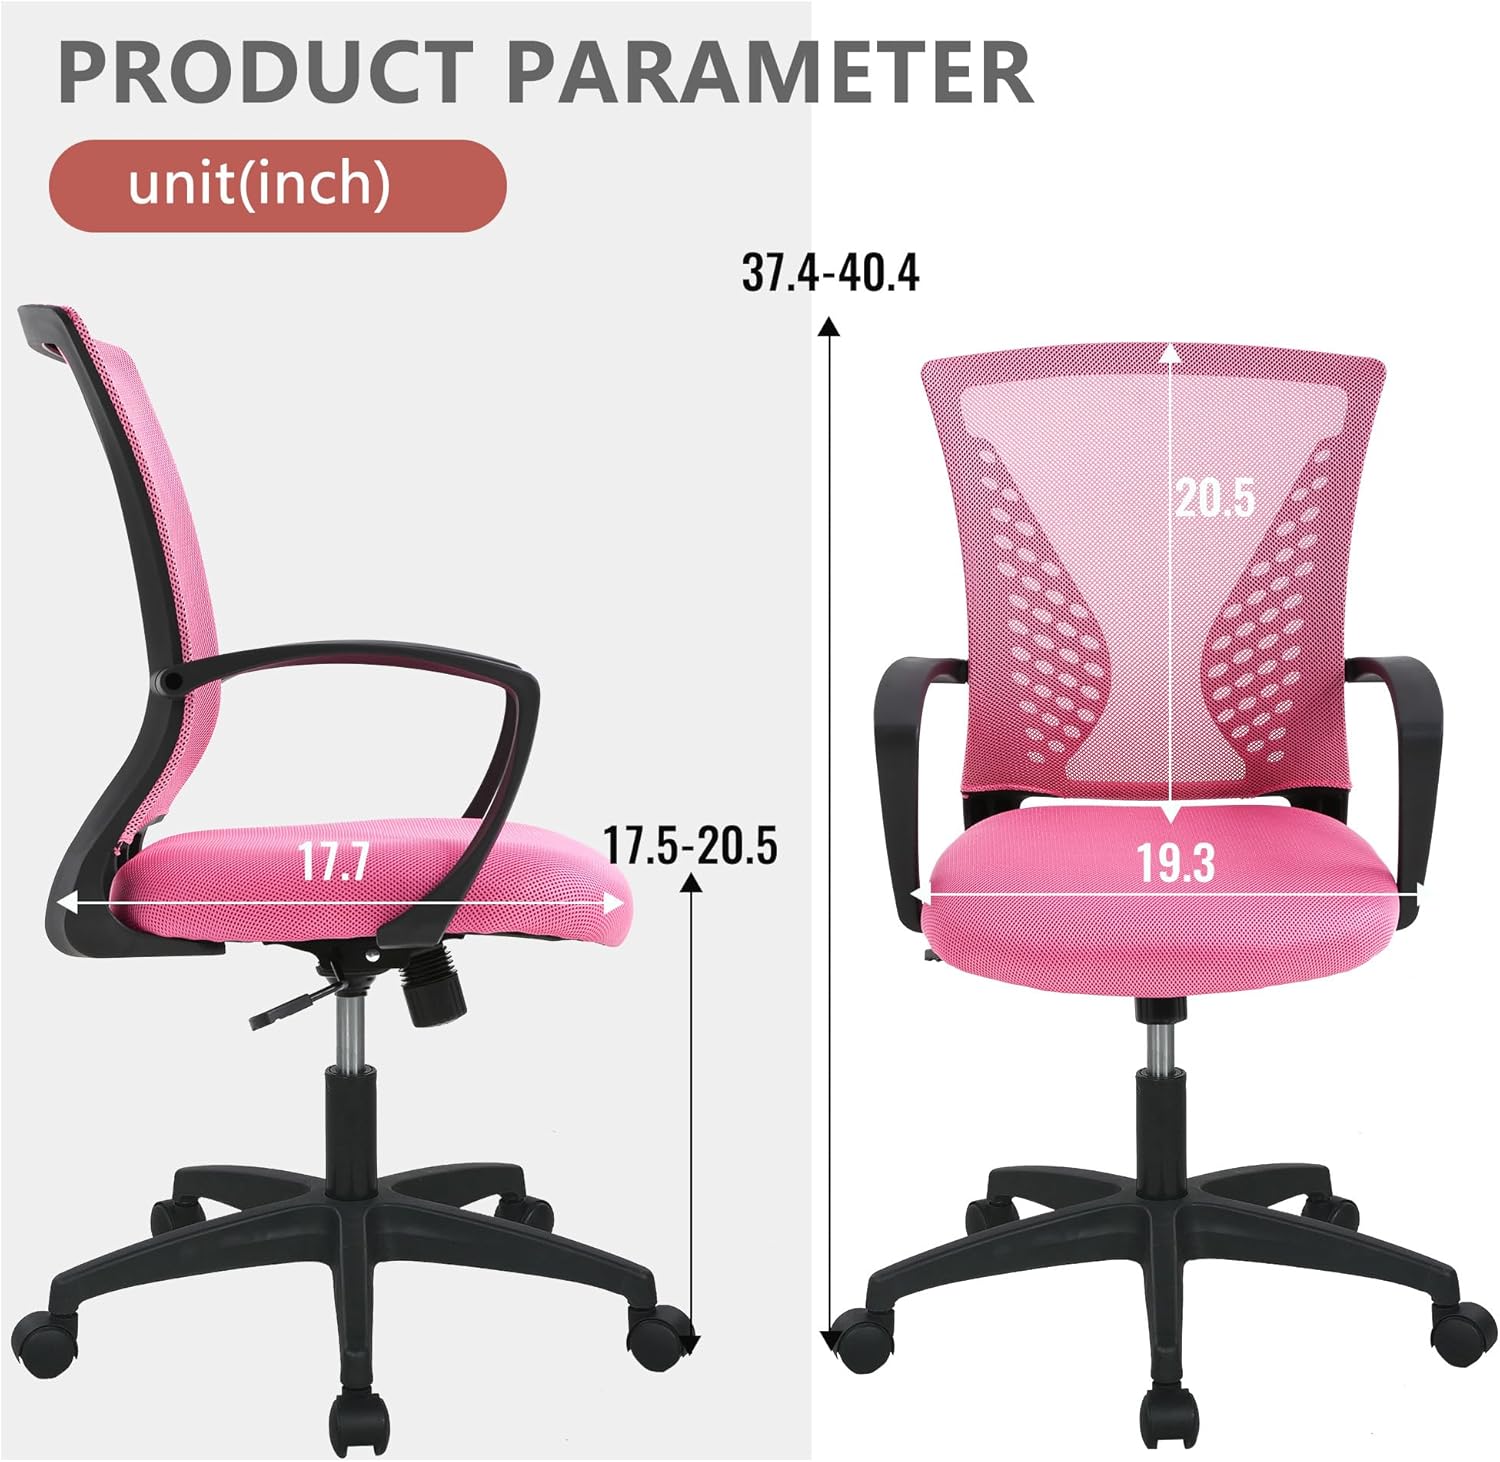
Image: Detailed product parameter diagram showing chair dimensions in inches.
Ábyrgð og stuðningur
For warranty information, technical support, or to order replacement parts, please contact PayLessHere customer service through the retailer where the product was purchased. Keep your purchase receipt for warranty claims.