Inngangur
This instruction manual provides essential information for the proper installation, maintenance, and care of your DEERC 1611/1205 Brushless RC Car Front Swing Set. These suspension A-arms are designed as direct replacement parts to ensure the continued optimal performance and handling of your compatible DEERC RC vehicle. Please read this manual thoroughly before proceeding with installation or maintenance.
Vara lokiðview
The DEERC Front Swing Set consists of a pair of suspension A-arms, critical components of your RC car's front suspension system. They connect the wheel hub to the chassis, allowing for vertical wheel movement while maintaining proper alignment.
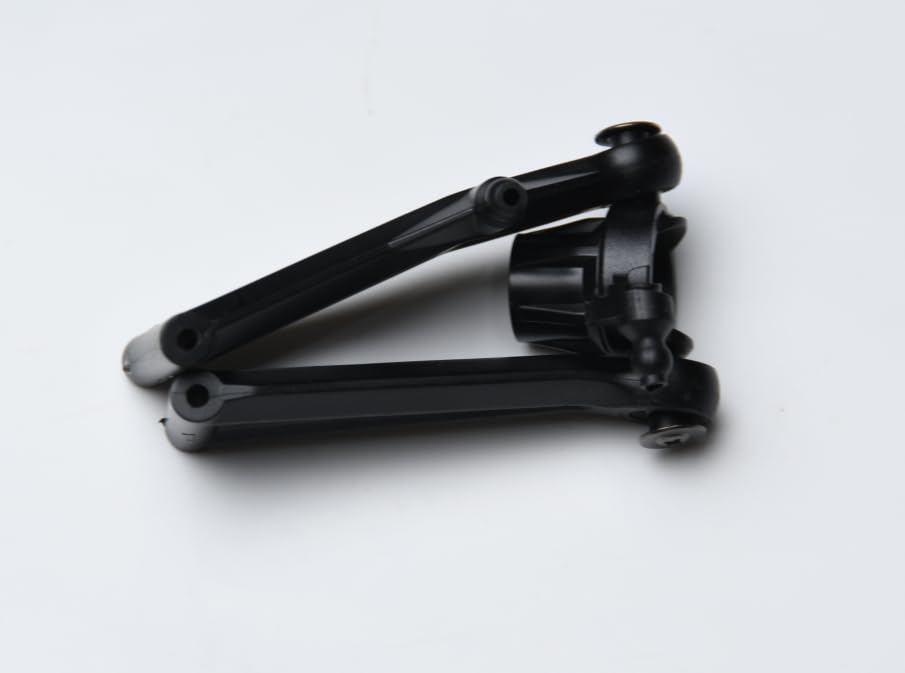
This image displays the two front suspension A-arms included in the set, one for the left side and one for the right side of the RC car. These components are crucial for the vehicle's suspension system.
Innihald pakka
Þegar pakkinn er opnaður skal ganga úr skugga um að allir eftirfarandi hlutir séu til staðar og óskemmdir:
- 1 x Front Right Suspension Arm
- 1 x Front Left Suspension Arm
Samhæfni
This Front Swing Set is specifically designed for use with the DEERC 1611 og DEERC 1205 Brushless RC Car models. Compatibility with other RC car models is not guaranteed.
Uppsetning og uppsetning
Follow these steps carefully to replace the front suspension A-arms on your DEERC 1611/1205 RC car. It is recommended to have a clean workspace and appropriate small tools (e.g., small Phillips head screwdriver, small pliers, hex wrenches).
- Öryggi fyrst: Ensure the RC car is powered off and the battery is disconnected before beginning any work.
- Undirbúðu ökutækið: Place the RC car on a stable surface. You may need to remove the body shell for better access to the suspension components.
- Fjarlægðu hjólið: Carefully remove the front wheel from the side where you are replacing the A-arm. This usually involves unscrewing a wheel nut or pin.
- Þekkja festingar: Locate the pins or screws that secure the existing A-arm to the chassis and the wheel hub carrier. There are typically two pivot points: one at the chassis and one at the outer hub.
- Remove Old A-Arm: Using appropriate tools, carefully remove the pins or screws. Once all fasteners are removed, detach the old A-arm from the vehicle. Note its orientation.
- Install New A-Arm: Take the new A-arm (ensure you have the correct left or right arm) and align it with the pivot points on the chassis and the wheel hub carrier.
- Secure New A-Arm: Insert the pins or screws through the new A-arm and into their respective mounting points. Tighten them securely, but do not overtighten, as this can strip threads or crack plastic. Ensure the A-arm can move freely without excessive play.
- Reattach Wheel: Mount the wheel back onto the hub carrier and secure it with its nut or pin.
- Repeat for Other Side (if necessary): If replacing both A-arms, repeat the process for the other front side.
- Lokaskoðun: Gently move the suspension up and down to ensure smooth operation and proper alignment. Reconnect the battery and test the steering and suspension movement before operating the vehicle.
Viðhald
Regular maintenance will extend the lifespan of your A-arms and ensure consistent performance:
- Skoðun: After each use, visually inspect the A-arms for any signs of cracks, bends, or excessive wear. Check the pivot points for looseness or damage.
- Þrif: Remove any dirt, dust, or debris that may accumulate on the A-arms and around the pivot points. A soft brush and compressed air can be effective. Avoid harsh chemicals that may degrade the plastic.
- Athugun á festingum: Periodically check that all screws and pins securing the A-arms are tight. Loose fasteners can lead to poor handling or further damage.
- Skipti: If an A-arm shows significant damage or wear that affects performance, replace it promptly to prevent damage to other components.
Úrræðaleit
Here are some common issues and their potential solutions related to the front swing set:
- Mál: Front wheel feels loose or has excessive play.
Lausn: Check if the A-arm mounting screws/pins are tight. Inspect the A-arm for cracks or damage. Ensure the wheel nut is securely fastened. - Mál: Suspension movement is stiff or restricted.
Lausn: Ensure no dirt or debris is lodged in the pivot points. Check if the A-arm screws are overtightened, which can bind the movement. Loosen slightly if necessary. - Mál: A-arm is visibly broken or cracked.
Lausn: The A-arm needs to be replaced. Refer to the "Setup and Installation" section for replacement steps. - Mál: RC car pulls to one side.
Lausn: While this can be due to many factors, inspect both front A-arms for equal movement and ensure they are installed correctly and not bent or damaged. Check steering trim and alignment.
Tæknilýsing
| Vörumál | 2.5 x 1.38 x 1.5 tommur |
| Þyngd hlutar | 8 aura |
| Framleiðandi | DEERC |
| Ráðlagður aldur | 14 ára og eldri |
Ábyrgð og stuðningur
For information regarding warranty coverage, technical support, or to purchase additional spare parts, please refer to the official DEERC website or contact DEERC customer service directly. Contact details are typically found on the product packaging or the manufacturer's official online channels.