
1. Inngangur
This manual provides essential information for the proper installation, operation, and maintenance of your Pro Chaser Carburetor. This carburetor is designed as a replacement part for various Cub Cadet tractor models, including LTX1042KH, RZT-42, and RZT-50KH, as well as specific part numbers 13AP91AS010, 13AP91AS056, 17AF2ACS010, 17WF2ACS009, and 17YF2ACP009.
Áður en þú heldur áfram með uppsetningu skaltu fara vandlega yfirview the images provided in this manual and compare them with your existing carburetor to ensure compatibility. Minor design differences can exist between models. If you are uncertain about compatibility, consult a qualified technician or contact customer support with clear images of your current carburetor.
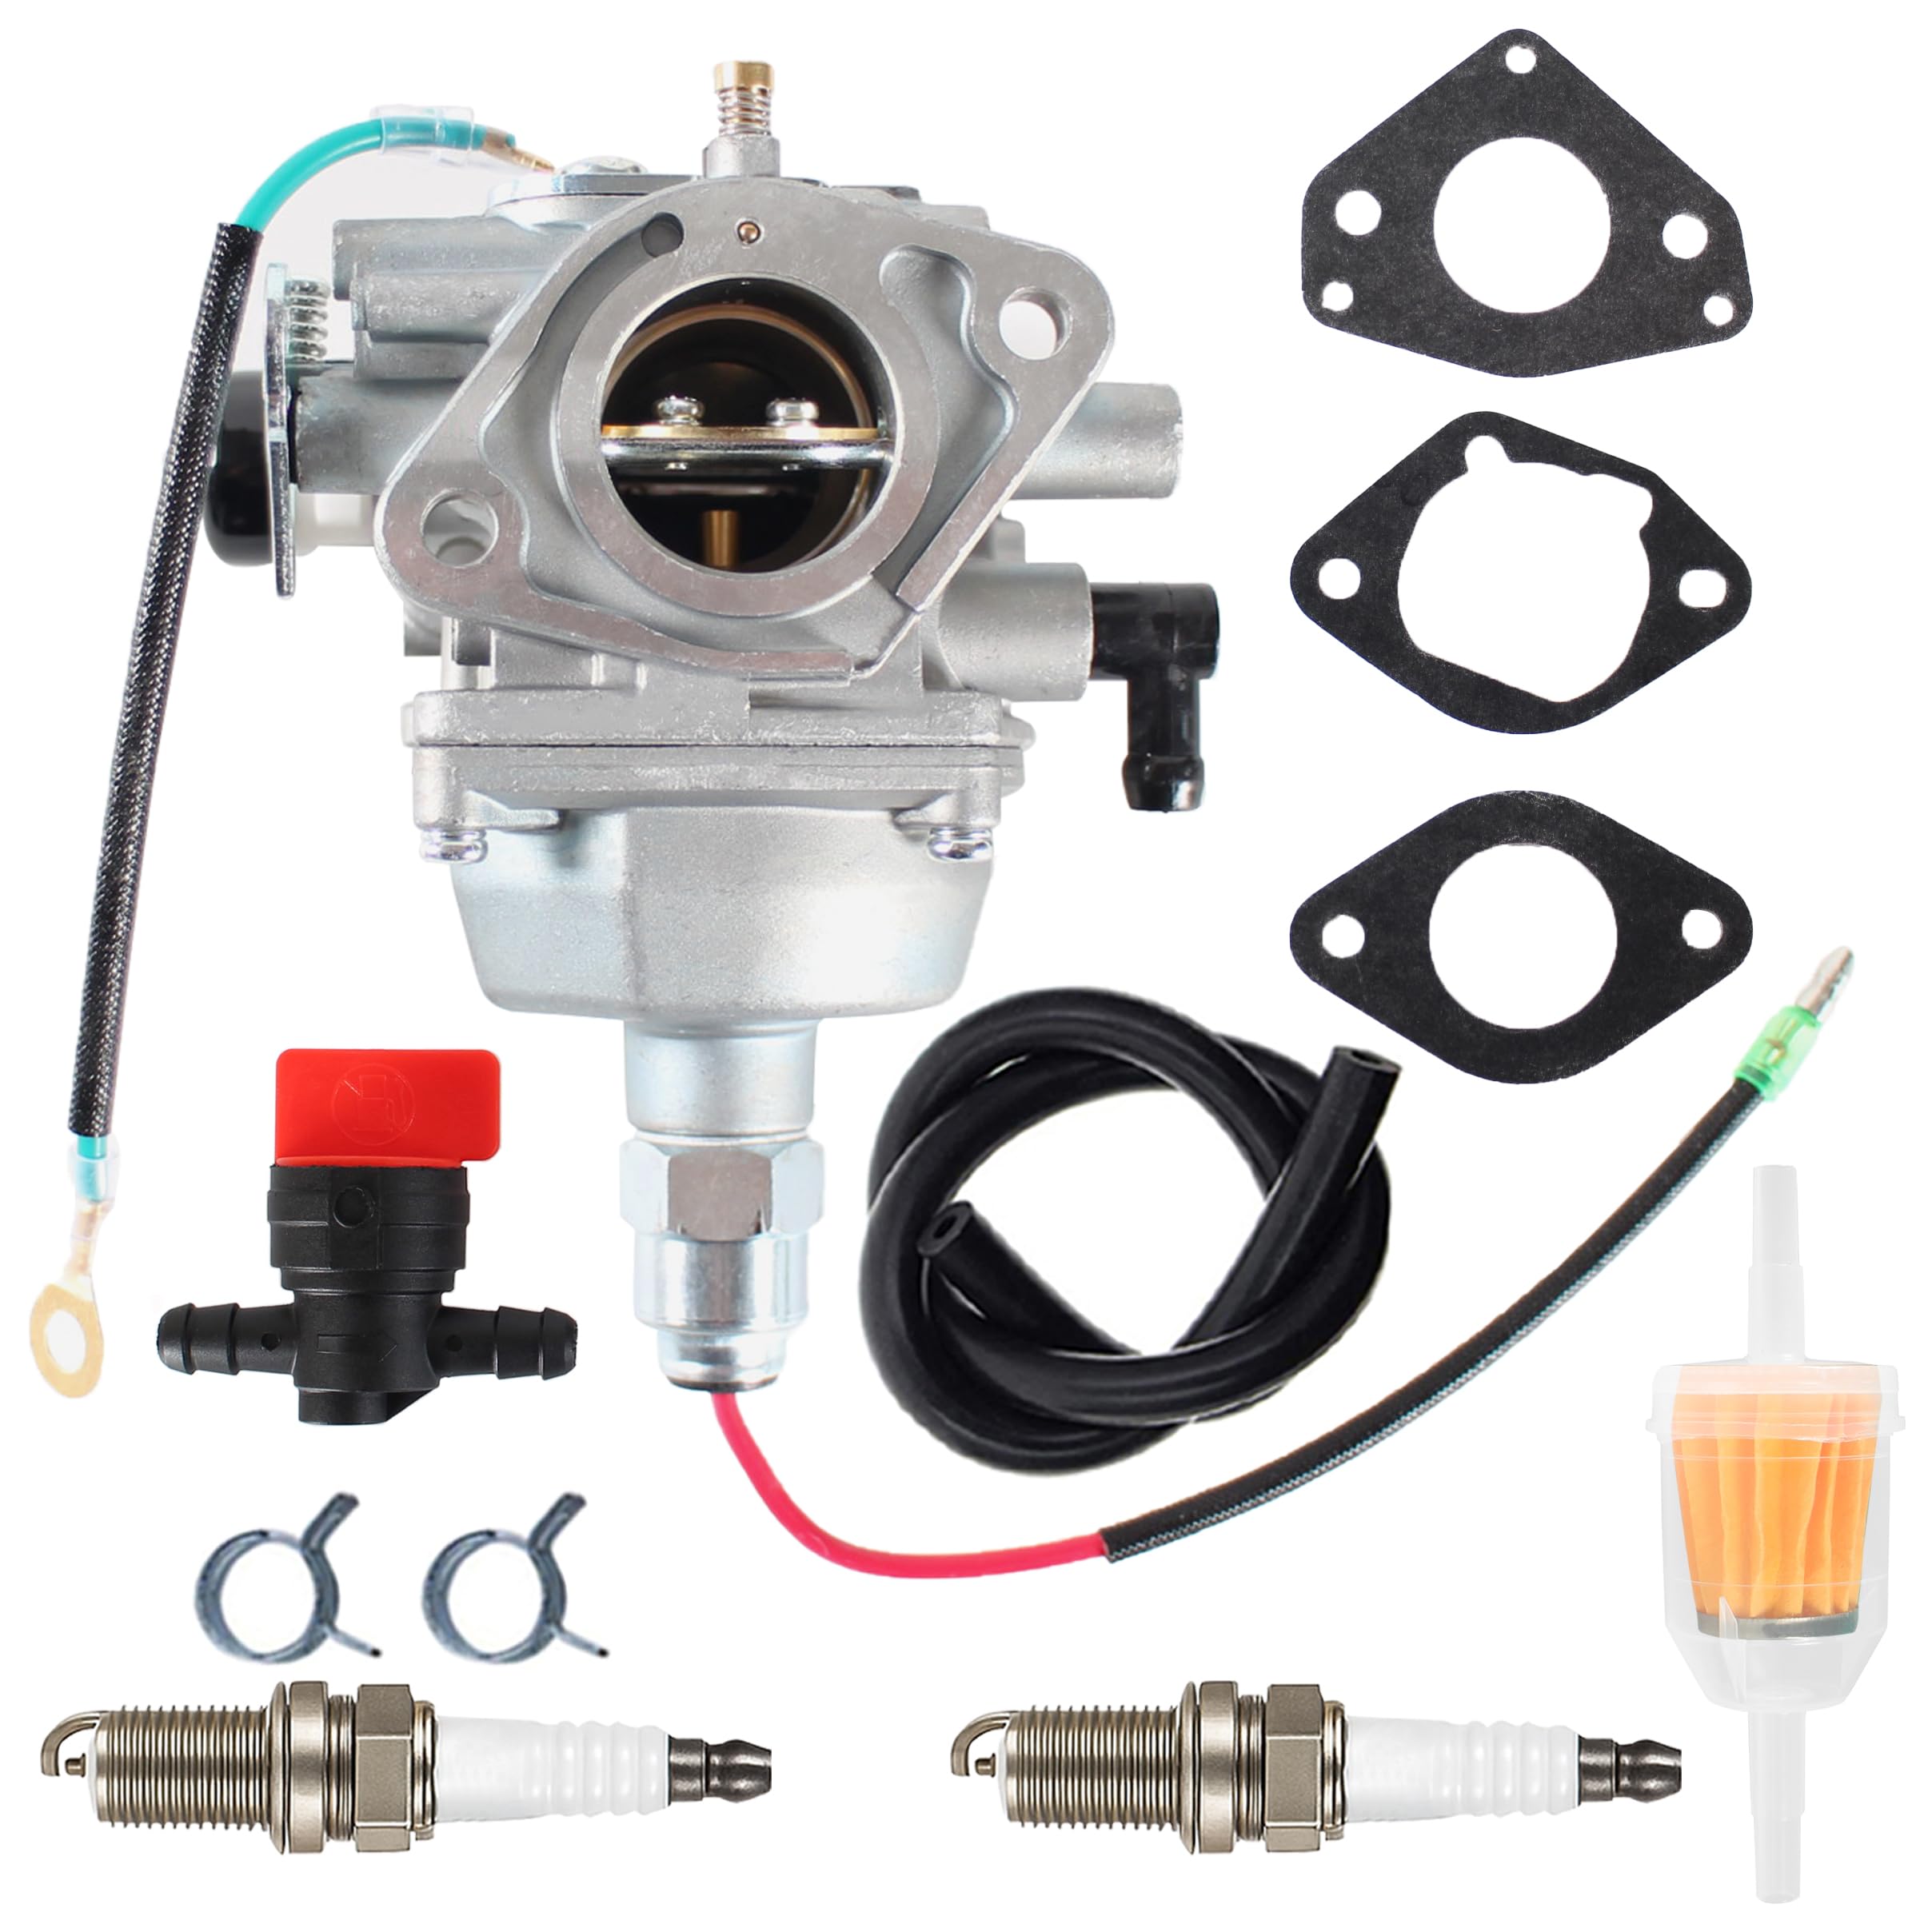
Mynd 1.1: Á heildina litið view of the Pro Chaser Carburetor. This image displays the general appearance and primary components of the carburetor.
2. Öryggisupplýsingar
Always prioritize safety when working with fuel systems and internal combustion engines. Failure to follow these safety guidelines may result in personal injury or damage to equipment.
- Augnvernd: Always wear safety glasses or goggles to protect your eyes from fuel, debris, and other hazards.
- Loftræsting: Vinnið á vel loftræstum stað til að forðast að anda að sér eldsneytisgufum.
- Eldhætta: Fuel is highly flammable. Keep open flames, sparks, and other ignition sources away from the work area. Do not smoke.
- Rafhlaða aftengd: Disconnect the spark plug wire or battery ground cable before beginning any work to prevent accidental engine starting.
- Heitt yfirborð: Engine components can remain hot for an extended period after operation. Allow the engine to cool completely before servicing.
- Meðhöndlun eldsneytis: Handle fuel with care. Wipe up any spills immediately. Store fuel in approved containers.
- Rétt verkfæri: Use appropriate tools for the job to prevent damage to components or injury.
3. Uppsetning og uppsetning
This section outlines the steps for replacing your old carburetor with the new Pro Chaser unit. If you are unfamiliar with engine repair, it is recommended to seek professional assistance.
3.1. Innifalið íhlutir
Gakktu úr skugga um að allir íhlutir séu til staðar í pakkanum þínum:
- 1 x Carburetor
- 1 x Fuel Hose
- 1 x Fuel Filter
- 3 x Gaskets (various types for different mounting configurations)
- 1 x Shut Off Valve
- 2 x Spark Plugs

Mynd 3.1: The Pro Chaser Carburetor kit, showing the carburetor, fuel hose, fuel filter, gaskets, shut-off valve, and spark plugs.
3.2. Verkfæri sem þarf
- Innstungusett
- Skrúfjárnsett (flathaus og Phillips)
- Töng
- Eldsneytislína clamp eða klíputæki
- Hreinsar tuskur
- Ílát til að tæma eldsneyti
3.3. Undirbúningur
- Gakktu úr skugga um að vélin sé svöl.
- Aftengdu vírinn/vírana frá kertinu til að koma í veg fyrir að það gangi óvart í gang.
- Locate the fuel shut-off valve (if present) and turn it to the OFF position.
- Place a suitable container under the carburetor to catch any spilled fuel.
3.4. Removal of Old Carburetor
- Carefully disconnect the fuel line from the carburetor. Use a fuel line clamp if no shut-off valve is present to minimize fuel spillage.
- Disconnect any throttle linkage, choke linkage, and electrical connections (if applicable) from the old carburetor. Note their positions for reassembly.
- Remove the mounting nuts or bolts that secure the carburetor to the engine intake manifold.
- Gently remove the old carburetor and any old gaskets. Dispose of old gaskets properly.
3.5. Installation of New Carburetor
- Clean the mounting surface on the engine intake manifold to ensure a proper seal.
- Select the correct gaskets from the included set that match your engine's configuration. Install the new gaskets onto the mounting studs or manifold.
- Carefully position the new Pro Chaser Carburetor onto the mounting studs, ensuring the gaskets are properly seated.
- Secure the carburetor with the mounting nuts or bolts. Tighten them evenly to prevent warping, but do not overtighten.
- Reconnect the throttle linkage, choke linkage, and any electrical connections. Ensure they operate smoothly without binding.
- Install the new fuel filter in the fuel line, ensuring the flow direction is correct (if indicated).
- Connect the new fuel hose to the carburetor and secure it with a clamp. If using the included shut-off valve, install it in an accessible location in the fuel line.
- Replace the old spark plug(s) with the new ones provided in the kit. Gap the new spark plugs according to your engine manufacturer's specifications if necessary.

Mynd 3.2: Hlið view of the carburetor, highlighting the fuel inlet and linkage connection points.
4. Notkunarleiðbeiningar
After installation, follow these steps for initial start-up and basic operation.
4.1. Upphafleg gangsetning
- Ensure all connections are secure and there are no fuel leaks.
- Refill the fuel tank with the appropriate fuel type for your engine.
- Open the fuel shut-off valve (if installed).
- Reconnect the spark plug wire(s).
- Set the choke to the appropriate starting position (usually full choke for a cold engine).
- Start the engine according to your tractor's manufacturer instructions.
- Once the engine starts, gradually move the choke to the OFF position as the engine warms up.
- Allow the engine to run for a few minutes to reach operating temperature and check for smooth operation.
4.2. Basic Adjustments
Most modern carburetors are pre-set and do not require extensive adjustments. However, if your engine runs rough or idles poorly after installation, minor adjustments may be needed. Refer to your engine's service manual for specific adjustment procedures.
- Hraði í lausagangi: If the engine idles too fast or too slow, locate the idle speed screw (if present) and adjust it gradually until the engine idles smoothly at the recommended RPM.
- Mixture Screws: Some carburetors may have idle mixture screws. Adjust these only if necessary and with caution, as improper adjustment can affect engine performance and emissions. Typically, turn the screw in until it lightly seats, then back it out 1.5 to 2 turns as a starting point. Fine-tune for the smoothest idle.
5. Viðhald
Regular maintenance ensures optimal performance and extends the life of your carburetor and engine.
- Eldsneytissía: Inspect the fuel filter regularly (e.g., annually or every 50 operating hours) and replace it if it appears dirty or clogged. A clogged fuel filter can restrict fuel flow to the carburetor.
- Loftsía: Ensure the engine's air filter is clean and free of debris. A dirty air filter can cause the engine to run rich and affect carburetor performance.
- Kerti: Inspect the spark plugs periodically. Clean or replace them if they are fouled, worn, or damaged. The included spark plugs should be gapped correctly for your engine.
- Fuel System Cleaning: If the equipment is stored for an extended period, drain the fuel system or use a fuel stabilizer to prevent fuel degradation and carburetor clogging.
- Ytri þrif: Keep the exterior of the carburetor clean from dirt, dust, and oil buildup.
6. Bilanagreining
This section provides solutions to common issues you might encounter. For more complex problems, consult a qualified technician.
| Vandamál | Möguleg orsök | Lausn |
|---|---|---|
| Vélin ræsist ekki | No fuel, clogged fuel filter, incorrect choke setting, fouled spark plug, no spark. | Check fuel level and shut-off valve. Replace fuel filter. Adjust choke. Inspect/replace spark plug. Check ignition system. |
| Vélin gengur ójafnt eða stöðvast | Dirty air filter, clogged fuel filter, improper carburetor adjustment, old/stale fuel. | Clean/replace air filter. Replace fuel filter. Adjust idle speed/mixture (if applicable). Drain and refill with fresh fuel. |
| Eldsneytisleki úr karburator | Loose connections, damaged gaskets, stuck float, worn O-rings. | Tighten fuel line connections. Replace gaskets. Inspect float and needle valve. |
| Missir vald | Clogged fuel filter, dirty air filter, incorrect carburetor adjustment, worn spark plug. | Replace fuel filter. Clean/replace air filter. Adjust carburetor. Replace spark plug. |
7. Tæknilýsing
| Vörumerki: | Pro Chaser |
| Gerðarnúmer: | PC310312 |
| Compatible with Cub Cadet Models: | LTX1042KH, RZT-42, RZT-50KH |
| Compatible with Part Numbers: | 13AP91AS010, 13AP91AS056, 17AF2ACS010, 17WF2ACS009, 17YF2ACP009 |
| Innifalið íhlutir: | 1 x Carburetor, 1 x Fuel Hose, 1 x Fuel Filter, 3 x Gaskets, 1 x Shut Off Valve, 2 x Spark Plugs |
| UPC/GTIN: | 679070670958 |
| Ytri frágangur: | Vélvirkt |
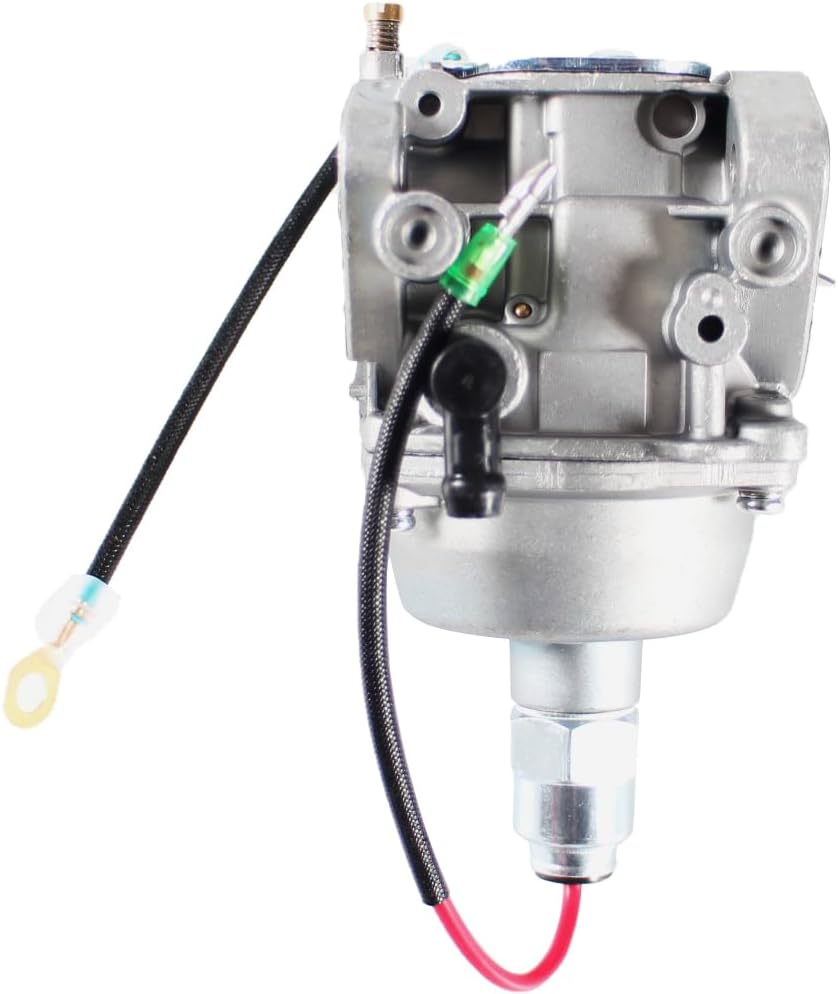
Mynd 7.1: Neðst view of the Pro Chaser Carburetor, showing the float bowl and drain screw.
8. Upplýsingar um ábyrgð
The Pro Chaser Carburetor comes with a manufacturer's warranty. Please refer to the following details:
- Ábyrgðartímabil: 90 dagar frá kaupdegi.
- Umfjöllun: Þessi ábyrgð nær til galla í efni og framleiðslu við venjulega notkun.
- Útilokanir: The warranty does not cover damage resulting from improper installation, misuse, neglect, accident, unauthorized repairs, or normal wear and tear.
For warranty claims or further details, please retain your proof of purchase and contact customer support.
9. Þjónustudeild
If you have any questions regarding the installation, operation, or maintenance of your Pro Chaser Carburetor, or if you encounter any issues not covered in this manual, please contact our customer support team.
Þegar þú hefur samband við þjónustuver skaltu hafa eftirfarandi upplýsingar tilbúnar:
- Gerðarnúmer vöru: PC310312
- Dagsetning kaups
- Lýsing á málinu
Contact information for Pro Chaser can typically be found on the product packaging or the retailer's websíðunni þar sem varan var keypt.