Inngangur
Þakka þér fyrir kaupinasing the Technics SL-PD807 MASH 5 Disc CD Player. This manual provides detailed instructions for the proper setup, operation, and maintenance of your new audio component. Please read this manual thoroughly before using the unit to ensure optimal performance and longevity.
The SL-PD807 features a 5-disc carousel changer, allowing for extended playback without interruption, and incorporates MASH (Multi-stage Noise Shaping) D/A conversion for high-quality audio reproduction.
Mikilvægar öryggisupplýsingar
- Aflgjafi: Gakktu úr skugga um að tækið sé tengt við AC 120V, 60Hz aflgjafa.
- Loftræsting: Ekki loka loftræstiopum. Skiljið eftir nægilegt pláss í kringum tækið til að tryggja rétta loftflæði til að koma í veg fyrir ofhitnun.
- Raki: Ekki láta tækið verða fyrir rigningu eða raka. Ekki setja hluti sem eru fylltir með vökva, eins og blómavösur, ofan á tækið.
- Þrif: Taktu tækið úr sambandi við innstunguna áður en það er þrifið. Notið þurran klút til að þrífa.
- Þjónusta: Reynið ekki að gera við þessa einingu sjálfur. Látið hæft starfsfólk sjá um alla þjónustu.
Innihald pakka
Vinsamlegast athugið hvort allir hlutir séu í pakkanum:
- Technics SL-PD807 MASH 5 Disc CD Player
- Rafmagnssnúra
- RCA hljóðsnúrur
Note: A remote control is not included with this unit.
Uppsetning
1. Upptaka
Carefully remove the CD player and all accessories from the packaging. Retain the packaging materials for future transport or storage.
2. Staðsetning
Place the CD player on a stable, level surface away from direct sunlight, heat sources, and excessive dust or vibrations. Ensure there is sufficient space around the unit for proper ventilation.

Mynd 1: Framan view of the Technics SL-PD807 CD Player with included RCA cables.
3. Tengingar
Connect the CD player to your amplifier or receiver using the supplied RCA audio cables.
- Connect one end of the RCA audio cables (red and white plugs) to the 'LINE OUT' jacks on the rear of the SL-PD807.
- Connect the other end of the RCA audio cables to an available 'CD IN' or 'AUX IN' input on your amplifier/receiver. Match the red plug to the 'R' (right) input and the white plug to the 'L' (left) input.
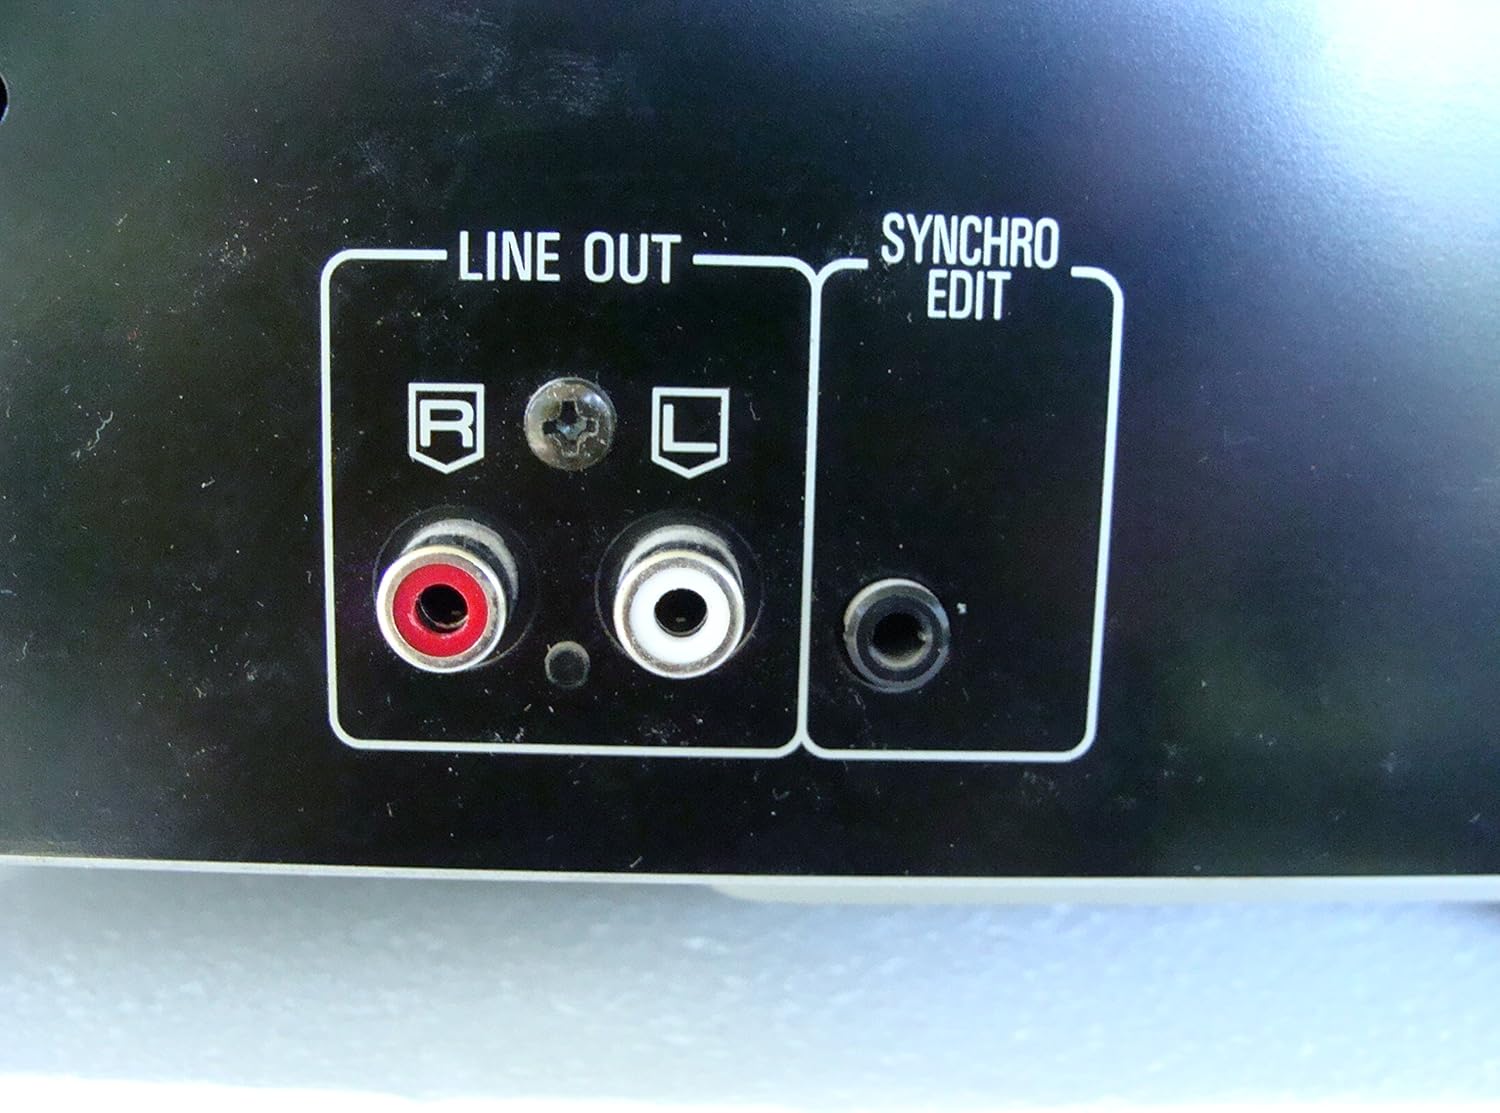
Mynd 2: Rear panel connections, highlighting the 'LINE OUT' (RCA) and 'SYNCHRO EDIT' ports.
- Plug the power cord into the AC inlet on the rear of the CD player, then plug the other end into a standard AC wall outlet.
Notkunarleiðbeiningar
1. Kveikt/slökkt
Ýttu á KRAFTUR button located on the front left of the unit to turn the CD player on or off.
2. Að hlaða diskum
The SL-PD807 features a 5-disc carousel. Press the OPNA/LOKA button to open the disc tray. Place up to five CDs onto the numbered disc slots with the label side facing up. Press OPNA/LOKA aftur til að loka bakkanum.

Mynd 3: Front panel controls including disc tray, display, and playback buttons.
3. Grunnspilun
- Spila: Ýttu á SPILA hnappinn (►) til að hefja spilun.
- Gera hlé: Ýttu á Hlé button (⏸) to temporarily stop playback. Press again to resume.
- Stöðva: Ýttu á HÆTTU hnappinn (■) til að stöðva spilun.
- Sleppa lögum: Ýttu á SKIPPA buttons (⏭︎ / ⏮︎) to skip to the next or previous track.
- Leita: Haltu niðri LEIT buttons (⏪︎ / ⏩︎) to fast forward or rewind within a track.
4. Disc Exchange
You can exchange discs while another disc is playing. Press the SKIPA SKIPA button to rotate the carousel to an empty slot or a disc you wish to remove/replace. The currently playing disc will continue to play until you select a new disc to play.
5. Spilunarstillingar
- Handahófskennd spilun: Ýttu á Handahófi button to play tracks on the current disc or all loaded discs in a random order.
- Dagskrárspilun: Notaðu PROGRAM button to create a custom playback sequence of tracks from the loaded discs. Refer to the on-screen display for programming steps.
- Endurtekið spil: Ýttu á ENDURTAKA hnappinn til að endurtaka núverandi lag, núverandi disk eða alla diska.
Viðhald
1. Þrif á einingunni
Wipe the exterior of the unit with a soft, dry cloth. For stubborn stains, slightly dampen the cloth with water and a mild detergent, then wipe dry. Do not use abrasive cleaners, benzene, thinner, or alcohol, as these can damage the finish.

Mynd 4: Top surface of the unit, illustrating areas that may require cleaning or show wear.
2. Umhirða diska
- Haldið diskunum á brúnunum til að forðast fingraför á spilfletinum.
- Keep discs clean. Wipe from the center outwards with a soft, lint-free cloth if necessary.
- Geymið diska í hulstrum sínum til að vernda þá fyrir ryki og rispum.
Úrræðaleit
If you experience problems with your CD player, please consult the following table before seeking service.
| Vandamál | Möguleg orsök | Lausn |
|---|---|---|
| Enginn kraftur | Rafmagnssnúra ekki vel tengd. | Athugið tengingu rafmagnssnúrunnar við tækið og innstunguna. |
| Ekkert hljóð | RCA audio cables not connected correctly. AmpInntak fyrir sendara/móttakara ekki valið. | Ensure RCA cables are securely connected to both the CD player and ampVeldu rétta inntakið á tækinu þínu. amplyftara/móttakari. |
| Disc does not play / Skipping | Diskurinn er óhreinn eða rispaður. Diskurinn er rangt settur í. | Clean the disc with a soft, lint-free cloth. Ensure the disc is placed label-side up in the tray. Try another disc. |
| Carousel does not rotate | Obstruction in the disc tray. | Ensure no foreign objects are obstructing the carousel mechanism. |
Tæknilýsing
The following are the technical specifications for the Technics SL-PD807 MASH 5 Disc CD Player:
| Eiginleiki | Forskrift |
|---|---|
| Nafn líkans | SL-PD807 |
| Framleiðandi | Tækni |
| Diskur Stærð | 5 Diskar |
| Aflþörf | AC 120V, 60Hz, 13W |
| Stærðir pakka | 17 x 17 x 5 tommur |
| Þyngd hlutar | 15.02 pund |
| Tengitækni | Auxiliary, Infrared |
| Sérstakur eiginleiki | Skriðvörn |

Mynd 5: Product label displaying model number and power specifications.
Ábyrgð og stuðningur
For information regarding warranty coverage and customer support for your Technics SL-PD807 CD Player, please refer to the warranty card included with your purchase or visit the official Technics website. If you require further assistance, please contact Technics customer service.


