1. Vöru lokiðview
The Midiplus Studio M is a compact and high-performance USB audio interface designed for studio recording. It features one input and two outputs, supporting high-quality microphone input and 24-bit/192kHz high-precision sampling. The device is powered via PC USB and includes 48V phantom power for condenser microphones. Its small, exquisite design is compatible with both Mac and Windows operating systems, making it a versatile tool for musicians and producers.
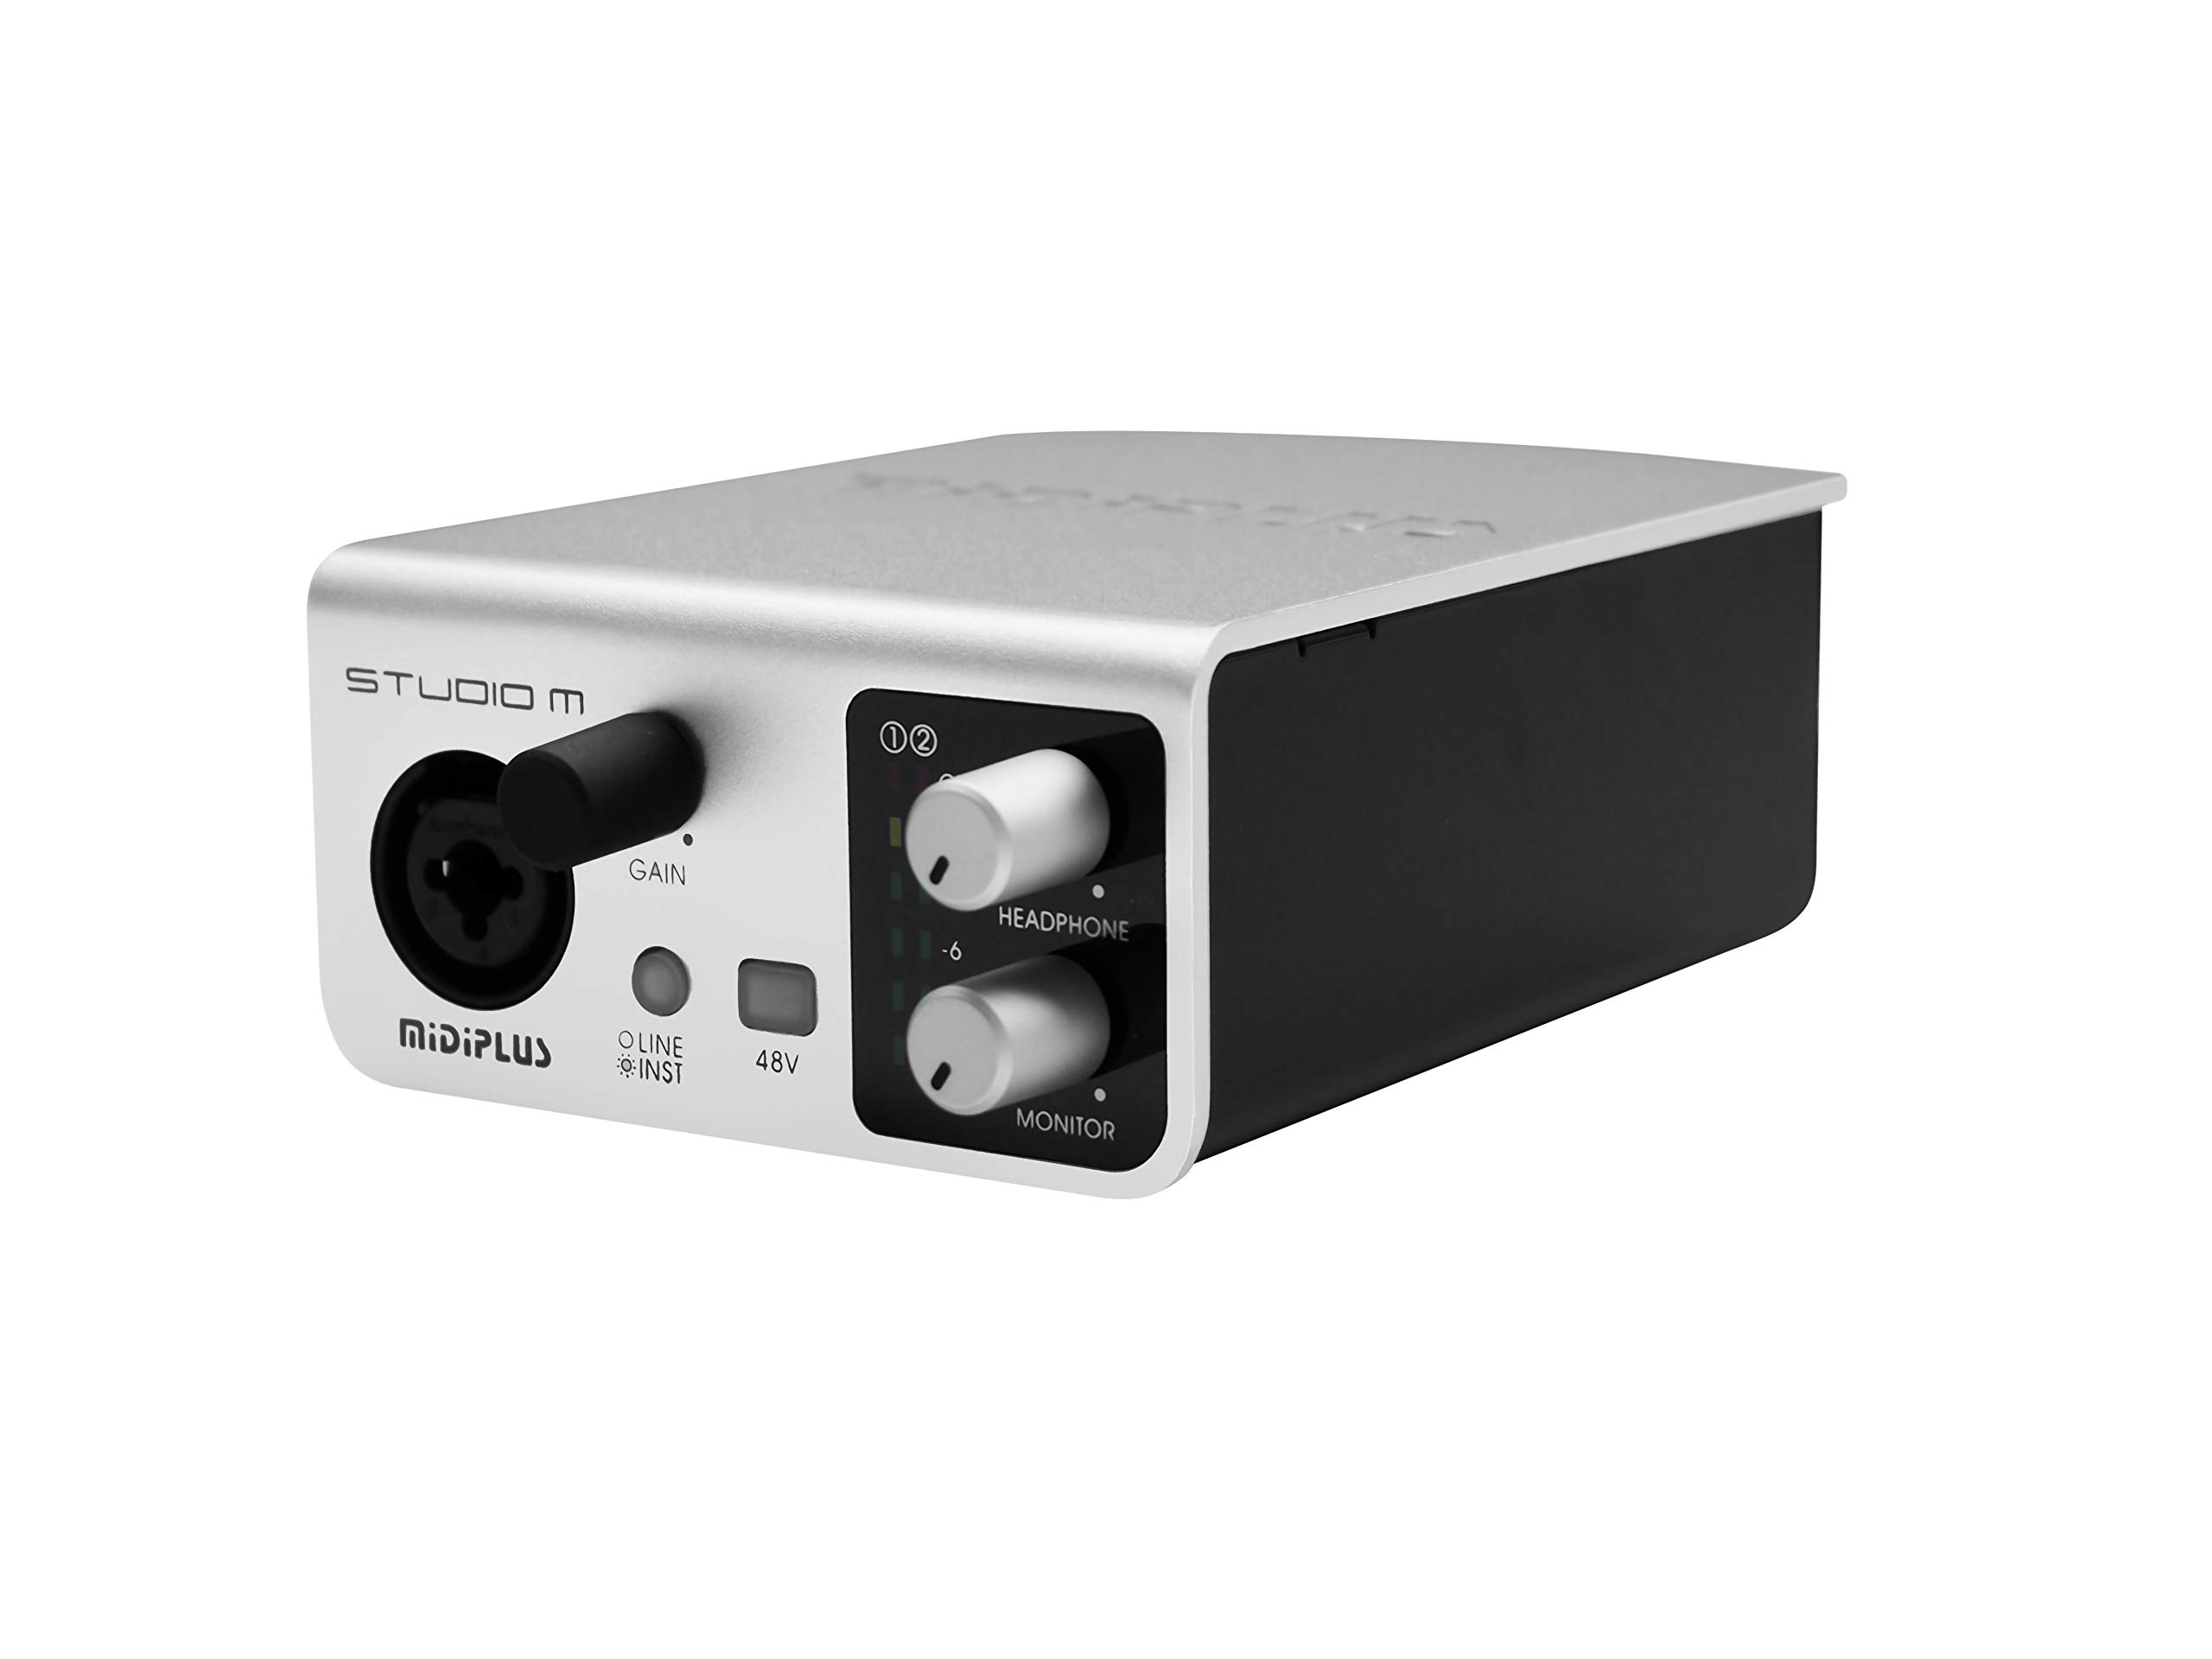
Mynd 1: Framan og aftan view of the Midiplus Studio M USB Audio Interface.
2. Uppsetningarleiðbeiningar
2.1 Innihald pakka
- Midiplus Studio M USB Audio Interface
- USB snúru
- Handbók eiganda (þetta skjal)
- Upplýsingakort
2.2 Kerfiskröfur
- Stýrikerfi: Windows, macOS
- Compatible Devices: Personal Computer with USB port
2.3 Tenging tækisins
- Connect the Midiplus Studio M to your computer using the provided USB cable. The device is USB-powered.
- Ensure your operating system (Windows or macOS) recognizes the device. Drivers may be required for optimal performance; refer to the Midiplus webVefsíða fyrir nýjustu niðurhal á bílstjórum.
- Connect your microphone or instrument to the Input (MIC/Line/Hi-z) interface on the front panel.
- Connect your headphones to the headphone interface on the front panel, or your studio monitors to the Output interface (Left/Right) on the rear panel.

Figure 2: Midiplus Studio M connected to a computer, showing input and output cables.
3. Notkunarleiðbeiningar
3.1 Stjórnborð á framhlið
- Input Gain Control Knob: Adjusts the input level for the connected microphone or instrument.
- Switch (Mic/Instrument) Button: Toggles between microphone and instrument input modes.
- 48V Phantom Power ON/OFF: Activates or deactivates 48V phantom power for condenser microphones.
- Headphone Volume Control Button: Adjusts the output volume for connected headphones.
- Output Volume Control Button: Adjusts the main output volume for connected studio monitors.

Figure 3: Midiplus Studio M in a studio setup, demonstrating its compact size and integration.
3.2 Tengingar að aftan
- USB tengi: USB2.0 port for connection to your computer and power supply.
- Output Interface (Left/Right): Connects to your studio monitors or other output devices.
- Extensible Device Interface: Provides additional connectivity options for other devices.
4. Viðhald
- Haldið tækinu hreinu með því að þurrka það með mjúkum, þurrum klút. Forðist að nota sterk efni eða slípiefni.
- Ensure all cables are securely connected to prevent signal loss or damage.
- Store the interface in a cool, dry place away from direct sunlight and extreme temperatures.
- Forðastu að setja þunga hluti ofan á tækið.
5. Bilanagreining
5.1 Enginn hljóðútgangur
- Check all cable connections (USB, input, output, headphones).
- Ensure the device is powered on and recognized by your computer.
- Verify that the output volume controls (headphone and main output) are turned up.
- Check your computer's sound settings to ensure the Midiplus Studio M is selected as the output device.
5.2 Input Signal Issues
- Adjust the Input Gain Control Knob.
- Ensure the correct input mode (Mic/Instrument) is selected.
- If using a condenser microphone, verify that 48V Phantom Power is enabled.
- Check the microphone/instrument cable for damage.
5.3 Tölva þekkir ekki tækið
- Prófaðu að tengja USB snúruna við annað USB tengi á tölvunni þinni.
- Endurræstu tölvuna þína.
- Ensure the latest drivers for the Midiplus Studio M are installed from the official Midiplus websíða.
- Prófaðu með annarri USB snúru ef hún er til staðar.
6. Tæknilýsingar
| Eiginleiki | Smáatriði |
|---|---|
| Gerðarnúmer | Studio M |
| Vörumerki | Midiplus |
| Tengitækni | USB (USB2.0) |
| Hljóðupplausn | 24-bita / 192kHz |
| Inntak | 1 (MIC/Line/Hi-z) |
| Úttak | 2 (Left/Right) |
| Phantom Power | 48V (hægt að skipta um) |
| Samhæft stýrikerfi | Windows, macOS |
| Vörumál | 5.28 x 3.54 x 1.89 tommur |
| Þyngd hlutar | 14.1 aura (0.4 kíló) |
7. Ábyrgð og stuðningur
For warranty information and technical support, please refer to the official Midiplus webeða hafið samband við næsta söluaðila. Geymið kaupkvittunina sem sönnun fyrir kaupum ef þið viljið gera kröfur um ábyrgð.


