1. Inngangur
The Audio-Technica PRO24CM is a lightweight, compact stereo condenser microphone designed for digital recording with high-fidelity stereo sound. It is optimized for use with camcorders that feature an accessory shoe and a stereo microphone input. The microphone utilizes a pair of cardioid elements in an X-Y configuration to capture the spatial impact and realism of a live sound field.
This manual provides essential information for the proper setup, operation, and maintenance of your PRO24CM microphone.
2. Innihald pakka
Gakktu úr skugga um að allir eftirfarandi hlutir séu innifaldir í pakkanum þínum:
- PRO24CM Stereo Condenser Microphone with permanently attached 6-12 inch coiled cable and right-angle 3.5 mm stereo mini plug
- Video-camera shoe mount
- LR44 battery (1.5V)
- Framrúða
- Mjúkur hlífðarpoki

Image: Included accessories for the PRO24CM microphone.
3. Uppsetning
3.1 Uppsetning rafhlöðu
The PRO24CM can operate on a 1.5V LR44 battery or via plug-in power from your camcorder. If your camcorder does not provide plug-in power, battery installation is required.
- Locate the battery compartment on the microphone body.
- Opnaðu hólfið varlega.
- Insert one LR44 battery, ensuring correct polarity (+/-).
- Lokaðu rafhlöðuhólfinu örugglega.
Image: The LR44 battery for microphone power.
3.2 Uppsetning hljóðnemans
The PRO24CM is designed to attach to a camcorder's accessory shoe.
- Slide the video-camera shoe mount onto your camcorder's accessory shoe.
- Secure the mount by tightening its locking mechanism.
- Insert the microphone into the shoe mount.
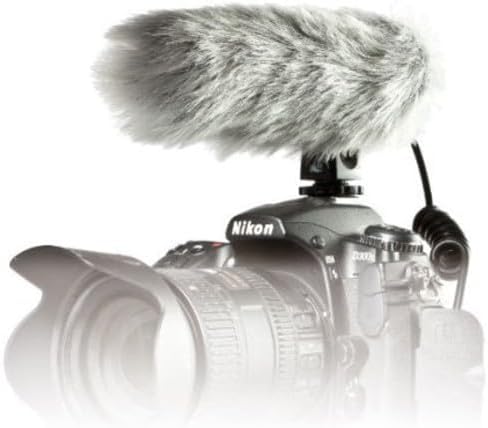
Image: PRO24CM microphone attached to a camcorder.
3.3 Connecting to a Camcorder
Connect the microphone to your camcorder's stereo microphone input.
- Locate the 3.5 mm stereo mini plug on the microphone's coiled cable.
- Insert the plug firmly into the microphone input jack on your camcorder.

Image: The PRO24CM microphone showing its coiled cable and 3.5mm connector.
3.4 Using the Windscreen
For outdoor recording or in windy conditions, attach the included windscreen to reduce wind noise and plosives.
- Gently slide the foam windscreen over the microphone's capsule.
- Ensure it fits snugly without obstructing the microphone elements.
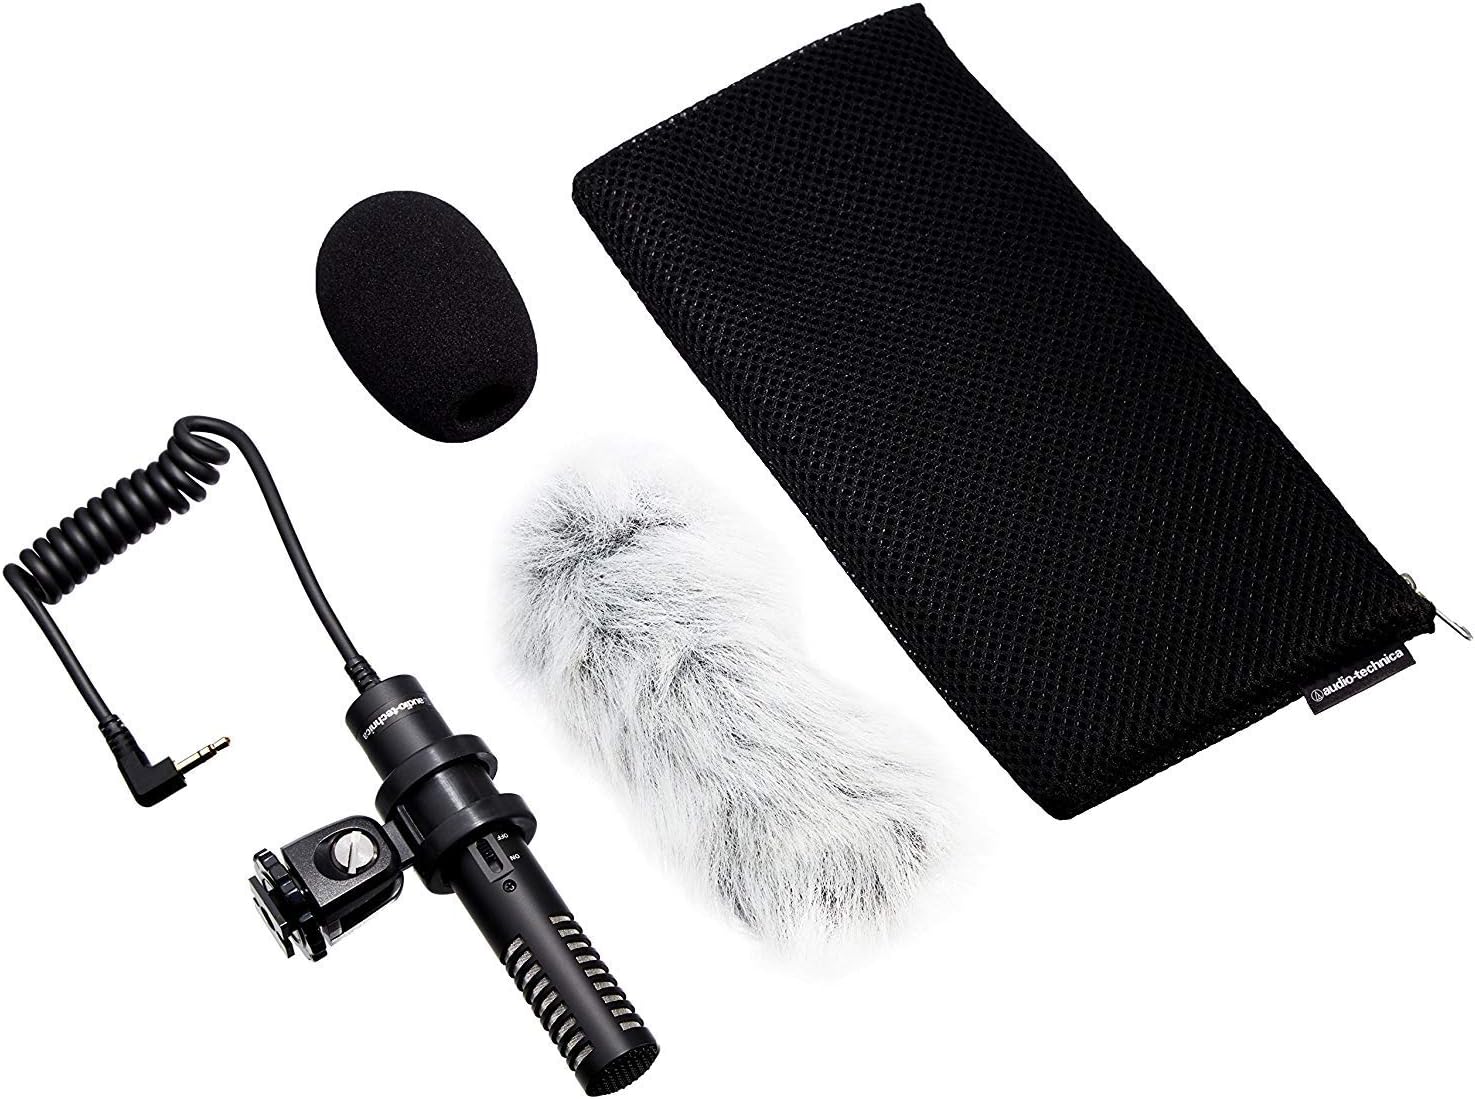
Image: PRO24CM microphone with windscreen and other accessories.
4. Rekstur
4.1 Kveikt/slökkt
The PRO24CM features an on/off switch for convenient operation.
- Til að kveikja á hljóðnemanum ON, rennið rofanum í „ON“ stöðuna.
- Til að kveikja á hljóðnemanum SLÖKKT, rennið rofanum í stöðuna „SLÖKKT“.
When using plug-in power from your camcorder, the microphone will draw power directly from the camcorder, and battery operation is not required. However, it is still recommended to turn the microphone off when not in use to conserve battery life if a battery is installed.
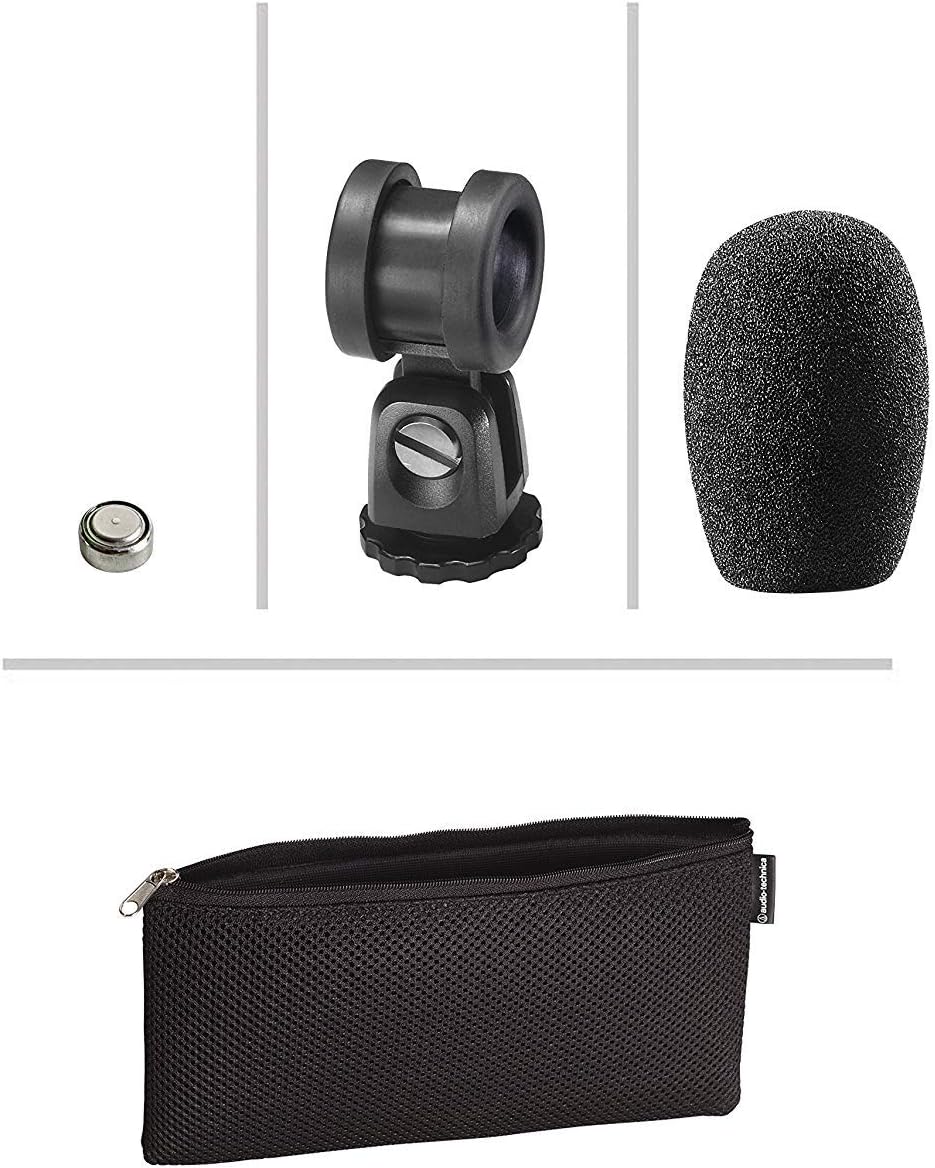
Image: The PRO24CM microphone with its on/off switch visible.
4.2 Recording Considerations
- Staðsetning: Position the microphone to capture the desired sound source. The X-Y stereo configuration is designed to provide a natural stereo image.
- Eftirlit: Always monitor your audio through headphones connected to your camcorder to ensure optimal sound quality and to detect any unwanted noise.
- Ávinningsstig: Adjust the input gain on your camcorder to prevent clipping (distortion) while ensuring a strong signal.
5. Viðhald
- Þrif: Notið mjúkan, þurran klút til að þrífa hljóðnemann. Forðist að nota sterk efni eða slípiefni.
- Geymsla: When not in use, store the microphone in its protective pouch to prevent dust and damage. Remove the battery if storing for extended periods to prevent leakage.
- Kapalumhirða: Avoid sharp bends or kinks in the microphone cable.
6. Bilanagreining
- Ekkert hljóð:
- Ensure the microphone's on/off switch is in the "ON" position.
- Athugaðu hvort rafhlaðan sé rétt sett í og nægilega hleðst. Skiptu um hana ef þörf krefur.
- Verify the 3.5 mm plug is fully inserted into the camcorder's microphone input.
- Confirm the camcorder's audio input settings are correct and the input gain is not set to zero.
- Bjagað hljóð:
- Reduce the input gain on your camcorder.
- Ensure the microphone is not too close to the sound source, causing overload.
- Of mikill vindhávaði:
- Ensure the windscreen is properly installed.
- Consider using an additional furry wind muff for extreme conditions (not included).
7. Tæknilýsing
| Eiginleiki | Forskrift |
|---|---|
| Frumefni | Fasthleðslu bakplata varanlega skautaður eimsvali |
| Polar mynstur | X/Y Stereo |
| Tíðni svörun | 100-17,000 Hz |
| Næmi fyrir opna hringrás | -50 dB (3.1 mV) re 1V við 1 Pa |
| Viðnám | 600 ohm |
| Hámarks hljóðstyrk inntaks | 119 dB SPL, 1 kHz við 1% THD |
| Dynamic Range (typical) | 82 dB, 1 kHz við hámarks SPL |
| Merki-til-hávaða hlutfall | 57 dB, 1 kHz við 1 Pa |
| Aflþörf | 2-10V DC plug-in power or 1.5V LR44 battery |
| Tegund rafhlöðu | 1.5V LR44 |
| Rafhlaða núverandi / líf | 0.6 mA / 200 klst dæmigerð |
| Skipta | Kveikt/slökkt |
| Þyngd | 3.9 oz (111 g) / 120 Grams |
| Stærð (L x Hámarksþvermál) | 4.59" (116.5 mm) long, 0.83" (21.0 mm) maximum body diameter |
| Úttakstengi | 3.5 mm stereo mini plug on cable |
| Kapall | Permanently attached 152.4 mm - 304.8 mm (6"-12") coiled cable with right-angle molded 3.5 mm stereo mini-plug |
8. Öryggisupplýsingar
- Ekki láta hljóðnemann verða fyrir miklum hita, raka eða beinu sólarljósi.
- Forðist að láta hljóðnemann detta eða verða fyrir hörðum höggum.
- Haltu hljóðnemanum frá sterkum segulsviðum.
- Do not attempt to disassemble or modify the microphone. This will void any warranty.
- Fargið notuðum rafhlöðum á ábyrgan hátt í samræmi við staðbundnar reglur.
9. Ábyrgð og stuðningur
For warranty information or technical support, please contact Audio-Technica customer service or visit their official webvefsíða. Geymið kaupkvittunina sem sönnun fyrir kaupunum.
Audio-Technica Contact Information:
- Opinber Audio-Technica Websíða
- Vísaðu til umbúða vörunnar eða opinberra website for specific regional contact details.


