1. Vöru lokiðview
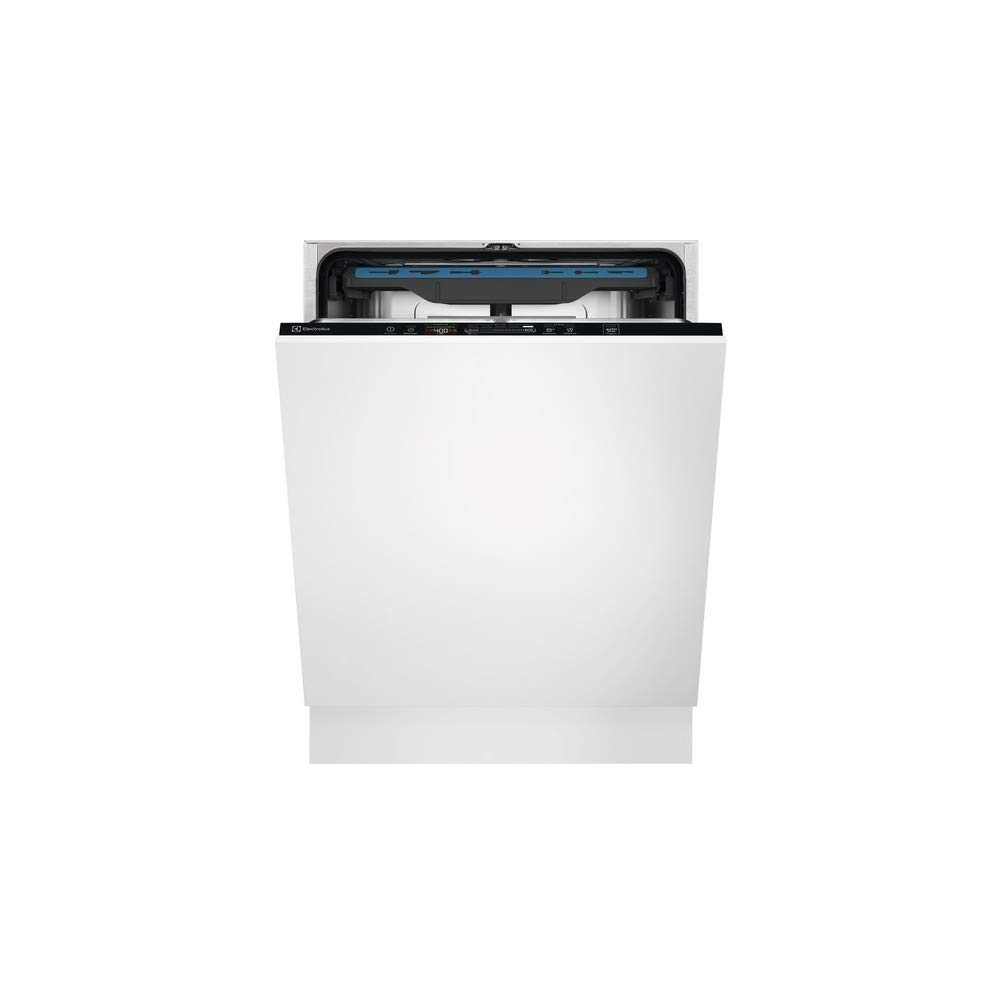
The Electrolux EEG48200L is an integrated dishwasher designed for efficient and quiet dishwashing. This appliance features a capacity of 14 place settings and operates at a low noise level of 44 decibels. It includes multiple wash programs and convenient loading options such as a cutlery drawer and a cutlery basket.
Mynd 1: Electrolux EEG48200L Integrated Dishwasher. This image shows the front view of the dishwasher, typically installed within kitchen cabinetry.
Helstu eiginleikar:
- Stærð: 14 staðsetningar
- Hávaðastig: 44 desibel
- Gerð stjórna: Fully integrated controls
- Gerð uppsetningar: Integrated / Built-in
- Innifalið íhlutir: Cutlery basket, cutlery drawer
- Hringrásarvalkostir: 8 þvottakerfi
2. Uppsetning og uppsetning
Proper installation is crucial for the safe and efficient operation of your Electrolux EEG48200L dishwasher. Ensure all connections are secure and meet local regulations.
2.1. Dimensions and Cabinetry Requirements
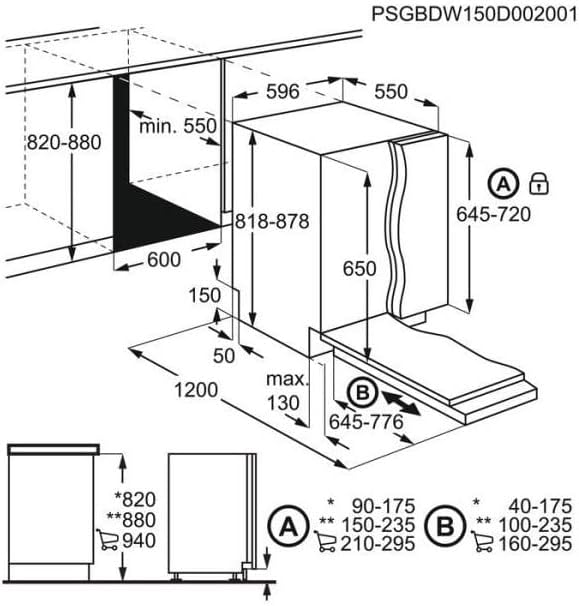
Refer to the diagram below for detailed dimensions and cabinetry requirements for integrating your dishwasher.
Mynd 2: Installation dimensions for the Electrolux EEG48200L dishwasher. This diagram illustrates the required cabinet opening dimensions (width 600mm, height 820-880mm), dishwasher unit dimensions (width 596mm, height 818-878mm), and panel dimensions (height 645-720mm for panel A, 645-776mm for panel B). It also shows the adjustable feet and minimum clearances.
- Cabinet Opening Width: 600 mm
- Cabinet Opening Height: 820 - 880 mm
- Dishwasher Unit Dimensions (W x H): Approximately 596 mm x 818-878 mm
- Dýpt: Minimum 550 mm for the cabinet.
- Front Panel Dimensions:
- Panel A (top): 645 - 720 mm height
- Panel B (bottom): 645 - 776 mm height
- Stillanlegir fætur: Allows for height adjustment.
2.2. Tengingar við vatn og rafmagn
Connect the water inlet hose to a cold or hot water supply (max 60°C) and the drain hose to a suitable drain. Ensure the electrical connection is properly grounded and matches the appliance's power requirements. Consult a qualified technician for installation if you are unsure.
3. Notkunarleiðbeiningar
Follow these steps for optimal performance and cleaning results.
3.1. Uppþvottavélin hlaðin
- Skafið stórar mataragnir af diskum áður en þeir eru settir í þá.
- Setjið stærri hluti í neðri körfuna og minni, viðkvæma hluti í efri körfuna.
- Utilize the dedicated cutlery drawer or basket for forks, knives, and spoons, ensuring they do not nest together.
- Gangið úr skugga um að úðaarmarnir geti snúist frjálslega og að þeir séu ekki stíflaðir af diskum.
3.2. Bæta við þvottaefni og gljáaefni
- Fill the detergent dispenser with the appropriate amount of dishwasher detergent according to the program selected and water hardness.
- Check the rinse aid indicator and refill the rinse aid dispenser when necessary to ensure streak-free drying.
- If your water is hard, ensure the salt reservoir is filled with dishwasher salt to prevent limescale buildup.
3.3. Að velja og ræsa þvottakerfi
- Lokaðu hurð uppþvottavélarinnar.
- Select the desired wash program using the control panel. The dishwasher offers 8 cycle options.
- Ýttu á Start hnappinn til að hefja lotuna.
- A light indicator on the floor may signal that the dishwasher is in operation.
- The dishwasher may automatically open its door at the end of the cycle to assist with drying.
4. Viðhald og umönnun
Reglulegt viðhald tryggir endingu og skilvirkni uppþvottavélarinnar.
4.1. Þrif á síum
- Periodically check and clean the coarse and fine filters located at the bottom of the dishwasher tub.
- Remove any food debris to prevent blockages and ensure proper drainage.
4.2. Þrif á innra og ytra byrði
- Þurrkaðu að innan með auglýsinguamp klút til að fjarlægja allar leifar.
- Clean the exterior control panel and door with a soft, damp klút. Forðist slípiefni.
4.3. Vetrarbúningur (ef við á)
If the dishwasher is in an unheated area and there is a risk of freezing, drain all water from the appliance and disconnect the water supply. Consult the full manual for detailed winterization procedures.
5. Bilanagreining
Before contacting customer service, refer to the following common issues and solutions.
5.1. Dishwasher Does Not Start
- Gakktu úr skugga um að hurðin sé alveg lokuð og læst.
- Athugaðu hvort rafmagnssnúran sé tryggilega tengd í innstungu.
- Gakktu úr skugga um að rofinn hafi ekki slegið út.
- Confirm that a wash program has been selected and the Start button pressed.
5.2. Poor Cleaning Results
- Check if the spray arms are blocked or clogged.
- Ensure dishes are loaded correctly, allowing water to reach all surfaces.
- Verify that the detergent dispenser was filled correctly and the detergent is fresh.
- Hreinsaðu síurnar.
- Check rinse aid and salt levels.
5.3. Water Not Draining
- Athugið hvort einhverjar beygjur eða stíflur séu á frárennslisslöngunni.
- Clean the filters to ensure no debris is obstructing the drain pump.
For more complex issues or persistent problems, please contact Electrolux customer service.
6. Tæknilýsing
Detailed technical specifications for the Electrolux EEG48200L dishwasher.
| Eiginleiki | Forskrift |
|---|---|
| Nafn líkans | EEG48200L |
| Vörumerki | Electrolux |
| Gerð uppsetningar | Innbyggt |
| Getu | 14 Staðsetningarstillingar |
| Hávaðastig | 44 desibel |
| Vörumál (L x B x H) | 54.99 x 59.59 x 81.79 cm (u.þ.b. 55 x 59.6 x 81.8 cm) |
| Þyngd hlutar | 37.08 Kilograms (approx. 37.1 kg) |
| Fjöldi hringrásarvalkosta | 8 |
| Skjár Tegund | LED |
| Gerð stjórna | Alveg samþætt |
| Litur | Hvítur |
| Innifalið íhlutir | Cutlery basket, cutlery drawer |
| Gerð klára | Glansandi |
7. Ábyrgð og stuðningur
For detailed warranty information, please refer to the warranty card included with your product or visit the official Electrolux webá síðunni. Ábyrgðarskilmálar geta verið mismunandi eftir svæðum.
For technical assistance, spare parts, or customer service inquiries, please contact your local Electrolux customer support. Have your model number (EEG48200L) and serial number ready when contacting support.


