Inngangur
This manual provides detailed instructions for the safe installation, operation, and maintenance of your Machine Nordic LED Chandelier, Model B 6 Lights. Please read this manual thoroughly before installation and retain it for future reference.
Mikilvægar öryggisupplýsingar
- Slökkvið alltaf á aðalrafmagninu við rofann áður en rafmagnsvinna hefst.
- Hafðu samband við viðurkenndan rafvirkja ef þú ert ekki viss um uppsetningarferlið.
- Gakktu úr skugga um að allar raflagnir séu öruggar og í samræmi við gildandi rafmagnsreglugerðir.
- Ekki fara yfir tilgreint vatntage fyrir ljósaperur.
- Farið varlega með gleríhluti til að koma í veg fyrir að þeir brotni.
- Þessi festing er eingöngu hönnuð til notkunar innanhúss.
Innihald pakka
Gakktu úr skugga um að allir íhlutir séu til staðar og óskemmdir áður en uppsetningunni er haldið áfram. Ef einhverjir hlutar vantar eða eru skemmdir skaltu hafa samband við þjónustuver.
- Chandelier main body (wooden frame with metal base)
- 6 x White Iron Lamptónum
- Mounting hardware (screws, wire nuts, mounting bracket)
- Leiðbeiningarhandbók
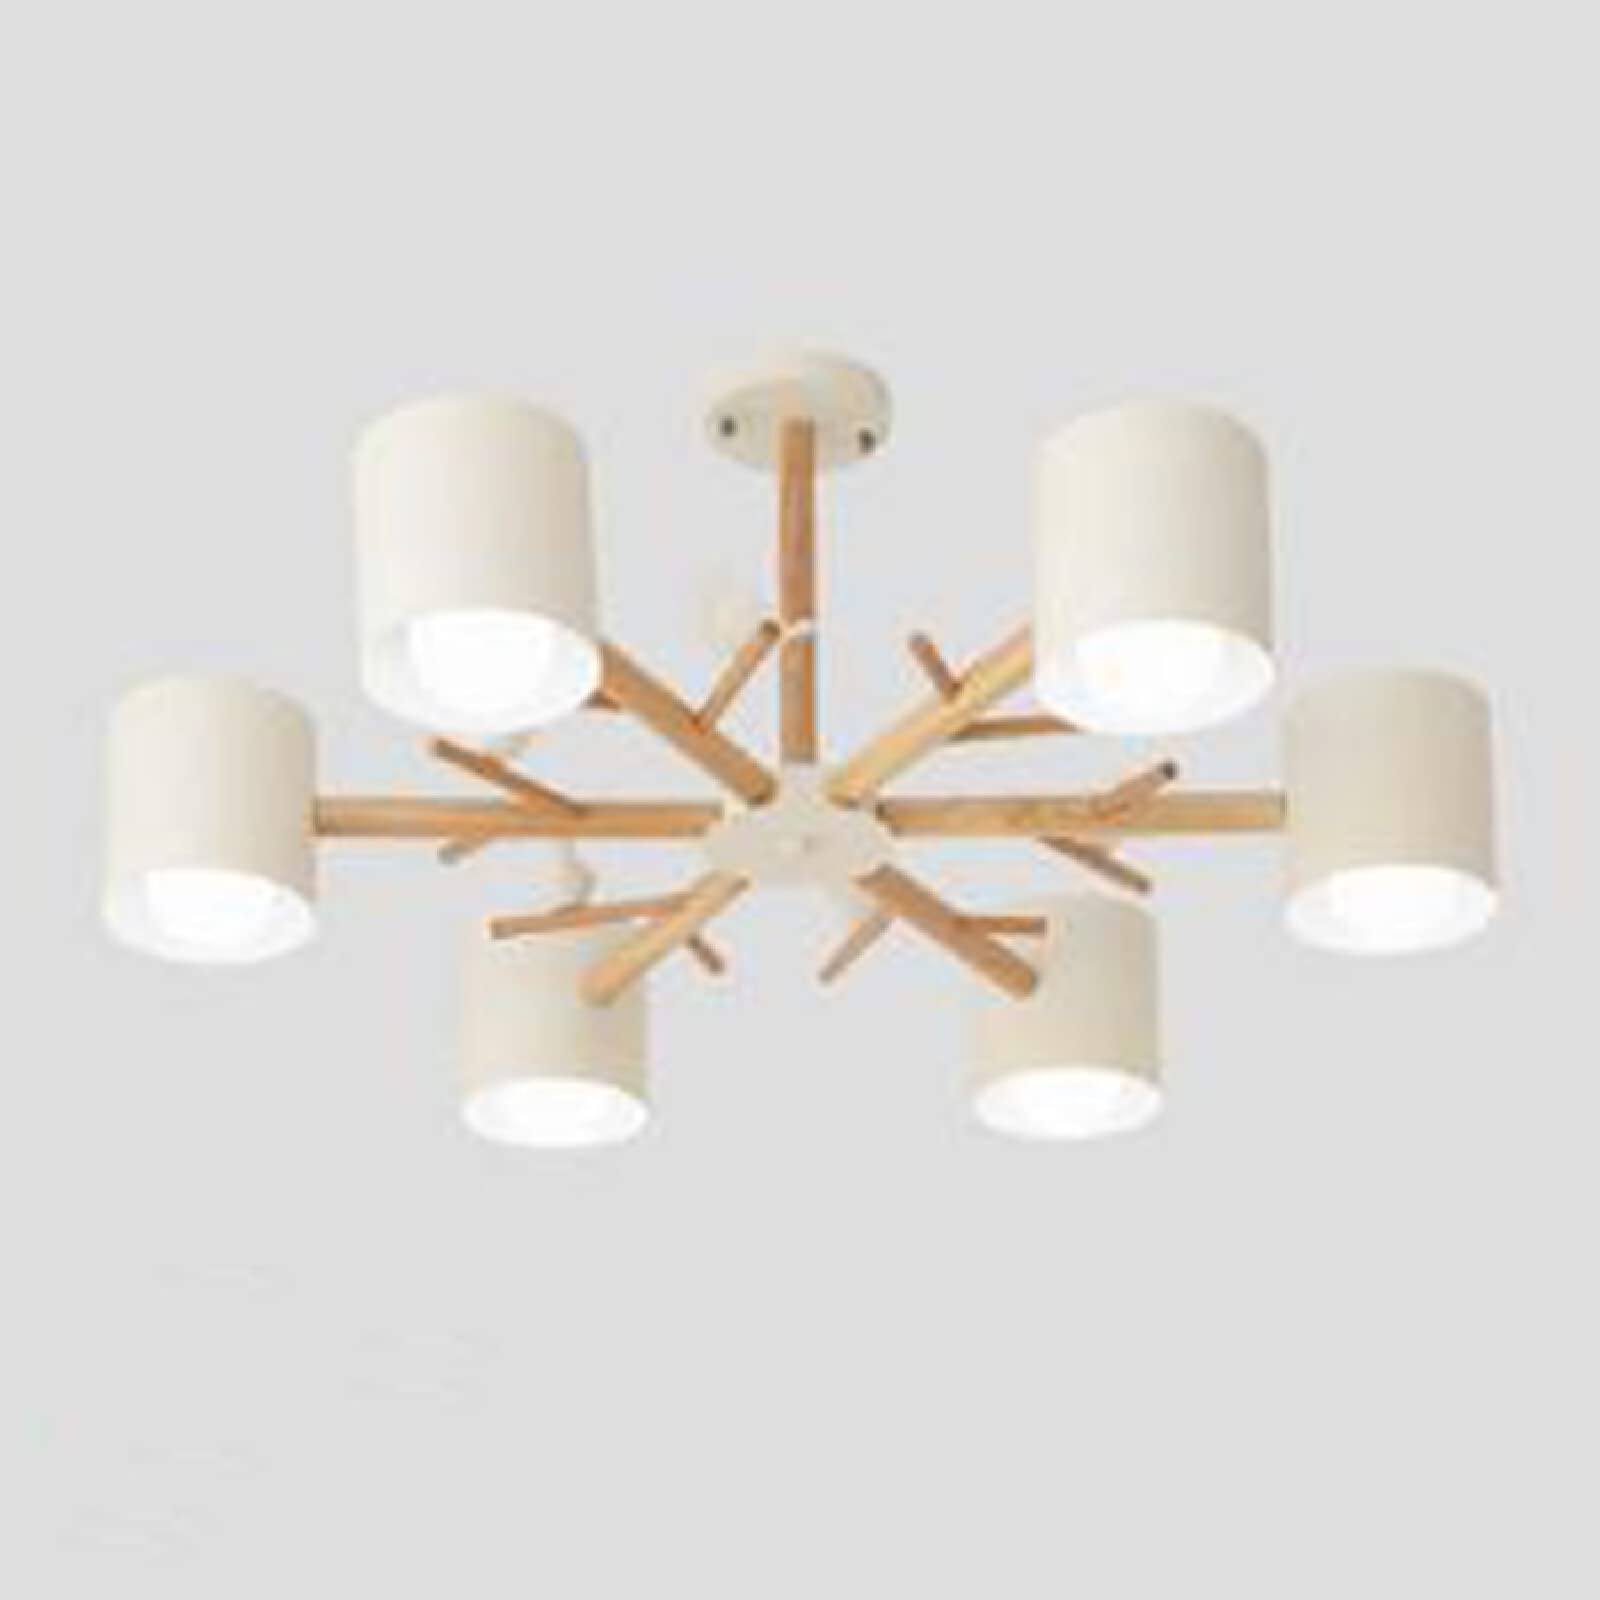
Image: Machine Nordic LED Chandelier, Model B 6 Lights. This image displays the complete chandelier assembly, featuring a central wooden structure with six arms extending outwards, each terminating in a cylindrical white iron lampskugga. Hinn lampshades are designed to house LED light sources. The overall design is modern and minimalist.
Uppsetning og uppsetning
Verkfæri sem þarf (ekki innifalið):
- Skrúfjárn (Phillips höfuð)
- Vír Strippers
- Töng
- Rafmagnsband
- Stiga
Uppsetningarskref:
- Slökktu á rafmagni: Before starting, ensure the power to the installation area is completely off at the circuit breaker.
- Undirbúa festingarfestingu: Festið festingarfestinguna við tengikassann í loftinu með meðfylgjandi skrúfum. Gangið úr skugga um að hún sé vel fest.
- Vírtengingar:
- Connect the ground wire (usually bare copper or green) from the fixture to the ground wire from the junction box using a wire nut.
- Connect the live wire (usually black) from the fixture to the live wire from the junction box using a wire nut.
- Connect the neutral wire (usually white) from the fixture to the neutral wire from the junction box using a wire nut.
- Ensure all connections are tight and secure. Wrap electrical tape around wire nuts for added safety.
- Festu festinguna: Carefully lift the chandelier and align the holes in the fixture's canopy with the screws on the mounting bracket. Secure the fixture to the bracket using the decorative nuts or screws provided.
- Settu upp L.amptónum: Attach each of the six white iron lampshades to their respective light sockets on the chandelier arms. Ensure they are firmly in place.
- Settu upp ljósaperur: Screw in the appropriate LED light bulbs (not included) into each socket. Do not overtighten.
- Endurheimta kraft: Þegar uppsetningu er lokið og allar tengingar hafa verið athugaðar skal endurræsa strauminn við rofann.
Notkunarleiðbeiningar
The Machine Nordic LED Chandelier operates like a standard ceiling light fixture. Once installed and powered, it can be controlled via a wall switch connected to the circuit.
- Kveikt/slökkt: Use the wall switch to turn the chandelier on or off.
- Skipt um peru:
- Slökkvið á rafmagninu á ljósastæðinu við rofann.
- Leyfið perunum að kólna alveg áður en þið snertið þær.
- Carefully unscrew the old bulb from its socket.
- Screw in a new LED bulb of the correct type and wattage.
- Komdu aftur á rafmagn á aflrofanum.
Viðhald og umhirða
- Þrif:
- Slökkvið alltaf á rafmagninu á tækinu áður en það er þrifið.
- Wipe the metal and wooden parts with a soft, dry cloth.
- Fyrir lampshades, use a slightly damp klút ef þörf krefur og þurrkaðu síðan strax.
- Avoid using abrasive cleaners, solvents, or polishes as they may damage the finish.
- Skoðun: Athugið reglulega allar tengingar og festingarbúnað til að tryggja að þeir séu öruggir.
Úrræðaleit
| Vandamál | Möguleg orsök | Lausn |
|---|---|---|
| Ljós kviknar ekki. |
|
|
| Flikkandi ljós. |
|
|
Tæknilýsing
- Vörumerki: Vél
- Gerð: Model B 6 Lights
- Efni: Painted metal, Wood, Glass
- Tegund ljósgjafa: LED (bulbs not included)
- Fjöldi ljósgjafa: 6
- Aflgjafi: Rafmagn með snúru
- Gerð festingar: Loftfesting
- Inni/úti notkun: Innandyra
- Herbergistegund: Dining Room, Bedroom, Living Room, Sitting Room, Restaurant, Parlor, Baby Room, Kids Room, Study Room, Kitchen Room, Dressing Room, Office, Working Place, Porch
- Þyngd hlutar: Um það bil 0.035 únsur (1 grömm) - Note: This weight seems unusually low and may be a data entry error. Please refer to product packaging for accurate weight.
Ábyrgð og stuðningur
For warranty information or technical support, please refer to the retailer's policy or contact the manufacturer directly. Keep your purchase receipt as proof of purchase.
Fyrir frekari aðstoð, vinsamlegast farðu á Machine brand store on Amazon eða hafið samband við kaupstaðinn ykkar.