1. Inngangur
Welcome to the user manual for your Tawson 3-Light Convertible Chandelier. This manual provides essential information for safe installation, operation, and maintenance of your lighting fixture. Please read all instructions carefully before beginning installation.
Öryggisupplýsingar:
- Always turn off the power at the main fuse or circuit breaker before installation or maintenance.
- Hafðu samband við viðurkenndan rafvirkja ef þú ert ekki viss um uppsetningarferlið.
- Gakktu úr skugga um að allar rafmagnstengingar séu í samræmi við gildandi reglugerðir og reglugerðir á hverjum stað.
- Ekki fara yfir ráðlagða vötntage fyrir perur.
- Farið varlega með gleríhluti.
2. Innihald pakka
Gakktu úr skugga um að allir íhlutir séu til staðar áður en uppsetning hefst.
- Chandelier fixture body
- Glass shades (3)
- Festivélbúnaður
- Adjustable rods (various lengths)
- Leiðbeiningarhandbók

Image: A diagram illustrating the chandelier's dimensions, including the 28-inch height and 18-inch width, along with adjustable rods (two 6-inch and two 12-inch) and a note that bulbs are not included. Various compatible bulb types are shown at the bottom, indicating an E26 base.
3. Tæknilýsing
| Eiginleiki | Smáatriði |
|---|---|
| Vörumerki | Tawson |
| Gerðarnúmer | 13810 |
| Litur | Burstað nikkel |
| Efni | Gler, málmur |
| Stíll | Nútímalegt |
| Form fyrir ljósabúnað | Chandelier (Convertible) |
| Vörumál | 18.1" L x 18.1" B x 13.8" H |
| Inni/úti notkun | Innandyra |
| Aflgjafi | AC |
| Gerð uppsetningar | Hálf innfelld festing |
| Tegund ljósgjafa | Incandescent, LED, Fluorescent, Halogen |
| Gerð klára | Burstað |
| Skuggaefni | Gler |
| Fjöldi ljósgjafa | 3 |
| Voltage | 110-120V (AC) |
| Bulb Base | E26 |
| Hvaðtage | Up to 100 watts per bulb |
| Birtustig | 5100 lumen (total) |
| Skilvirkni | 51 lúmen á watt |
| Samsetning krafist | Lágmarks samsetning krafist |
4. Uppsetning og uppsetning
This chandelier can be installed as a pendant or a semi-flush mount fixture. Follow these steps carefully.
4.1 Nauðsynleg verkfæri (ekki innifalin)
- Skrúfjárn
- Vír Strippers
- Töng
- Rafmagnsband
- Stiga
4.2 Foruppsetning
- Slökktu á rafmagni: Finndu rofann eða öryggiskassann og slökktu á rafmagninu í tengikassanum þar sem festingin verður sett upp.
- Taktu upp: Fjarlægðu alla íhluti varlega úr umbúðunum.
- Skoðaðu: Check for any damage during shipping. Do not install if damaged.
4.3 Samsetningarskref
- Festu festingarplötu: Festið festingarplötuna við tengikassann með meðfylgjandi skrúfum.
- Determine Height (Pendant Option): Select the desired length of adjustable rods. Connect the rods to the fixture body and the canopy.
- Raflögn:
- Connect the fixture's ground wire to the supply ground wire (usually bare copper or green).
- Connect the fixture's neutral wire (usually white) to the supply neutral wire (white).
- Connect the fixture's hot wire (usually black) to the supply hot wire (black).
- Festið allar tengingar með vírhnetum og rafbandi.
- Öruggt tjaldhiminn: Carefully push the canopy up to the ceiling, covering the junction box, and secure it with the provided screws or nuts.
- Setja upp glerhlífar: Attach the three satin etched glass shades to the fixture arms.
- Settu upp perur: Insert three E26 base bulbs (not included) into the sockets. Do not exceed 100W per bulb.

Mynd: Ítarleg view highlighting the brushed nickel metal components and the white frosted glass shades, emphasizing the quality of materials and finish.
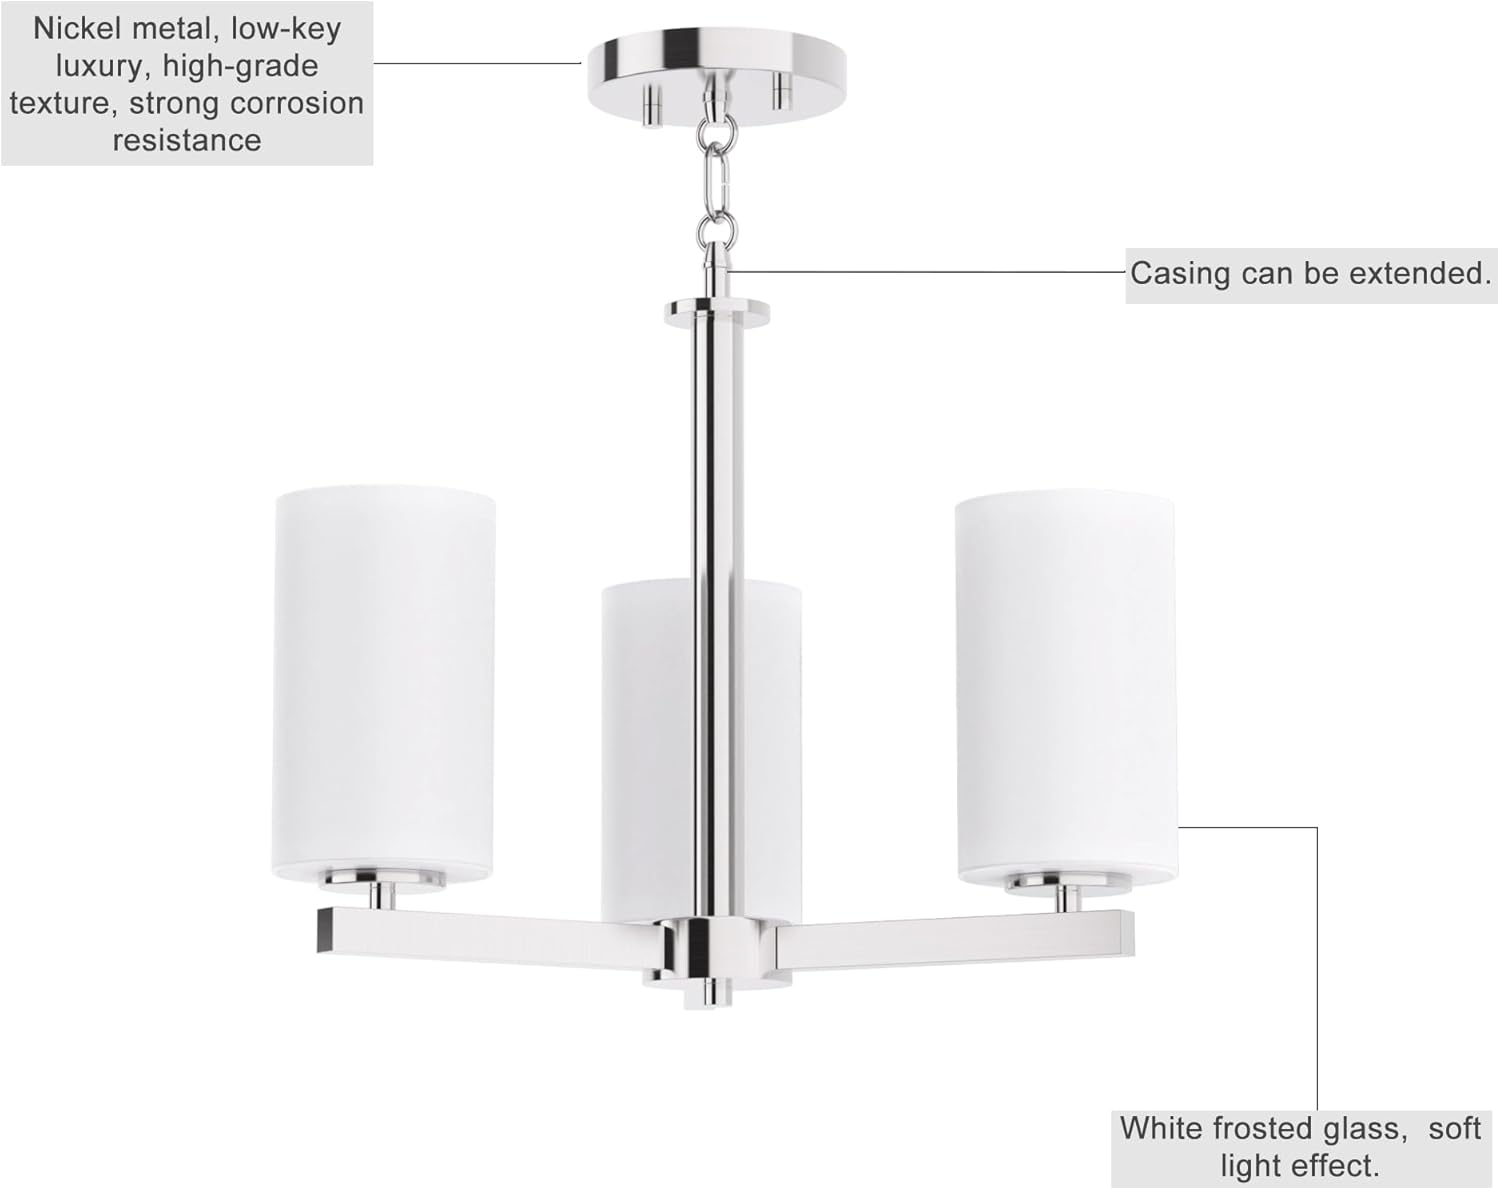
Image: A composite image showing close-ups of various parts of the chandelier: the connection point of the glass shade to the arm, the ceiling canopy with chain link, the central rod connection, and the arm connection to the central body. This illustrates the modular design and connection points.
5. Notkunarleiðbeiningar
Once installed, restore power at the circuit breaker. The chandelier operates via your wall switch.
- Kveikt/slökkt: Use the standard wall switch connected to the fixture to turn the lights on or off.
- Dimmvirkni: If you have a compatible wall dimmer switch, use dimmable bulbs to utilize the dimming feature. Bulbs are not included.
Myndband: Stutt myndbandssýningasing the Tawson 3-Light Chandelier in various room settings, demonstrating its aesthetic appeal and how it illuminates different spaces. The video highlights the brushed nickel finish and the soft glow from the glass shades.
6. Viðhald og umönnun
Regular cleaning and proper care will ensure the longevity and appearance of your chandelier.
- Þrif:
- Slökktu á rafmagninu áður en þú þrífur.
- Þurrkið málmhlutana með mjúkum, þurrum klút.
- Þrífið glerskjái með mildum glerhreinsiefni og mjúkum klút. Forðist slípandi hreinsiefni.
- Skipt um peru:
- Gakktu úr skugga um að slökkt sé á rafmagninu.
- Leyfðu perunum að kólna áður en þær eru snertar.
- Unscrew old bulbs and replace with new E26 base bulbs (max 100W each).
- Skoðun: Athugið reglulega hvort allar tengingar og festingarbúnaður séu þéttir.
7. Bilanagreining
Ef þú lendir í vandræðum með ljósakrónuna þína skaltu skoða eftirfarandi algeng vandamál og lausnir:
| Vandamál | Möguleg orsök | Lausn |
|---|---|---|
| Ljós kviknar ekki | Ekkert rafmagn á innréttinguna | Athugið rofa/öryggi. Gangið úr skugga um að veggrofi sé kveikt. |
| Bulbs not working | Lausar eða bilaðar perur | Ensure bulbs are screwed in tightly. Replace with new bulbs. |
| Flikkandi ljós | Laus raflögn eða ósamhæfur ljósdeyfir | Turn off power, check wire connections. If using a dimmer, ensure bulbs are dimmable and compatible with the dimmer switch. |
| Innréttingin er laus | Mounting hardware not secure | Turn off power, tighten mounting screws and canopy nuts. |
8. Ábyrgð og stuðningur
For warranty information or technical support, please contact Tawson customer service. Keep your purchase receipt for warranty claims.
Samskiptaupplýsingar: Refer to your product packaging or the Tawson official websíðuna fyrir nýjustu upplýsingar um stuðning.
9. Notkunartilvikamples
The Tawson 3-Light Convertible Chandelier is versatile and suitable for various indoor settings.
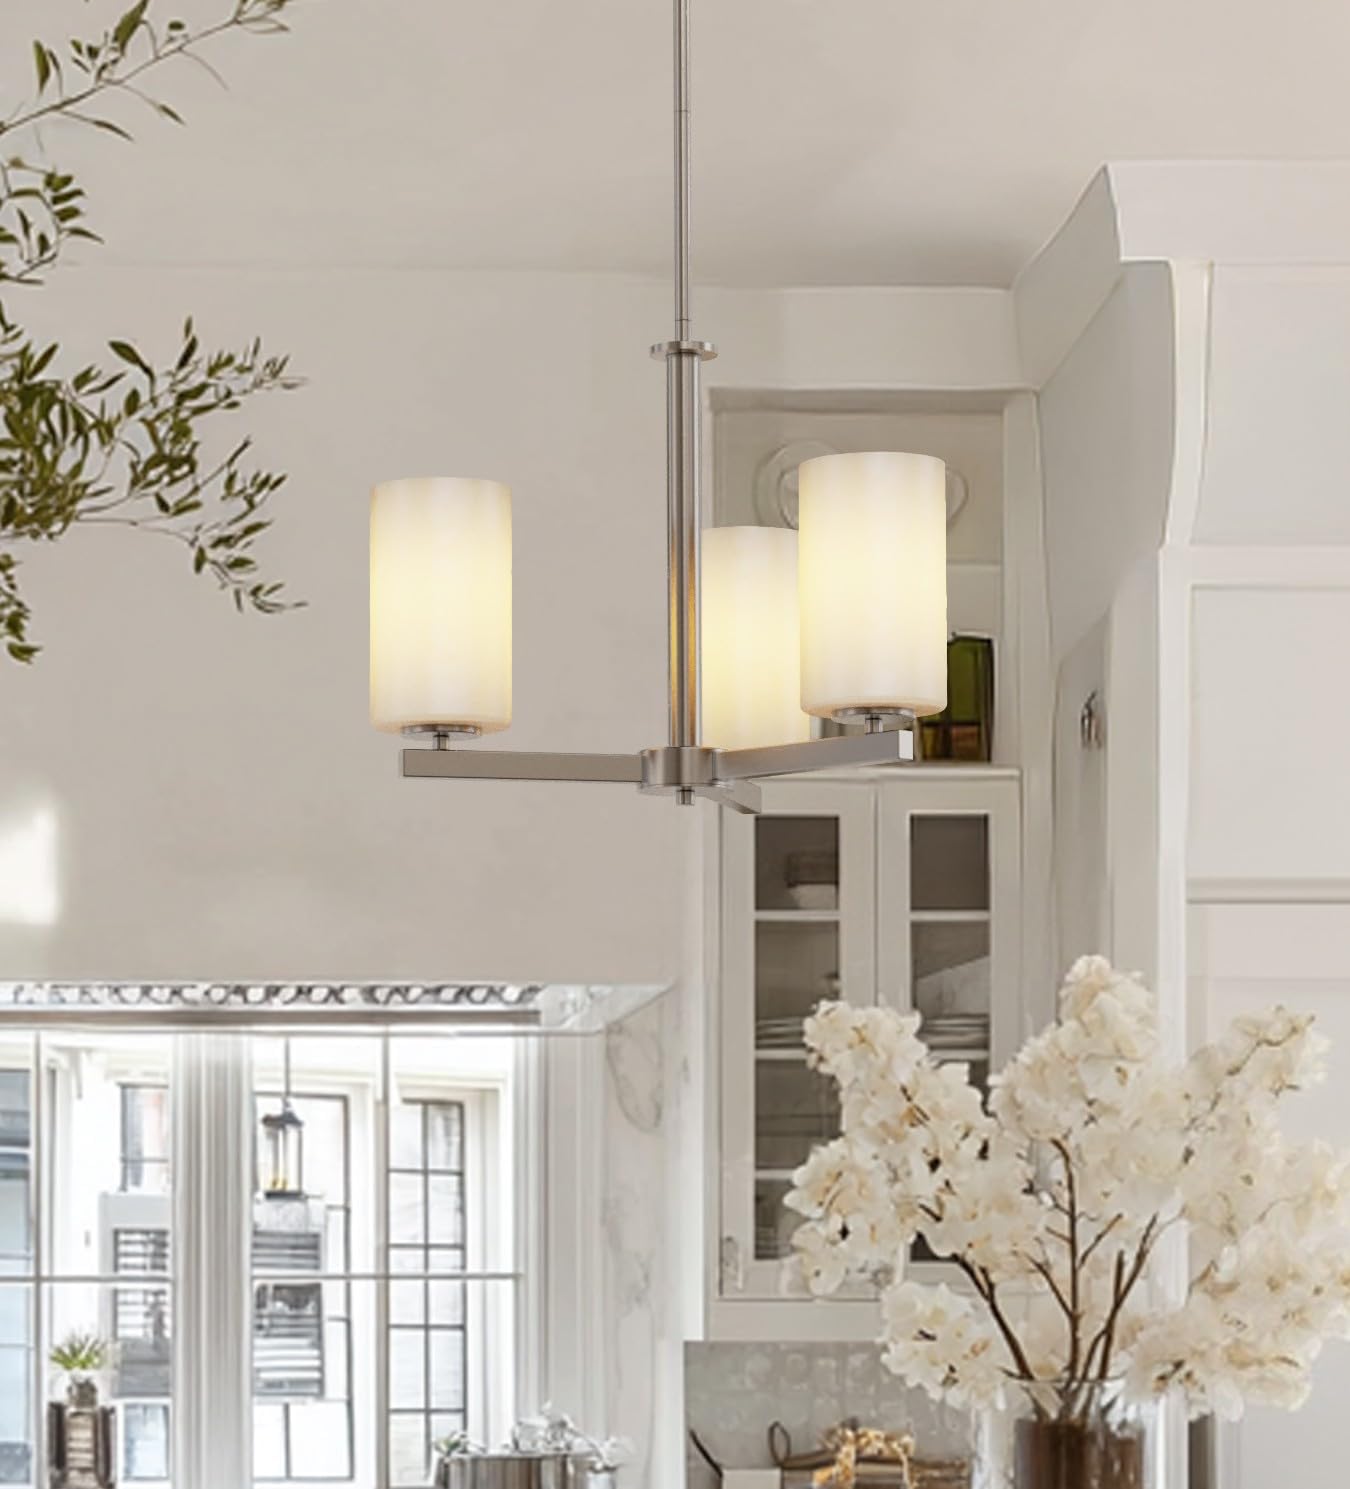
Image: The chandelier illuminating a contemporary kitchen space, featuring white cabinetry, a dark island, and light-colored flooring. The fixture provides ambient lighting above the island.

Image: The chandelier positioned above a dining table in a room with large windows, demonstrating its suitability for dining areas and its ability to complement natural light.

Image: The chandelier installed in a spacious bathroom, featuring a large vanity mirror, a white marble fireplace, and patterned floor tiles, showcasing its elegant integration into a sophisticated bathroom design.

Image: The chandelier hanging above a home bar or serving station, which includes patterned wallpaper, wooden shelves with bottles, and glassware, illustrating its use in a stylish entertainment space.


