1. Vöru lokiðview
The Anykit Portable Tire Inflator D55002 is a versatile and efficient air pump designed for various inflation needs. It features a powerful dual-cylinder motor, a large 12000mAh rechargeable battery, and a digital pressure gauge with automatic shut-off functionality. This device is suitable for inflating tires on cars, motorcycles, bicycles, as well as sports balls and other inflatables. Its compact design and multiple power options make it ideal for both everyday use and emergency situations.
Helstu eiginleikar:
- Langur rafhlöðuending: Búin með 12,000mAh litíum rafhlöðu fyrir langvarandi notkun.
- Powerful Dual Cylinder Inflation: Delivers 50% more power with a maximum pressure of 150 PSI and an airflow speed of 44L/min.
- Sjálfvirk slökkt: Stöðvar sjálfkrafa uppblástur þegar fyrirfram ákveðnum þrýstingi er náð.
- Fjölhæfar stillingar: Four pressure units (PSI, KPA, BAR, KG/CM²) and five preset inflation modes (car, motorcycle, bike, balls, custom).
- Tvöfaldir aflvalkostir: Can operate on its built-in battery or via a 12V DC power cord connected to a vehicle's cigarette lighter.
- Fjölvirkni: Includes 5V/3A USB output ports to function as a portable power bank and an emergency LED light.

Image: The Anykit Portable Tire Inflator, showcasing its compact design and compatibility with various vehicles including vans, trucks, and cars.
2. Öryggisleiðbeiningar
Please read and understand all safety instructions before operating the Anykit Portable Tire Inflator. Failure to follow these instructions may result in electric shock, fire, or serious injury.
- Haltu tækinu frá börnum og gæludýrum.
- Ekki nota blásturstækið í blautum aðstæðum eða nálægt eldfimum vökvum eða lofttegundum.
- Ensure the inflation hose is securely connected to the tire valve before starting inflation.
- Do not overinflate tires. Always refer to the recommended pressure for your specific item (vehicle, bike, ball).
- Monitor the inflation process closely. The device features an automatic shut-off, but manual monitoring is always recommended.
- Allow the device to cool down after prolonged use to prevent overheating.
- Notið aðeins meðfylgjandi hleðslusnúruna og fylgihluti.
- Ekki taka tækið í sundur eða reyna að gera við það sjálfur. Hafðu samband við þjónustuver til að fá aðstoð.
- Geymið uppblásarann á köldum og þurrum stað þegar hann er ekki í notkun.
3. Innihald pakka
Gakktu úr skugga um að allir hlutir séu til staðar í pakkanum þínum:
- Anykit Portable Tire Inflator (Main Unit)
- Verðbólgudæla
- Langur stútur
- Stutt stútur
- French Adapter
- Öryggi
- Geymslupoki
- Pökkunarbox
- Leiðbeiningar (þetta skjal)
4. Eiginleikar og íhlutir vörunnar
Familiarize yourself with the various parts and functions of your Anykit Portable Tire Inflator.

Image: Detailed diagram illustrating the components of the Anykit Portable Air Compressor, including LED/SOS light, USB-A port, DC port, USB Type-C port, working mode, inflation buttons, unit/light switch, and display.
- Slöngutengi: Point for attaching the inflation hose.
- Rafhlöðustöðuvísir: Sýnir núverandi hleðslustig rafhlöðunnar.
- Real-Time Pressure Value Display: Shows the current pressure reading.
- Einingaskjár: Indicates the selected pressure unit (PSI, BAR, KPA, kg/cm²).
- Stillingarvísir: Shows the selected inflation mode (car, motorcycle, bike, ball, custom).
- Preset Pressure Value Display: Shows the target pressure set by the user.
- Preset Minus Button (-): Lækkar forstillt þrýstingsgildi.
- Unit/Light Switch Button: Toggles between pressure units and controls the LED light.
- Preset Plus Button (+): Eykur forstillt þrýstingsgildi.
- Inflation On/Off Button: Starts or stops the inflation process.
- Kveikja / slökkva hnappur: Kveikir eða slekkur á tækinu.
- Working Mode Button: Cycles through preset inflation modes.
- USB Type-C tengi: For charging the inflator.
- DC höfn: For 12V DC power input from a vehicle.
- USB-A tengi: Til að hlaða ytri tæki (rafhlaða).
- LED/SOS Light: Provides illumination or emergency signal.
Battery Capacity and Performance:
The inflator is equipped with a 12000mAh extended battery, providing ample power for multiple inflation tasks.
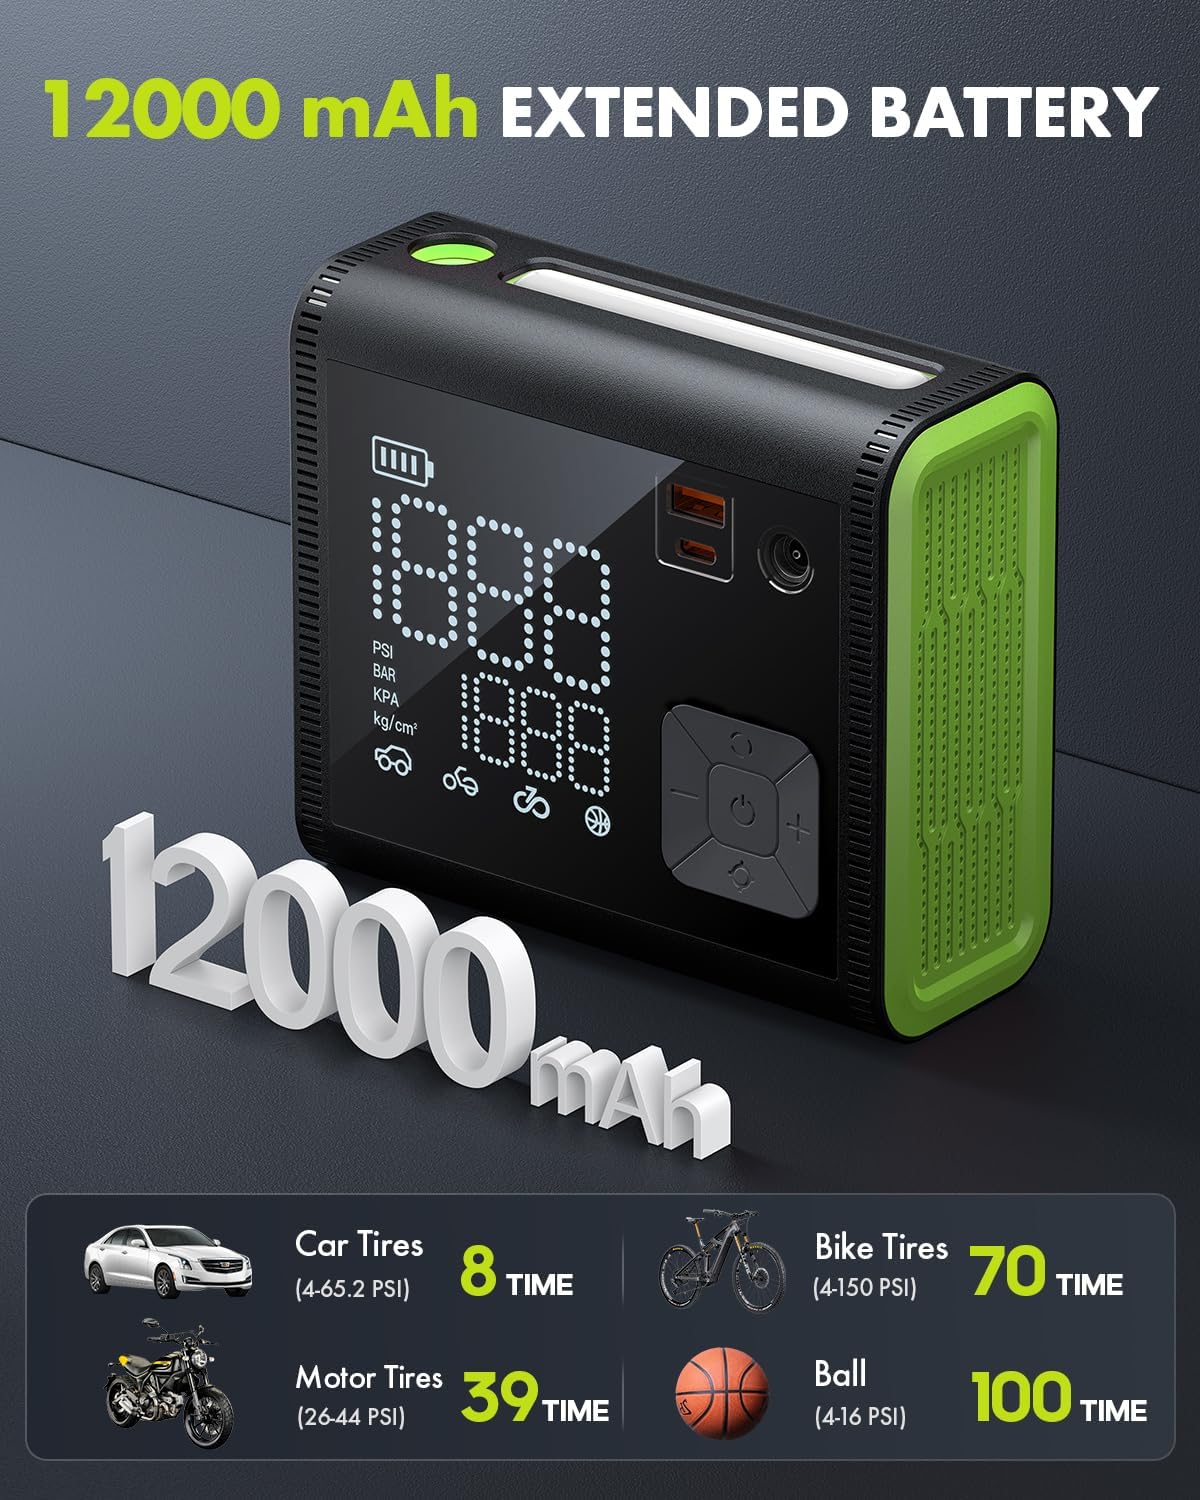
Image: Illustration of the 12000 mAh extended battery, detailing approximate inflation times for various items: Car Tires (8 times), Motor Tires (39 times), Bike Tires (70 times), and Balls (100 times).
Dual Cylinder Technology:
The dual-cylinder design significantly enhances inflation efficiency, making the process faster and more powerful.
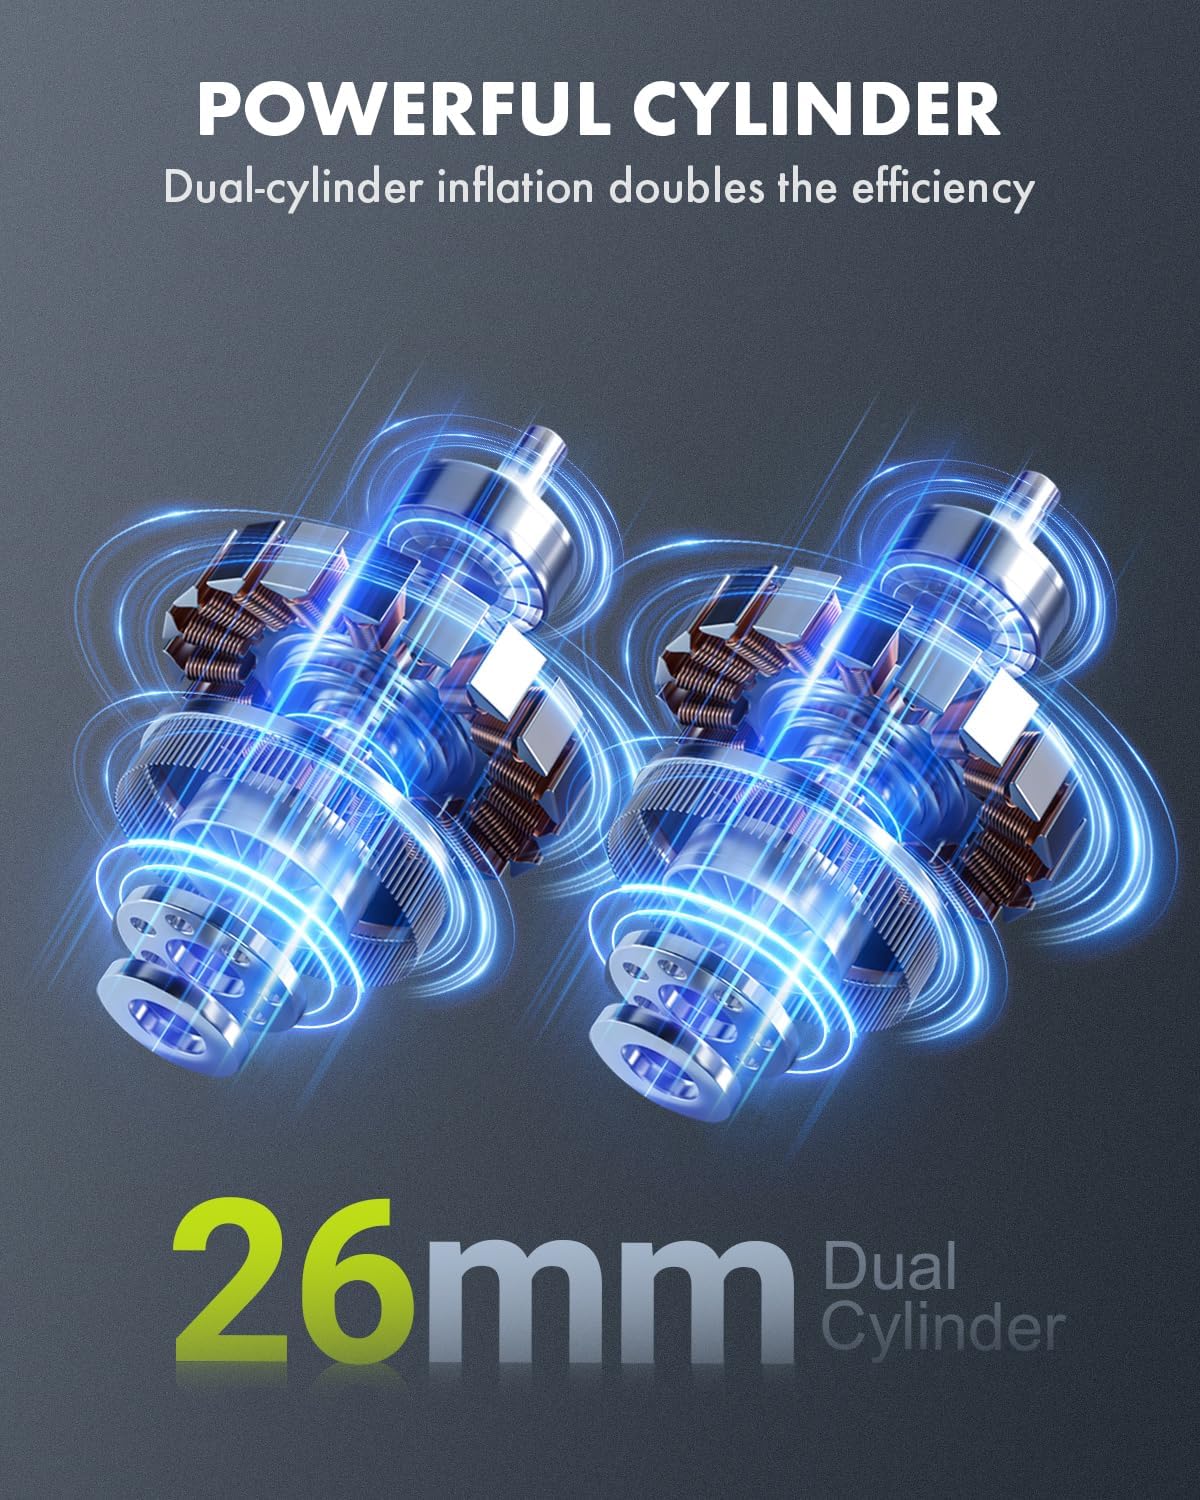
Image: Visual representation of the powerful 26mm dual-cylinder mechanism, highlighting its efficiency in inflation.
Versatile Inflation Needs:
The Anykit inflator is designed to meet a wide range of inflation requirements with specialized adapters.

Image: Displaying the versatility of the Anykit inflator for various items such as cars, motorcycles, bikes, balls, swimming rings, and air cushions, along with their respective nozzle types.
Fyrirferðarlítil og flytjanleg hönnun:
The inflator's compact size ensures easy storage and portability, making it convenient for travel and emergencies.

Image: The compact and portable size of the Anykit inflator, showing its dimensions as approximately 5.98 inches (length) x 5.51 inches (height) x 2.56 inches (width).
5. Uppsetning
5.1 Upphafshleðsla
Before first use, fully charge the Anykit Portable Tire Inflator. Connect the provided USB Type-C cable to the inflator's USB Type-C port and the other end to a suitable USB power adapter (not included) or a computer USB port. The battery status indicator will show charging progress. A full charge typically takes less than 4 hours.
5.2 Connecting the Inflation Hose
- Screw the inflation hose securely onto the hose connector on the inflator.
- Select the appropriate nozzle adapter for the item you wish to inflate (e.g., Schrader valve for car tires, Presta adapter for some bike tires, needle for balls).
- Attach the selected nozzle adapter to the free end of the inflation hose.
6. Rekstur
6.1 Kveikt/slökkt
Press and hold the Power On/Off button to turn the inflator on or off.
6.2 Inflation Process (4 Simple Steps)

Image: A four-panel guide demonstrating the simple steps for inflation: 1. Connect the inflation hose to the air inlet of the car tire. 2. Select the appropriate inflation mode and pressure unit. 3. Adjust the desired inflation value using the +/- buttons. 4. Begin inflation until it stops automatically.
- Tengja slönguna: Connect the inflation hose to the air inlet of the item you wish to inflate. Ensure a secure connection to prevent air leakage.
- Select Mode & Unit: Turn on the inflator. Press the Working Mode button to cycle through preset modes (car, motorcycle, bike, ball, custom). Press the Unit/Light Switch button to select your desired pressure unit (PSI, KPA, BAR, KG/CM²). The real-time pressure value will be displayed.
- Stilla þrýsting: Use the Preset Plus (+) and Preset Minus (-) buttons to adjust the desired target pressure.
- Byrjaðu verðbólgu: Press the Inflation On/Off button to begin inflation. The inflator will automatically stop once the preset pressure is reached.
6.3 Notkun sem rafmagnsbanka
To charge external devices, connect your device's USB charging cable to the USB-A port on the inflator. The inflator will provide 5V/3A output.
6.4 Using the LED/SOS Light
Press and hold the Unit/Light Switch button to turn on the LED light. Press again to cycle through different light modes (e.g., steady light, SOS flashing). Press and hold again to turn off.
6.5 Using 12V DC Power
In emergencies or when the internal battery is low, you can power the inflator directly from your vehicle's 12V cigarette lighter. Connect the provided 12V DC power cord to the inflator's DC port and then to your vehicle's cigarette lighter socket.
7. Viðhald
7.1 Þrif
Þurrkið ytra byrði blásturstækisins með mjúkum, damp cloth. Do not use harsh chemicals or abrasive cleaners. Ensure the device is turned off and disconnected from any power source before cleaning.
7.2 Geymsla
Store the inflator in its storage bag in a cool, dry place, away from direct sunlight and extreme temperatures. Ensure the battery is partially charged (around 50-70%) if storing for extended periods to prolong battery life.
7.3 Umhirða rafhlöðu
To maintain optimal battery performance, avoid fully discharging the battery frequently. Recharge the device regularly, even if not in constant use.
8. Bilanagreining
| Vandamál | Möguleg orsök | Lausn |
|---|---|---|
| Blásarinn kveiknar ekki á sér. | Rafhlaðan er tæmd. | Charge the inflator using the USB Type-C cable or connect to 12V DC power. |
| Inflator does not inflate. | Hose not securely connected; Nozzle blocked; Preset pressure not set; Device overheated. | Ensure hose and nozzle are tightly connected. Check for obstructions. Set a target pressure. Allow device to cool down if used continuously. |
| Ónákvæm þrýstingsmæling. | Hose not properly connected; Sensor issue. | Ensure hose is securely attached. If problem persists, contact customer support. |
| Tækið ofhitnar við notkun. | Langvarandi samfelld rekstur. | Turn off the inflator and allow it to cool down for at least 15-20 minutes before resuming use. |
| USB-A port not charging external devices. | Inflator battery low; Device not compatible. | Ensure inflator has sufficient battery charge. Check compatibility of the external device. |
9. Tæknilýsing
| Eiginleiki | Smáatriði |
|---|---|
| Vörumerki | Anykit |
| Nafn líkans | D55-GR (Item model number: D55002) |
| Aflgjafi | Battery Powered (12000mAh Lithium Battery) / 12V DC Car Cigarette Lighter |
| Hámarksrekstrarþrýstingur | 150 PSI (10.34 bör) |
| Loftstreymisgeta | 44 lítrar á mínútu |
| AC Adapter Current (Charging) | 3 Amps |
| Lengd slöngunnar | 1.97 fet |
| Vörumál | 33.5L x 10.9W x 38.1H sentimetrar |
| Þyngd hlutar | 1 kg 420 g |
| Efni | ABS |
| Litur | Grænn |
| Sérstakir eiginleikar | Easy to install, Portable, Rechargeable Battery, Variable speed, Digital Pressure Gauge, Auto Shut-off, LED Light, Power Bank Function |
| Mælt er með notkun | Outdoor, Car, Motorcycle, Bike, Balls, Inflatables |
10. Ábyrgð og þjónustuver
Anykit products are designed for reliability and performance. For specific warranty details, please refer to the warranty card included with your product or visit the official Anykit website. If you encounter any issues or have questions regarding your Anykit Portable Tire Inflator D55002, please contact Anykit customer support for assistance. Our team is dedicated to providing prompt and friendly support to ensure your satisfaction.
Samskiptaupplýsingar: Please refer to the contact details provided on the product packaging or the official Anykit websíða.


