1. Inngangur
This manual provides detailed instructions for the Machenike G3V2 Bluetooth Controller. It covers setup, operation, maintenance, and troubleshooting to ensure optimal performance and longevity of your device. Please read this manual thoroughly before using the controller.
2. Innihald pakka
Gakktu úr skugga um að allir hlutir séu til staðar í pakkanum þínum:
- Machenike G3V2 Bluetooth stjórnandi
- Hleðslustöð
- USB-C hleðslusnúra
- Notendahandbók
- Dual-Core Receiver (USB Dongle)
3. Vöru lokiðview
The Machenike G3V2 controller features Hall Effect joysticks, RGB lighting, programmable buttons, and a 1000mAh battery with a dedicated charging station. It supports multiple platforms including PC, Switch, iOS, and Android.

Mynd 3.1: Yfirview of Machenike G3V2 Controller features.
4. Uppsetning
4.1. Hleðsla stjórntækisins
Place the controller on the included charging dock. The built-in 1000mAh battery will begin charging via the USB-C port. The charging dock protects the controller and ensures efficient power replenishment for extended gaming sessions.
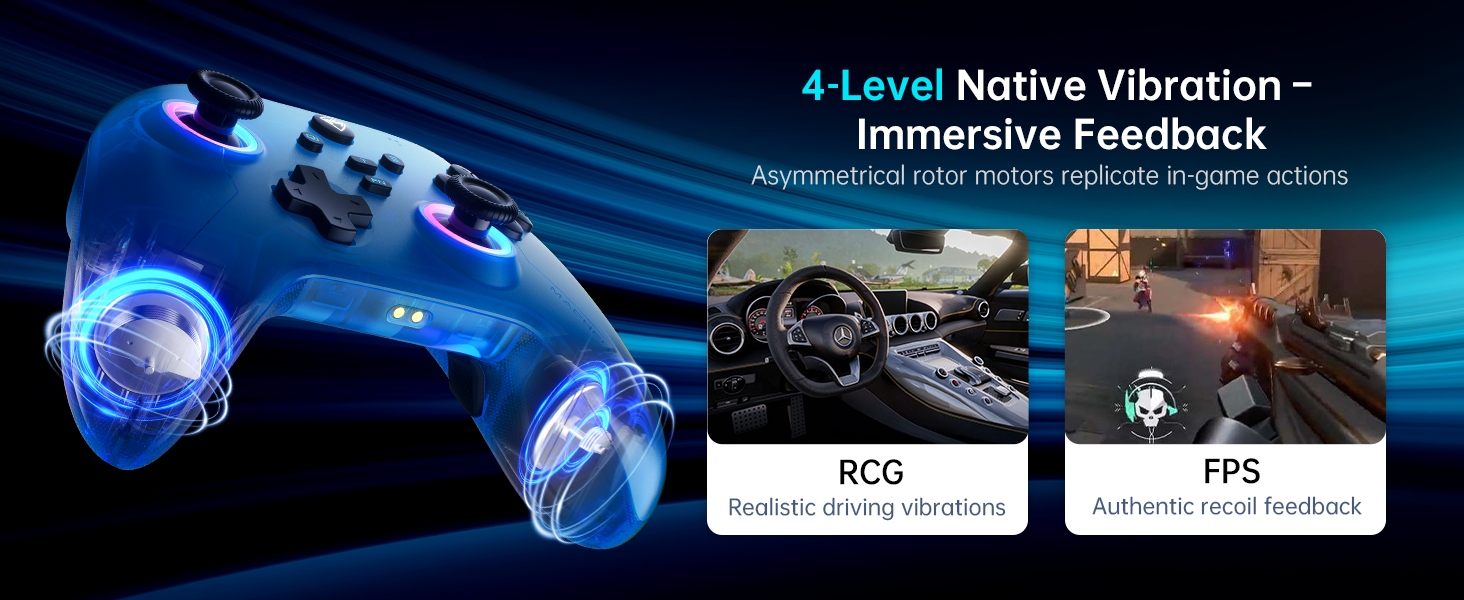
Figure 4.1: Controller on Dedicated Charging Dock.
4.2. Tengingar
The Machenike G3V2 supports three connection modes: 2.4G (via dual-core receiver), Bluetooth, and Wired.
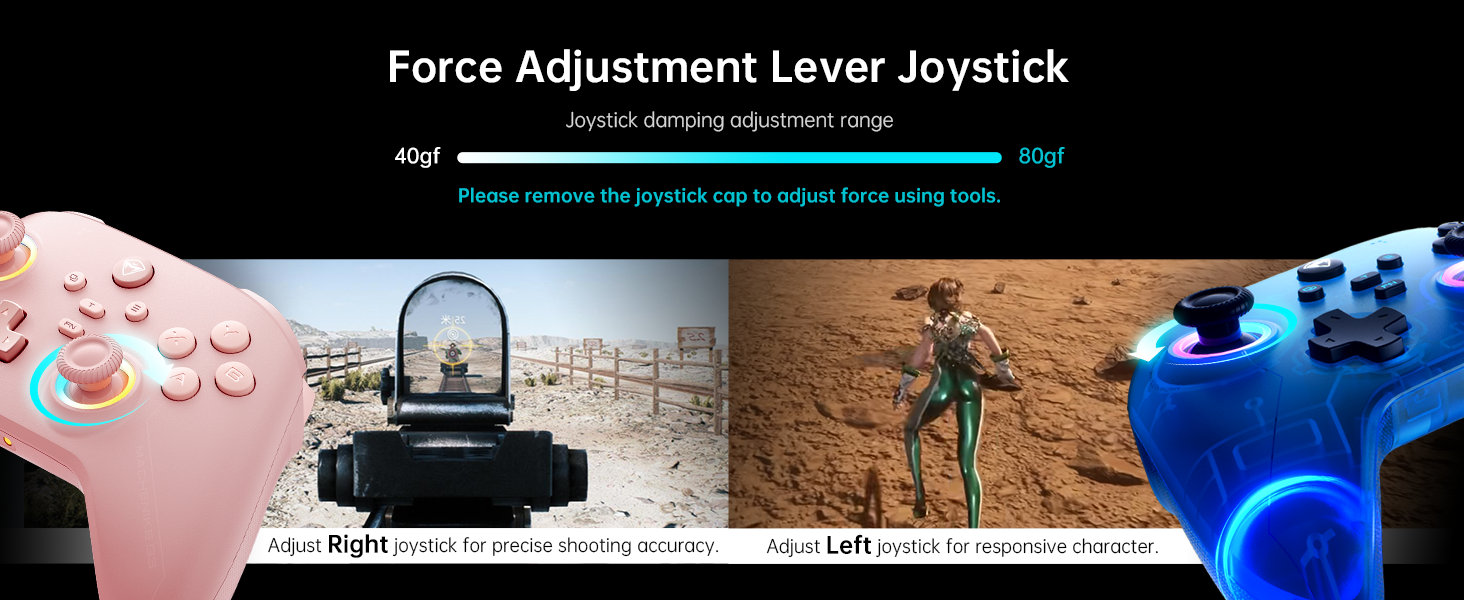
Figure 4.2: Multi-platform connectivity options.
4.2.1. Tenging við Nintendo Switch (Bluetooth-stilling)
To connect your controller to a Nintendo Switch:
- Put the controller into Switch pairing mode by holding the Y + Home buttons simultaneously. The indicator light will flash rapidly, changing from slow to fast flashing.
- Á Nintendo Switch-tækinu þínu skaltu fara í HOME-valmyndina.
- Select the 'Controllers' icon, then choose 'Change Grip/Order'.
- Bíddu eftir að stjórnandinn tengist sjálfkrafa. Þegar tengingin er komin mun stjórnandinn titra og táknmynd hans birtast á rofaskjánum.
- Press the 'A' button on your Machenike G3V2 controller to confirm.
- If you prefer the Switch button layout (A/B swapped), you can toggle it by pressing FN + A on the controller.
Video 4.1: Tutorial on connecting the Machenike G3V2 controller to a Nintendo Switch.
4.2.2. Connecting to PC/iOS/Android
For PC, iOS, and Android devices, follow the standard Bluetooth pairing procedure for your specific device. Ensure the controller is in the correct pairing mode (refer to the quick start guide for specific button combinations for different platforms).
5. Notkunarleiðbeiningar
5.1. Customizable Back Buttons (M1/M2)
The G3V2 controller features two customizable back buttons (M1 and M2) that support up to 32 programmable actions, including macro recording and remapping. This is particularly useful for complex combos in fighting games or rapid actions in shooters.
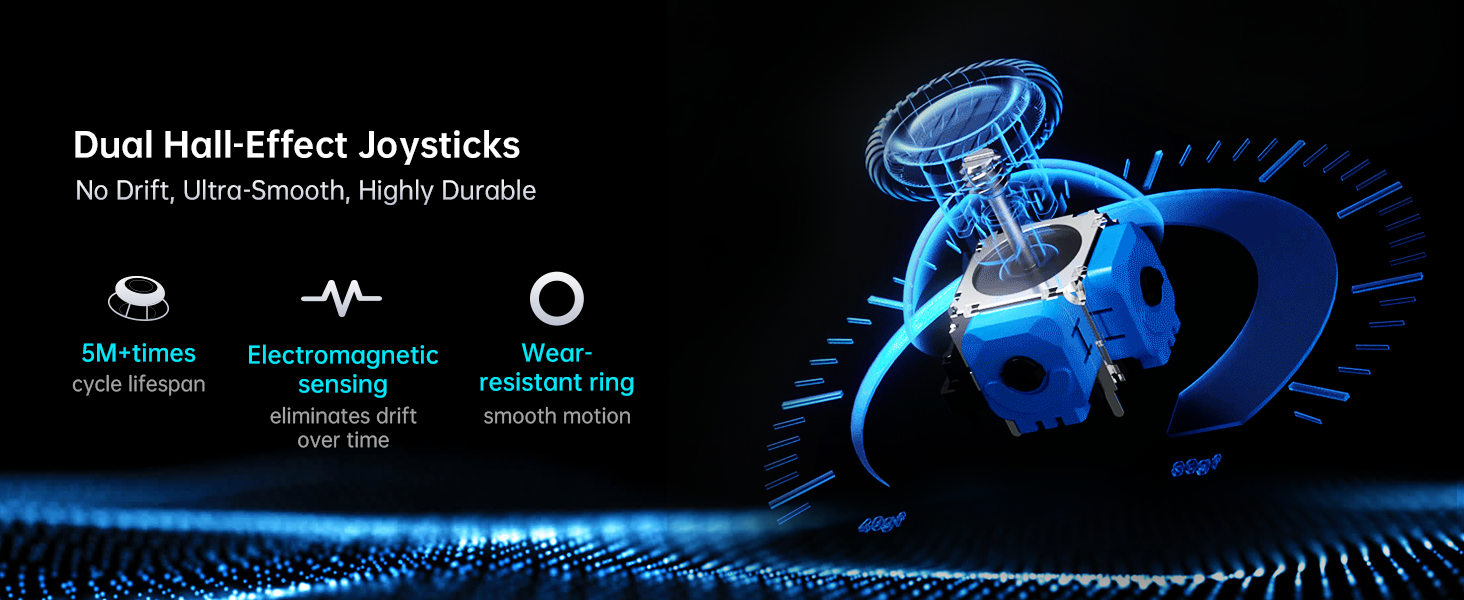
Figure 5.1: Dual Customizable Back Buttons.
Video 5.1: Tutorial on how to record keystroke macros for the back buttons.
5.2. Adjustable Hall Effect Joysticks and Triggers
The controller features dual Hall-Effect joysticks and triggers, offering precision and durability. The unique force adjustment feature allows you to customize joystick tension from 40gf to 80gf, adapting to various game requirements for responsive character movement or precise shooting accuracy. The triggers provide contactless, 255-level linear control with millisecond actuation.
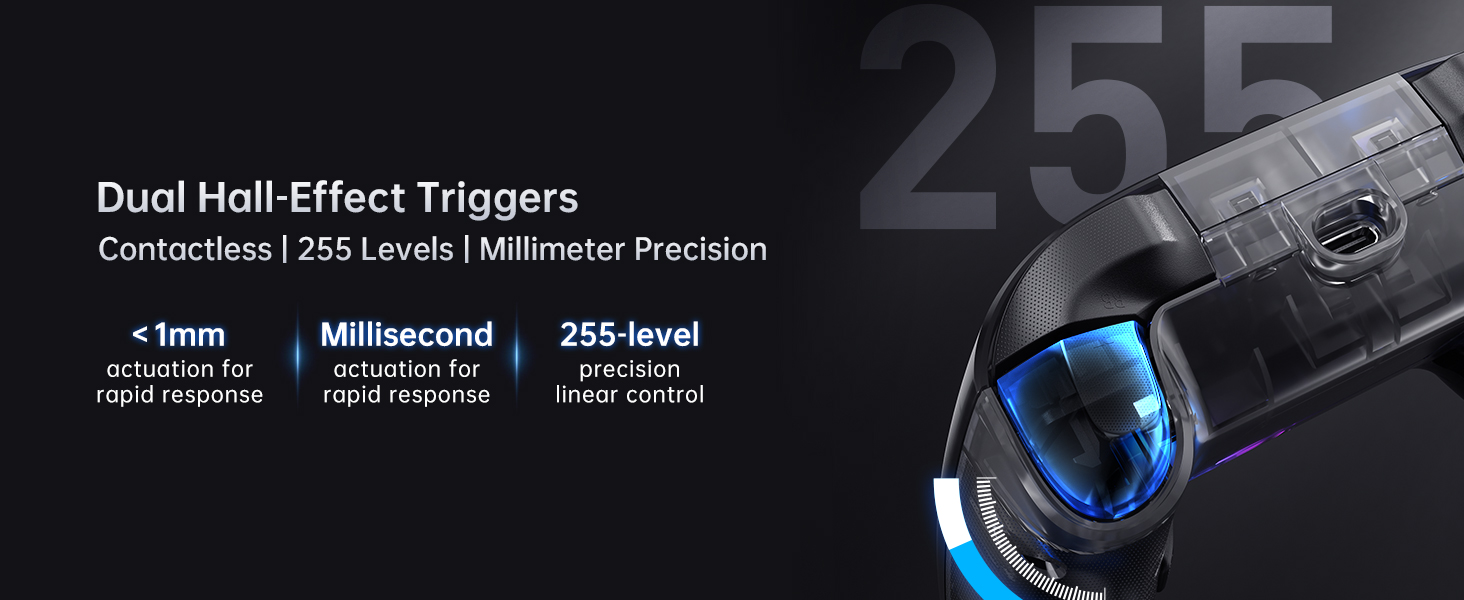
Figure 5.2: Force Adjustment Lever Joystick.
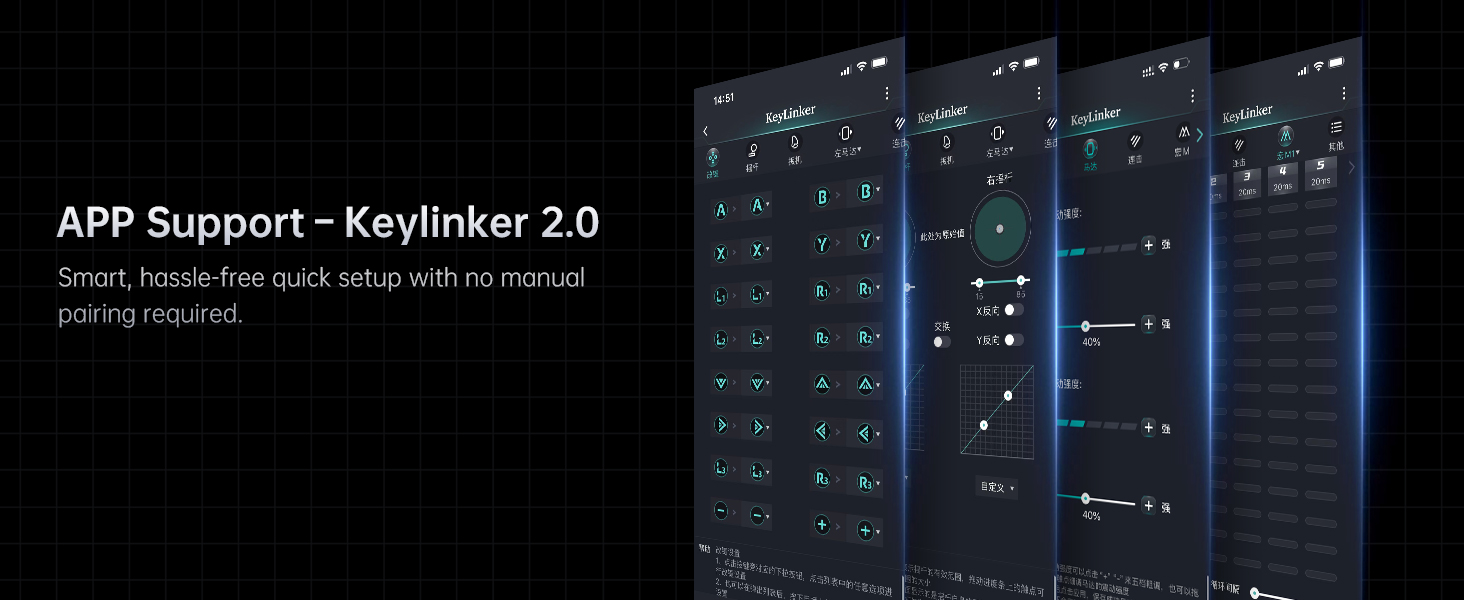
Figure 5.3: Dual Hall-Effect Joysticks.
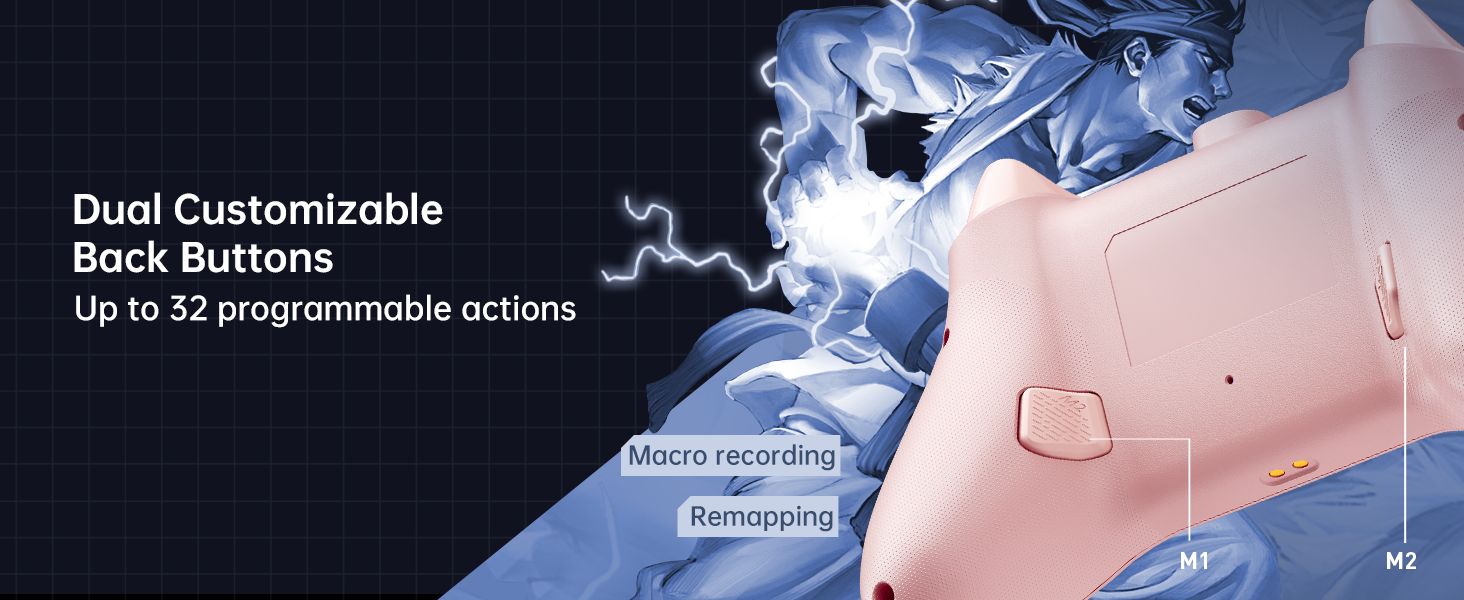
Figure 5.4: Dual Hall-Effect Triggers.
5.3. RGB lýsing
The controller features dual-ring dynamic RGB lighting around the joysticks, offering aesthetic customization to match your gaming setup.
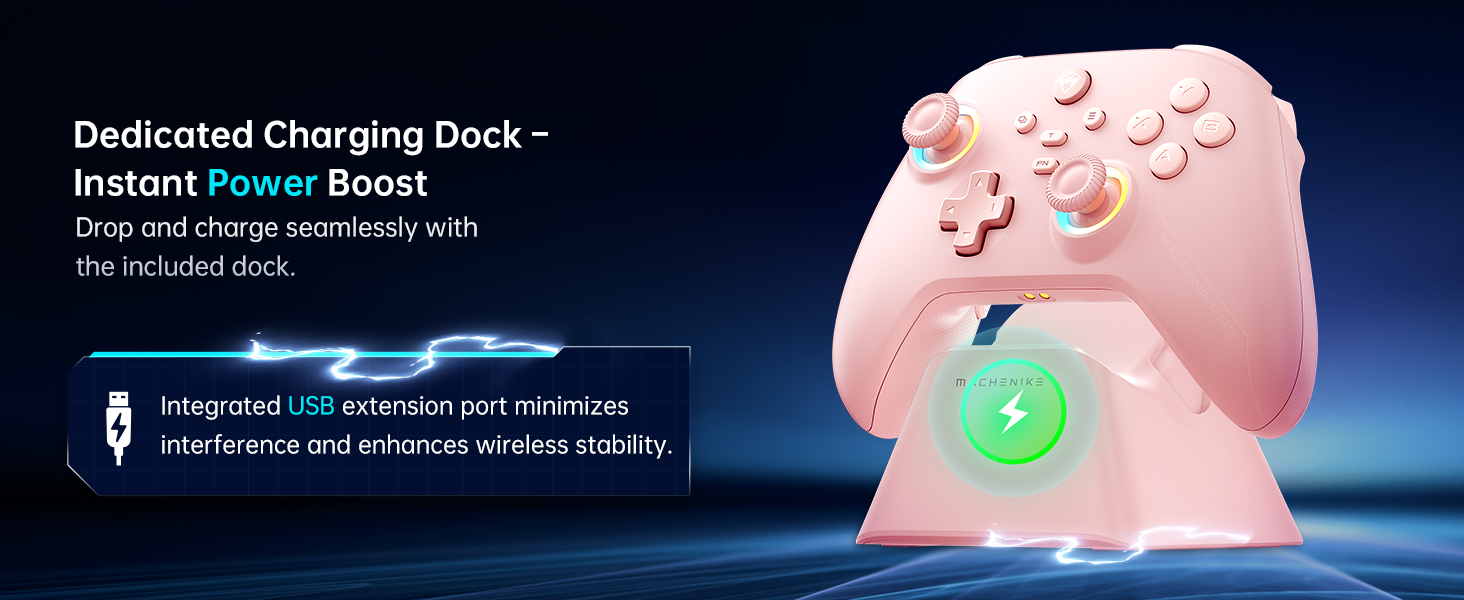
Figure 5.5: Dual-Ring Dynamic Lighting.
5.4. Titringsviðbrögð
Experience immersive gameplay with 4-level native vibration feedback. Asymmetrical rotor motors replicate in-game actions, providing realistic driving vibrations for racing games and authentic recoil feedback for first-person shooters.
Figure 5.6: 4-Level Native Vibration Feedback.
6. Kvörðun
To ensure optimal performance and address any potential joystick drift or trigger issues, you can calibrate your controller's joysticks and triggers.
6.1. Kvörðun stýripinna
To calibrate the joysticks:
- Press and hold the B + Back + Home buttons simultaneously. The blue LED will flash, indicating calibration mode.
- Move both joysticks in circles all the way around, making about three full rotations slowly and steadily.
- Once done, press the Start button to save. The controller will power off, indicating successful calibration.
- Reconnect the controller to your device.
6.2. Kvörðun kveikju
To calibrate the triggers:
- Press and hold the Y + Back + Home buttons simultaneously. The red light will flash, indicating trigger calibration mode.
- Press each trigger normally all the way down three times. Do not press too hard.
- Then press the Start button to save. The controller will power off, indicating successful calibration.
- Reconnect the controller to your device.
Note: When calibrating joysticks or triggers, always use normal, gentle pressure to ensure accurate calibration and avoid abnormal behavior.
Video 6.1: Tutorial on how to calibrate the triggers and joysticks.
7. Viðhald
To maintain your Machenike G3V2 controller in optimal condition:
- Haldið stjórntækinu hreinu með því að þurrka það með mjúkum, þurrum klút. Forðist að nota sterk efni eða slípiefni.
- Geymið stjórntækið á köldum, þurrum stað fjarri beinu sólarljósi og miklum hita.
- Forðist að missa stjórntækið eða láta það verða fyrir hörðum höggum.
- Regularly check the charging port and cables for any signs of damage.
8. Bilanagreining
If you encounter issues with your Machenike G3V2 controller, refer to the following common solutions:
- Stýringin kveikir ekki á sér: Ensure the controller is fully charged. Connect it to the charging dock or directly via USB-C cable.
- Tengingarvandamál: Verify that the controller is in the correct pairing mode for your device (Switch, PC, iOS, Android). Ensure Bluetooth is enabled on your device. Try re-pairing the controller.
- Stýripinninn rekur eða ónákvæm innsláttur: Perform joystick calibration as described in Section 6.1.
- Trigger issues: Perform trigger calibration as described in Section 6.2.
- Hnappar svara ekki: Ensure the controller is properly connected and charged. If using custom mappings, check the Keylinker 2.0 app settings.
- Back buttons not working as expected: Clear existing assignments and re-record macros as shown in Video 5.1.
- RGB lýsing virkar ekki: Check the controller's settings via the Keylinker 2.0 app for lighting customization options.
For further assistance, please contact Machenike customer support.
9. Tæknilýsing
| Gerðarnúmer | G3V2 (PE-Upgrade) |
| Mál | 3.94 x 2.76 x 5.91 tommur |
| Þyngd hlutar | 1.12 pund |
| Rafhlaða | 1 litíum pólýmer rafhlaða (1000mAh), fylgir með |
| Tengingar | Bluetooth, 2.4G (with Dual-Core Receiver), Wired |
| Samhæfni | Switch/Switch 2, iOS, Android, Windows PC (Not compatible with Xbox, PlayStation, or GeForce Now) |
| Stýripinnar | Dual Hall-Effect, Infinitely Adjustable (40-80gf) |
| Kveikjur | Dual Hall-Effect, Contactless, 255 Levels |
| Atkvæðagreiðsluhlutfall | 1000Hz |
| Forritanlegir hnappar | 2 (M1, M2) with up to 32 actions |
| Framleiðandi | Machenike |
| Dagsetning fyrst í boði | 27. maí 2025 |
10. Ábyrgð og stuðningur
For warranty information, technical support, or any inquiries regarding your Machenike G3V2 controller, please contact the seller, Machenike US STORE, directly through your purchase platform. Keep your proof of purchase for warranty claims.
You can visit the official Machenike Store for more information: Machenike Store


