1. Öryggisupplýsingar
Lestu og skildu allar öryggisviðvaranir og leiðbeiningar áður en þú setur upp, notar eða viðheldur þessari lyftu. Ef þessum leiðbeiningum er ekki fylgt getur það leitt til alvarlegra meiðsla eða dauða.
- Only qualified personnel should install and operate this equipment.
- Ensure the installation site has a level concrete floor of adequate thickness and strength.
- Notið alltaf viðeigandi persónuhlífar (PPE), þar á meðal öryggisgleraugu og hanska.
- Never exceed the rated lifting capacity of 10,000 lbs.
- Ensure the vehicle is properly centered and balanced on the lift arms before raising.
- Always engage safety locks before working under the vehicle.
- Haldið höndum og fótum frá hreyfanlegum hlutum meðan á notkun stendur.
- Do not modify the lift in any way. Use only genuine replacement parts.
2. Vöru lokiðview
The KATOOL KT-H100Y is a heavy-duty 2-post vehicle lift designed for professional and home garage use. It features a robust 10,000 lb lifting capacity, suitable for a wide range of vehicles from compact cars to light-duty trucks and SUVs. The lift incorporates a Double S Design column for enhanced strength and a Double Point Safety Lock System for secure operation.
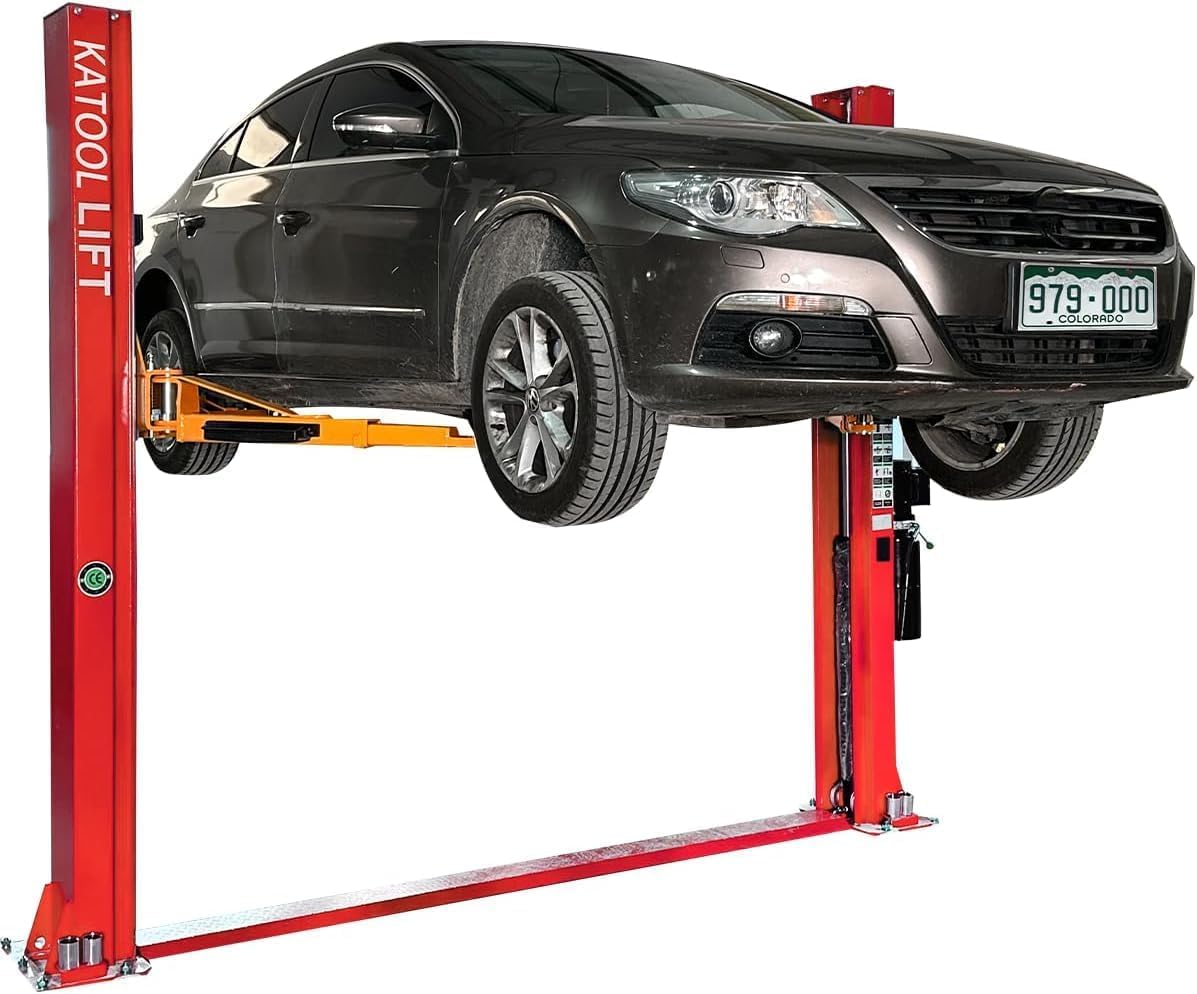
Figure 2.1: KATOOL KT-H100Y 2-Post Vehicle Lift with 10,000 lb capacity.

Figure 2.2: Close-up of the Double S Design column, indicating enhanced strength and a 220V/60HZ/2.2KW power unit for stronger carriage.
3. Listi yfir íhluti
Gakktu úr skugga um að allir íhlutir séu til staðar og óskemmdir áður en uppsetning hefst.
- Main Columns (2)
- Lifting Arms (4) - Two-stage and Three-stage
- Hydraulic Power Unit (1) - 220V 1 HP
- Stálkaplar (2)
- Floor Plate & Cover
- Olíuslöngur
- Height Extension Adapters / Screw Pads
- Door Guards
- Anchor Bolts and Fasteners

Mynd 3.1: Yfirview of the KATOOL 2-Post Lift components, including columns, arms, power unit, and various accessories.
4. Uppsetningarleiðbeiningar
Proper installation is crucial for safe and efficient operation. Refer to the detailed installation video below for visual guidance.
4.1 Upppakkning og undirbúningur
- Skoðaðu umbúðirnar með tilliti til skemmda.
- Carefully open the package and remove all accessories.
- Remove the side base plate and screws from both ends of the main frame.
- Organize all components in the installation area.
4.2 Column Placement and Anchoring
- Use lifting equipment to carefully stand the columns upright.
- Precisely position the columns in the desired installation location, ensuring proper spacing and alignment.
- Secure each column with at least one anchor bolt initially to prevent tilting.
- Drill holes for the expansion bolts, insert them, and tighten with a wrench.
4.3 Steel Cable Routing
- Remove the steel wire from the column and organize it.
- Remove side guards from pulleys and thread the steel wire through the pulleys as shown in the diagram (refer to video).
- Ensure the pulley notch faces the top surface when inserting the wire, then rotate to prevent it from coming out.
- Thread the steel wire downward from the yellow hole inward, ensuring it's on the same side as the front end of the wire.
- Guide the steel wire along both sides of the oil trough to the other side.
- Thread upward into the yellow hole.
4.4 Lifting Arm Installation
- Remove the spring retainer from the bottom of the pin and take out the pin.
- Install the lifting arms, paying attention to the direction: the rear side has two-section lifting arms, and the front side has three-section lifting arms, consistent with the direction of the power unit and the front of the vehicle.
- Insert the pin. If the pin gets stuck, lift the gear lock and slightly wiggle the lifting arm.
- After inserting the pin, install the spring retainer (kapring).
- Remove the spring retainer from the bottom of the tray and install it in the front hole of the bracket, ensuring that the notch fits with the block.
4.5 Hydraulic Power Unit Setup
- Adjust the screw depth on the main frame, then hang the power unit on the bracket and tighten the screws.
- Connect the electrical wiring: Ground Wire (green), Neutral Wire (white), Live Wire (black). Consult a qualified electrician if unsure.
- Swap the interfaces and plugs on both sides of the power unit, making sure to keep the washers.
- Remove the oil pipe plug from the side of the main column, remove the dust cap from the oil pipe, and connect the oil outlet of the power unit to the oil pipe connector of the main frame.
- Add hydraulic oil to the reservoir, ensuring it does not exceed the maximum level mark.
4.6 Tension Adjustment and Test Run
- Adjust the tension of the reinforcement bars on both sides: loosen the screws at the top, use a pry bar to lift them, and tighten the screws at the bottom until both sides are balanced. Then, lock both screws.
- Perform a test run by raising and lowering the lift several times without a vehicle.
- When the car lift moves upward and a "click" sound is heard simultaneously, it indicates that the force on both sides is even, and the safety device is locked into place.
Video 4.1: BILT HARD 11,000 lbs 2 Post Car Lift Installation Video. This video provides a comprehensive guide to the installation process, from unpacking to final adjustments.
5. Notkunarleiðbeiningar
Follow these steps for safe and effective operation of your KATOOL KT-H100Y lift.
5.1 Preparing the Vehicle
- Position the vehicle between the lift columns, ensuring it is centered.
- Adjust the lift arms to contact the vehicle's designated lifting points. The lift includes two-stage arms for the rear and three-stage arms for the front, allowing for versatile vehicle positioning.
- Use the provided height adjustment pads/screw pads as needed to ensure proper contact and stability.

Figure 5.1: Close-up of a lift arm, showing the adjustable screw pad for precise vehicle contact.
5.2 Lifting the Vehicle
- Ensure all personnel are clear of the lift and vehicle.
- Press and hold the 'UP' button on the hydraulic power unit to raise the vehicle.
- Monitor the vehicle as it rises, ensuring it remains stable and level.
- Once the desired height is reached, lower the lift slightly until the safety locks engage with an audible 'click'. This secures the vehicle at the chosen height.
5.3 Að lækka ökutækið
- Ensure the area beneath the vehicle is clear of obstructions and personnel.
- Slightly raise the lift to disengage the safety locks.
- Pull the safety lock release mechanism (typically a lever or cable) on both columns.
- Slowly lower the vehicle by operating the release lever on the hydraulic power unit.
- Once the vehicle is fully lowered and the arms are clear, carefully drive the vehicle off the lift.
Video 5.2: WEIZE 11000lbs 2 Post Car Lift. This video demonstrates the lift in operation, highlighting features like door guards, reinforced support arm pads, and truck adapters.
6. Leiðbeiningar um viðhald og umhirðu
Regular maintenance ensures the longevity and safe operation of your KATOOL vehicle lift.
6.1 Dagleg notkun
- Check daily if the safety device can lock into place and if the linkage is functioning properly. If there are any potential hazards, repair or replace them promptly.
6.2 Weekly Inspection
- Inspect the steel wire for looseness or broken strands.
- Observe the sliding blocks on the internal platform of the columns and apply grease as needed. If wear on one side exceeds 20%, it will no longer be securely gripped by the columns and should be replaced in a timely manner.
6.3 Bi-Weekly Check
- Inspect all hydraulic hose connections for leaks or ruptures, and repair or replace them as necessary.
6.4 Mánaðarlegt viðhald
- Check if all screws and nuts are tightened properly. After a test run, retighten all screws and nuts.
7. Bilanagreining
This section provides solutions to common issues you might encounter with your lift.
| Vandamál | Möguleg orsök | Lausn |
|---|---|---|
| Lyftan lyftist ekki | No power; Low hydraulic fluid; Motor fault; Obstruction | Check power supply; Add hydraulic fluid; Consult technician; Remove obstruction |
| Uneven lifting | Uneven cable tension; Unbalanced load; Hydraulic issue | Adjust cable tension; Reposition vehicle; Inspect hydraulic system |
| Lift lowers slowly or not at all | Obstruction; Hydraulic valve issue; Low fluid | Check for obstructions; Inspect/replace hydraulic valve; Add fluid |
| Mikill hávaði við notkun | Low hydraulic fluid; Loose components; Worn parts | Check/add fluid; Tighten fasteners; Inspect for worn parts |
8. Tæknilýsing
Key technical specifications for the KATOOL KT-H100Y 2-Post Vehicle Lift.
| Eiginleiki | Forskrift |
|---|---|
| Fyrirmynd | KT-H100Y |
| Hleðslugeta | 10,000 lbs (4536 kg) |
| Hámarks lyftihæð | 70.8 tommur (1800 mm) |
| Breidd í gegnumkeyrslu | 94.5 tommur (2400 mm) |
| Power Unit | 220V, 1 HP Hydraulic |
| Efni | Kolefnisstál |
| Þyngd hlutar | 1200 lbs (544 kg) |
| Þjónustutegund ökutækja | Car, Light-Duty Truck, SUV |

Figure 8.1: Detailed dimensions diagram for the KATOOL 2-Post Lift.
9. Ábyrgð og stuðningur
For warranty information, technical support, or to order replacement parts, please contact KATOOL customer service. Keep your purchase receipt and product model number handy for faster service.
Heimsæktu KATOOL Store fyrir fleiri vörur og upplýsingar.


